This homemade soft multigrain bread is prepared with multigrain hot cereal mix, such as 5 grain, 7 grain or 10 grain cereal. Whole or quick oats are an excellent option, too. It’s soft and fluffy like regular white sandwich bread, but has a hearty and satisfying flavor. Either instant or active-dry yeast work and you can even turn this dough into multigrain rolls.
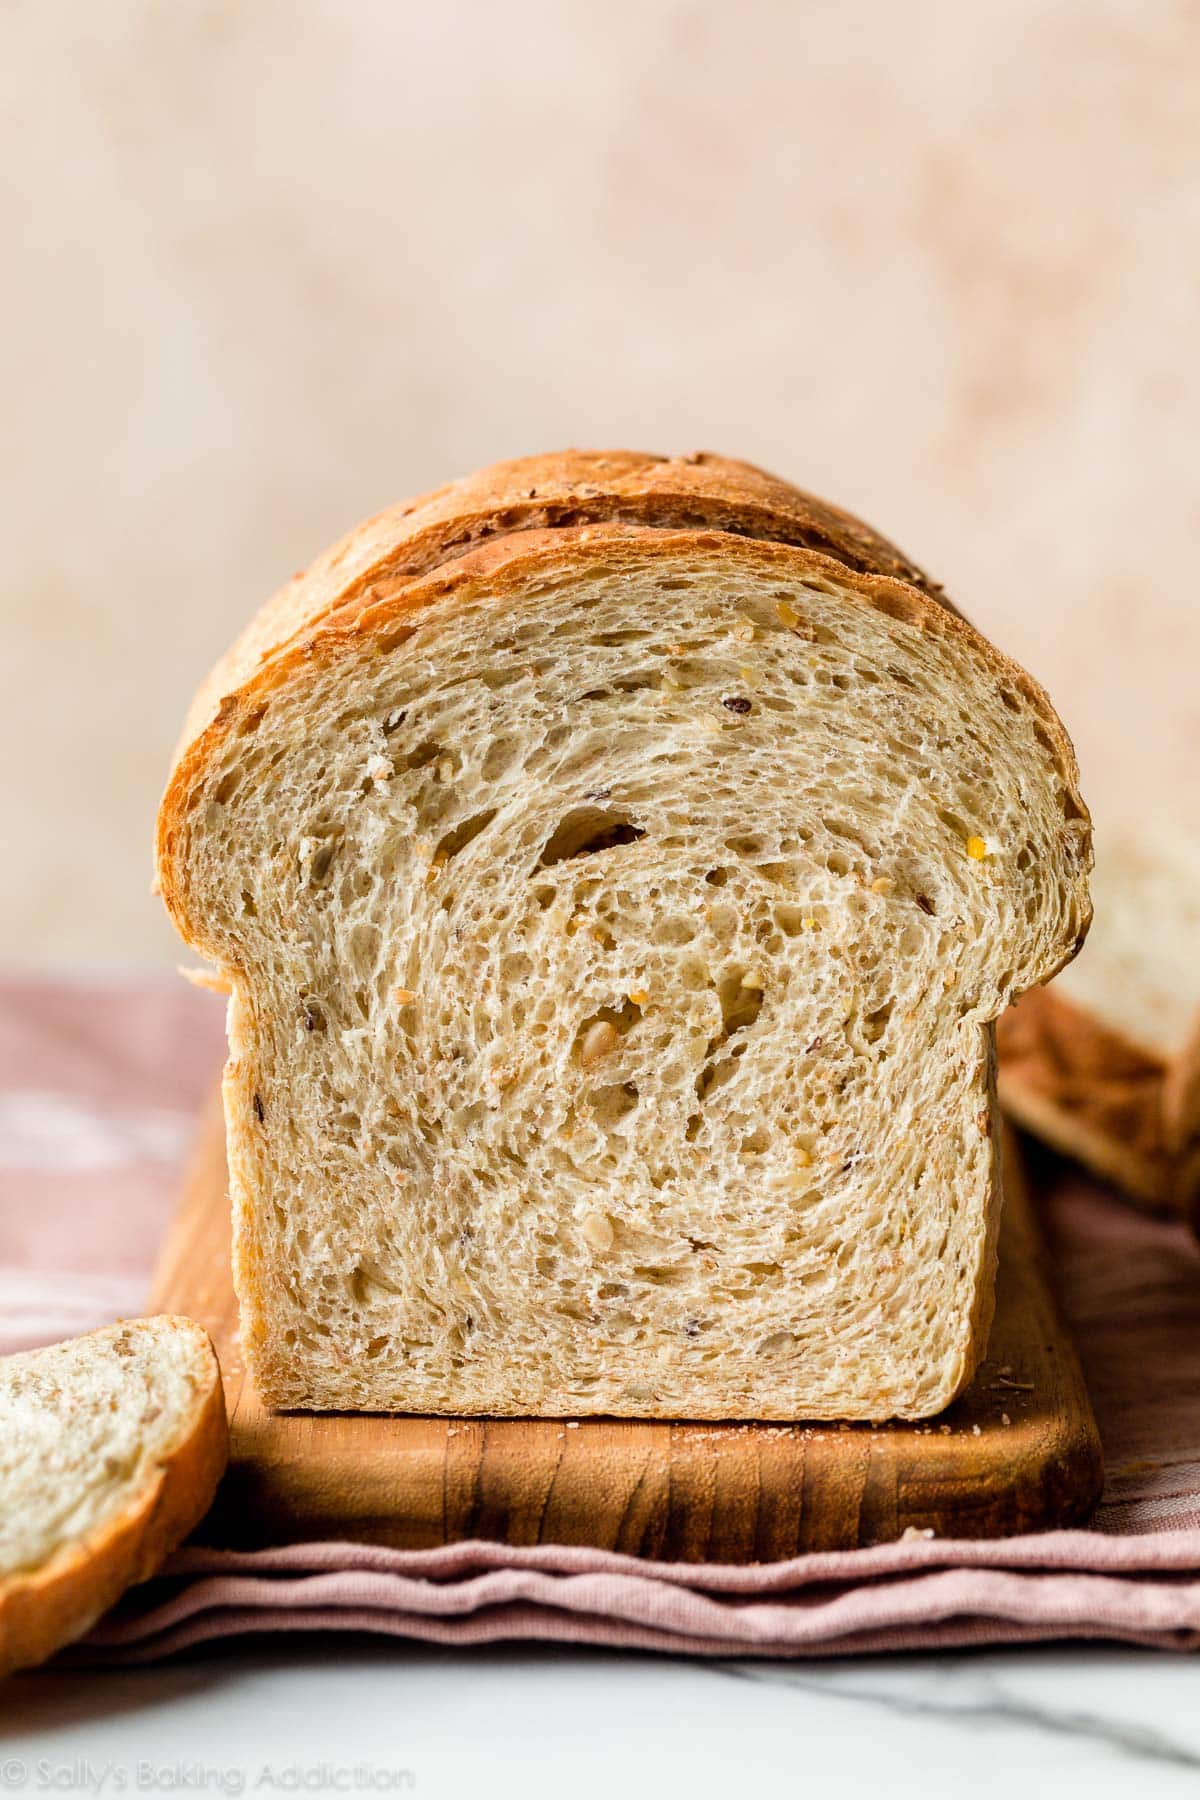
Learn to bake homemade bread. I’ve noticed that’s a common baking goal at the start of each year. Today I’m sharing a new homemade bread recipe, one I’ve been perfecting for months. Using my regular white sandwich bread as the starting point for this new variation, I finally mastered a multigrain bread that’s both soft and sturdy. If you love homemade bread and crave added texture, you’ll enjoy this multigrain loaf. Bonus: You can use this dough for homemade rolls, too!
Soft Multigrain Bread Details
- Flavor: Slightly nutty with an earthy, satisfying flavor similar to whole wheat bread. A little brown sugar adds mild sweetness.
- Texture: This wholesome bread is wonderfully soft without being flimsy. It’s great for sandwiches, but perfectly satisfying plain or with a spread of butter.
- Ease: I categorize this as an intermediate baking recipe. The dough requires an extra step in the very beginning—soaking those grains in water. If you read the directions before starting, you’ll be set for success. Take your time and if you’re new to baking with yeast, review my Baking with Yeast Guide and How to Knead Dough posts first. Lots of helpful information there.
- Time: Between preparing the dough, both rises, and baking, set aside at least 4-5 hours to complete this recipe. But keep in mind that most of the time is hands off as the dough rises. You can even get started on the dough the night before.
If you love wholesome, hearty homemade bread like this, you’ll enjoy no knead honey oat bread and no knead seeded oat bread recipes too.
Video Tutorial: How to Make Soft Multigrain Bread
We need a careful blend & ratio of ingredients to produce a grain loaf that (1) rises tall, (2) maintains a soft fluffy texture, and (3) has legitimate structure for sturdy slices. The ingredients are practically the same as this sandwich bread, but we’re skipping the milk, using hot boiling water, adding grain cereal mix and seeds, slightly reducing the butter, and swapping regular sugar for brown sugar. Took lots of tweaking to perfect.
Key Ingredients You Need & Why
- Multigrain Hot Cereal Mix or Oats: If you read anything in this post, have it be this. This recipe starts with multigrain cereal, such as 5 grain, 7 grain or 10 grain cereal. You can also use whole or quick oats, but I do not recommend steel cut. There are many variations of hot cereal available in grocery stores—a multigrain version may include rye, barley, oats, whole wheat, and/or more. Honestly any grain cereal you mix with hot water works assuming there’s no flavors or sugars added (for example, don’t use brown sugar cinnamon oatmeal mix). If you can’t find any multigrain hot cereals at the store, you can purchase online—or just use plain oats. I really like this 7 grain + flax seed hot cereal. Multigrain baby cereal works too.
- Boiling Water: Just as you would make the hot cereal to eat, mix it with hot water. Use 1 and 3/4 cups (420ml) boiling water, then let the mixture cool until a digital thermometer reads about 110°F (43°C). This usually takes 20 minutes. If it’s too hot, the heat will kill the yeast.
- Brown Sugar: Sugar feeds the yeast, increases its activity, and tenderizes the dough. You can use regular white granulated sugar, but brown sugar was especially tasty in this loaf.
- Butter: To make a soft bread, you need fat in the dough. Butter promises a soft and flavorful loaf. 3 Tablespoons is plenty.
- Flour: If you have both bread flour and all-purpose flour on hand, I recommend using bread flour. All-purpose flour definitely works, but you get a sturdier and more bread-like texture from bread flour. I love using whole wheat flour when I can, but this dough is not fit for all whole wheat flour. In my recipe testing, I found that similar to homemade English muffins, replacing up to 1 cup of the bread/all-purpose flour with whole wheat flour worked just fine. The bread was a bit denser, but had great flavor. I usually make it with 3 cups of bread flour and 1/3 cup whole wheat flour. If you wish to use all whole wheat flour, follow my recipe for whole wheat bread instead.
Add-In Options
Add-ins are completely optional, but I encourage seeds and/or nuts for a little texture. I usually use sunflower seeds. Other options include chopped pecans or walnuts, pepitas, raisins, dried cranberries, or a blend of these. You could also throw in smaller seeds such as chia, flax, or sesame. See recipe note below before starting.
Step-by-Step Photos
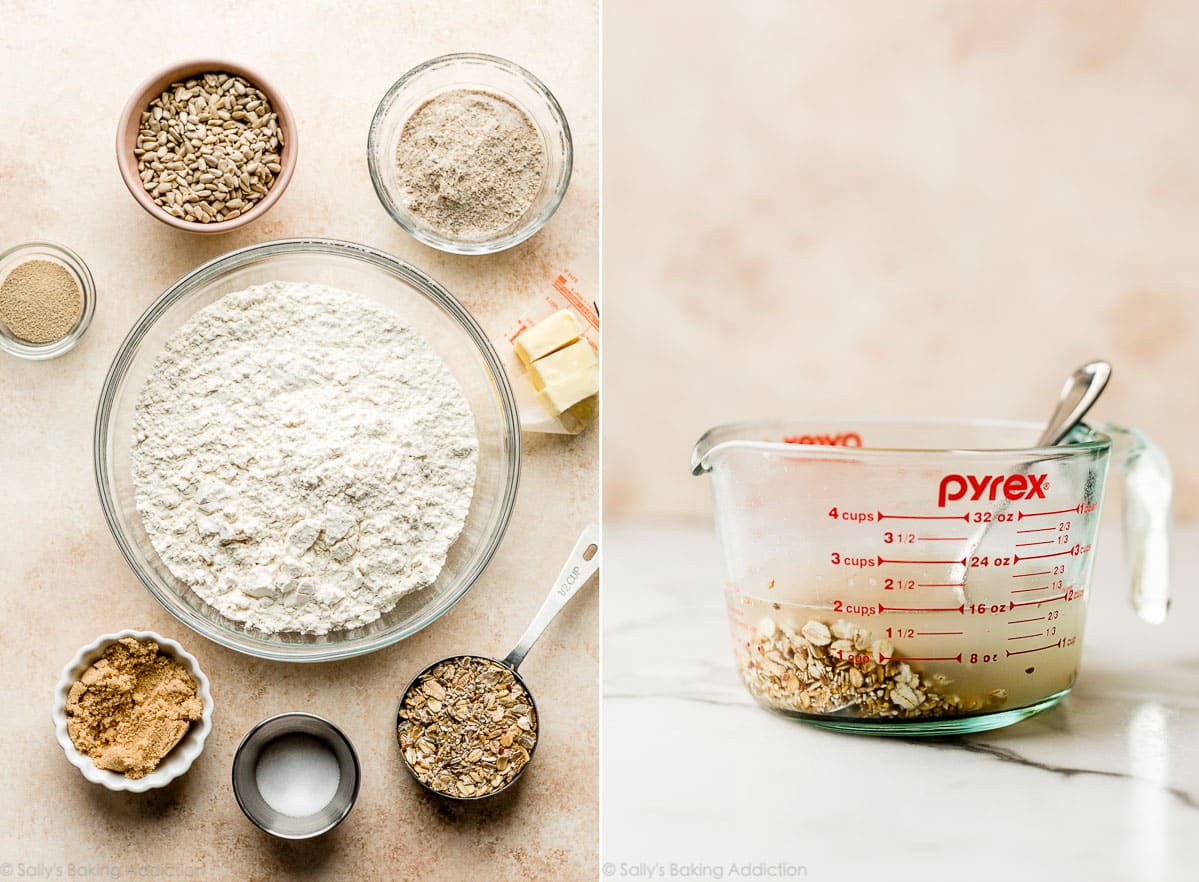
Soak the grain cereal in the boiling water, as pictured above.
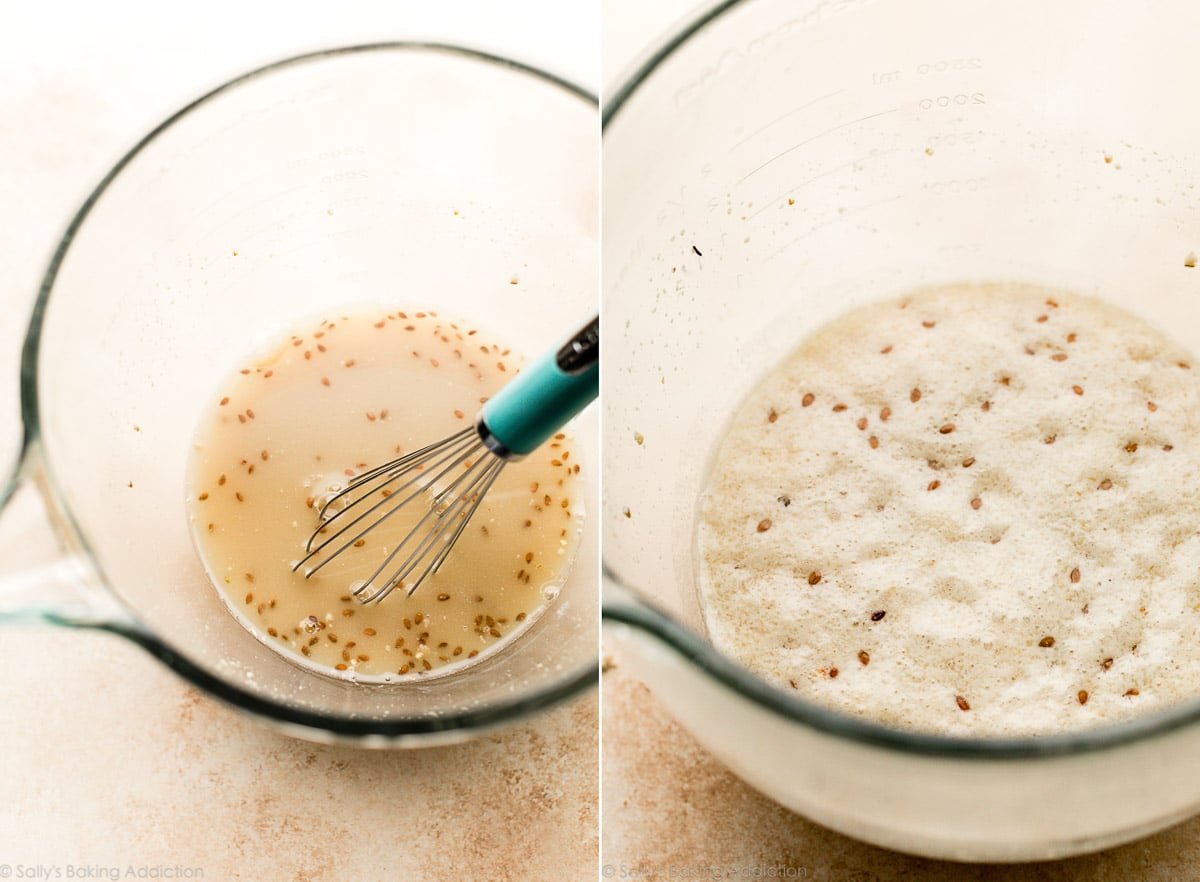
Below left: After it cools down, whisk in the yeast and brown sugar. Below right: After 5-10 minutes, you’ll notice foam or bubbles on the surface. This means the yeast is active and ready. Note that the hot cereal that I use contains flax seeds so that’s what you’re seeing floating on top!
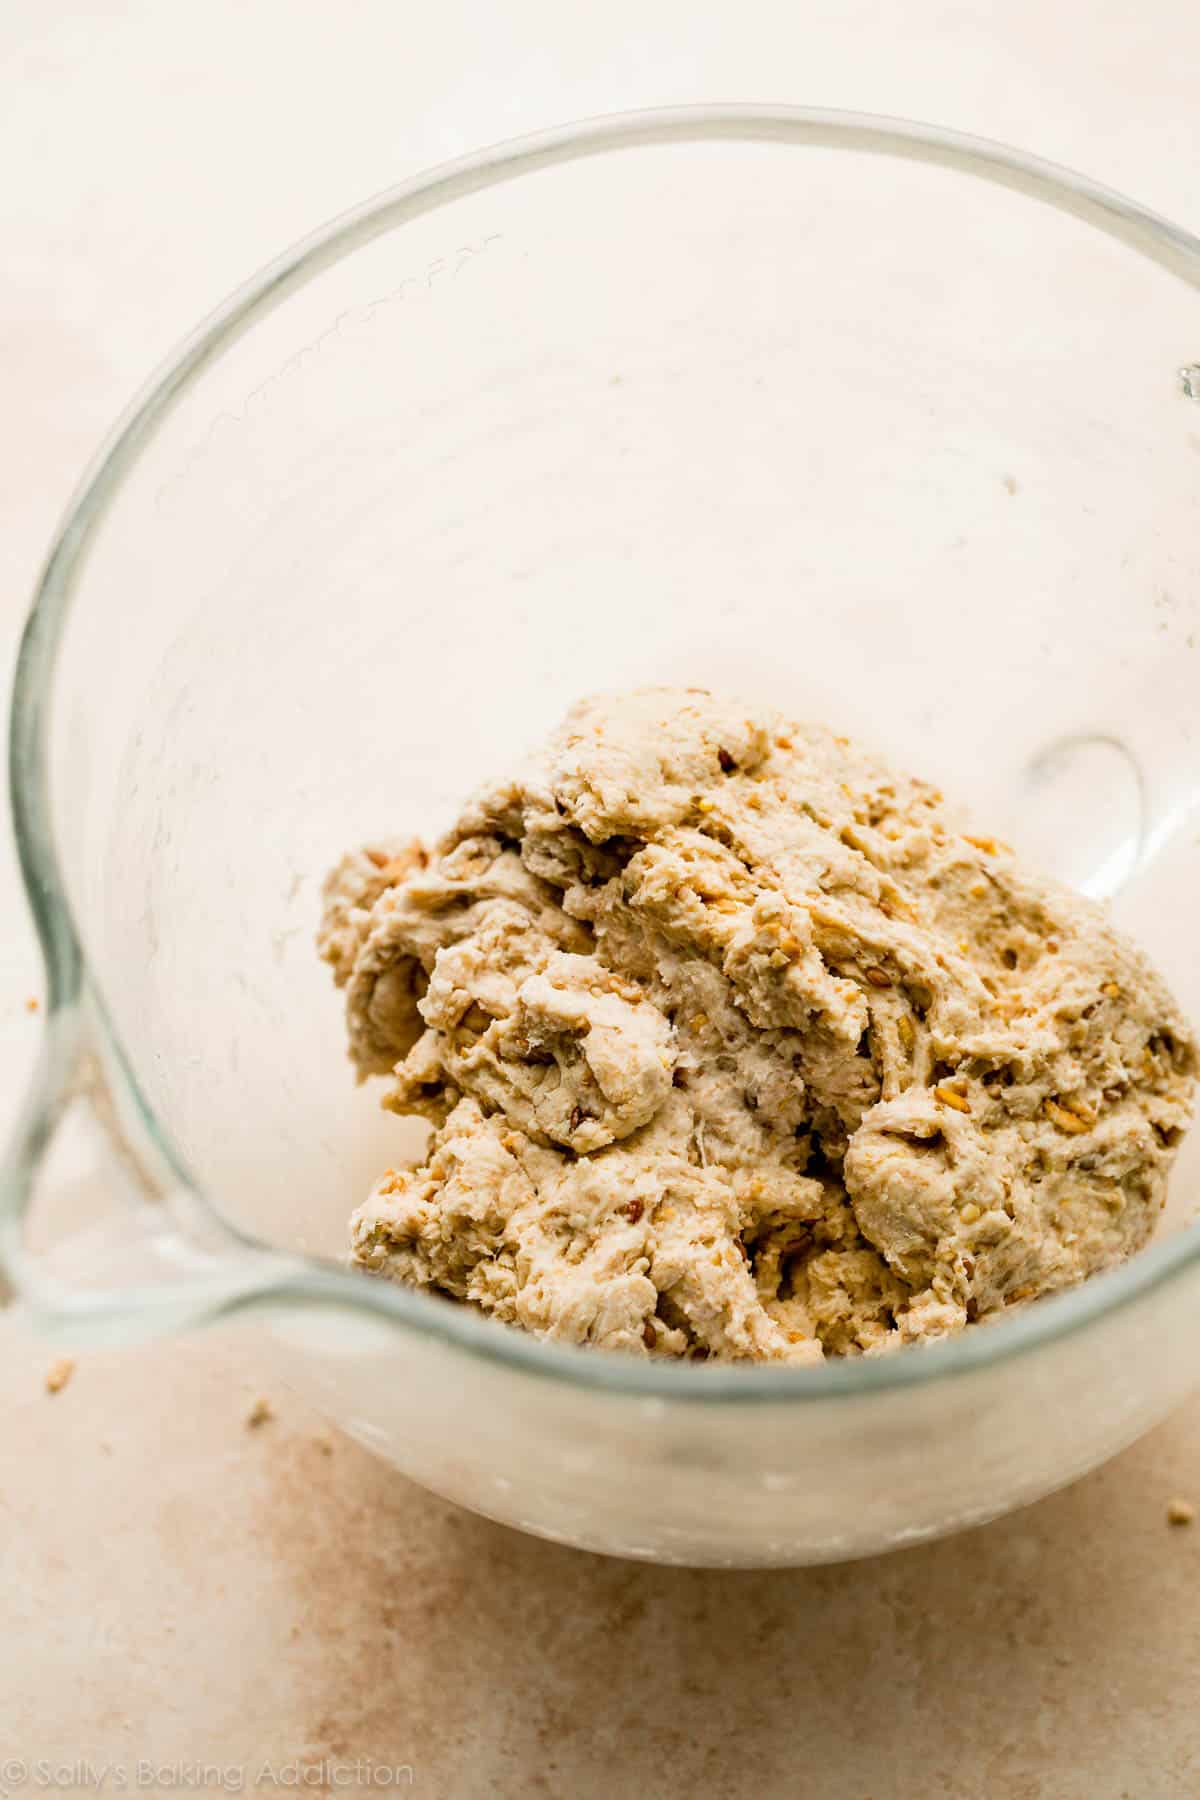
The dough will feel heavy. As instructed in the recipe below, knead it before letting it rise. If you’re new to bread-baking, my How to Knead Dough tutorial will be helpful here.
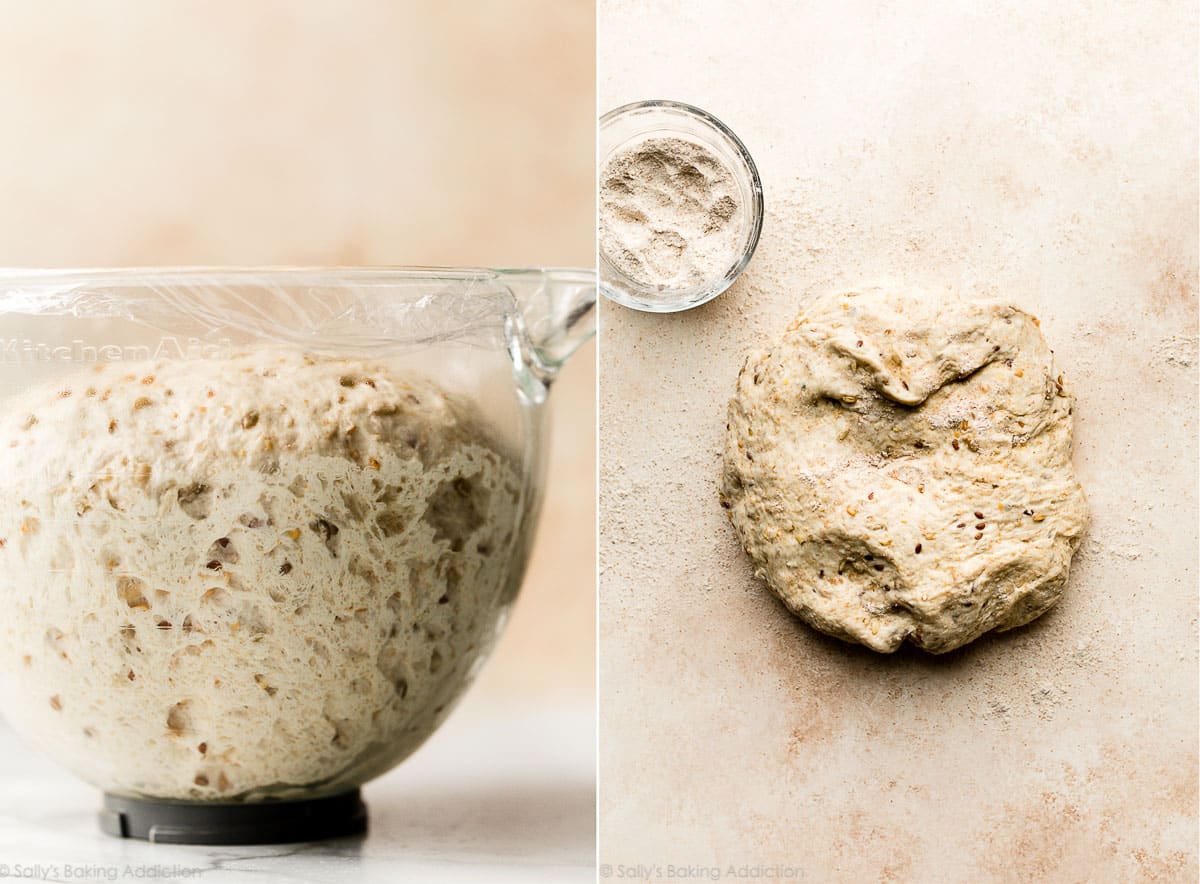
Below left: After you make and knead the dough, let it rise until doubled in size. Below right: Punch it down to release the air, then place on a lightly floured work surface.
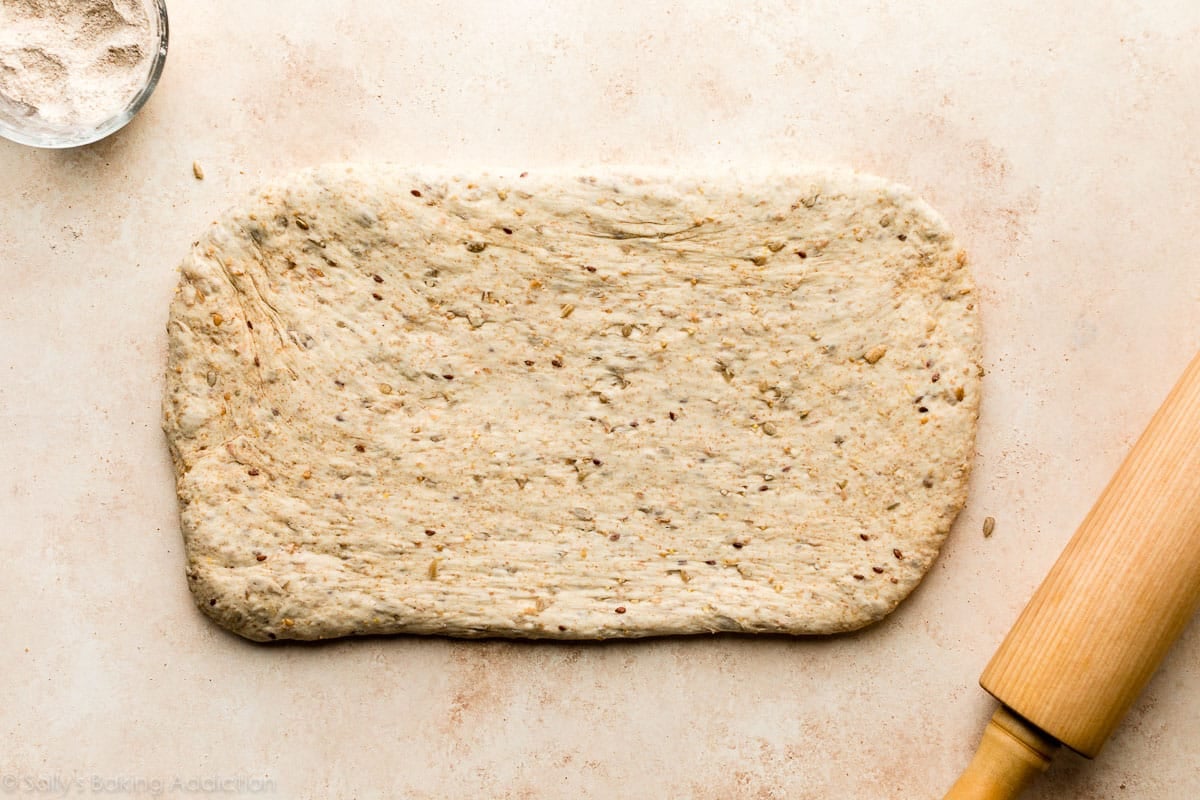
Roll it out into an 8×15-inch rectangle:
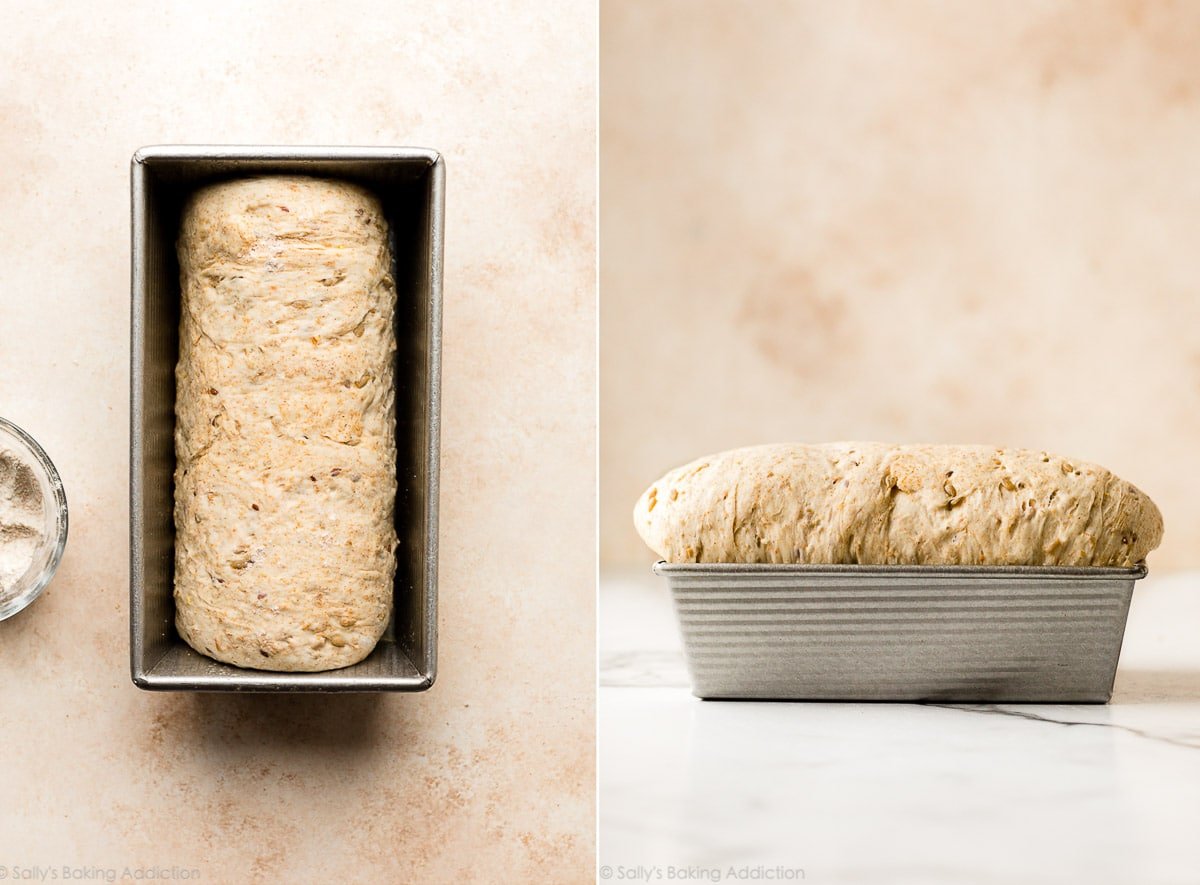
Below left: Roll it up tightly starting with the 8-inch side, so you have an 8-inch roll to fit into your 9×5 inch loaf pan. (Unlike cinnamon rolls where you roll up the dough starting with the larger side.) Below right: Let it rise until it’s 1-2 inches above the rim of the pan.
Look at this height!
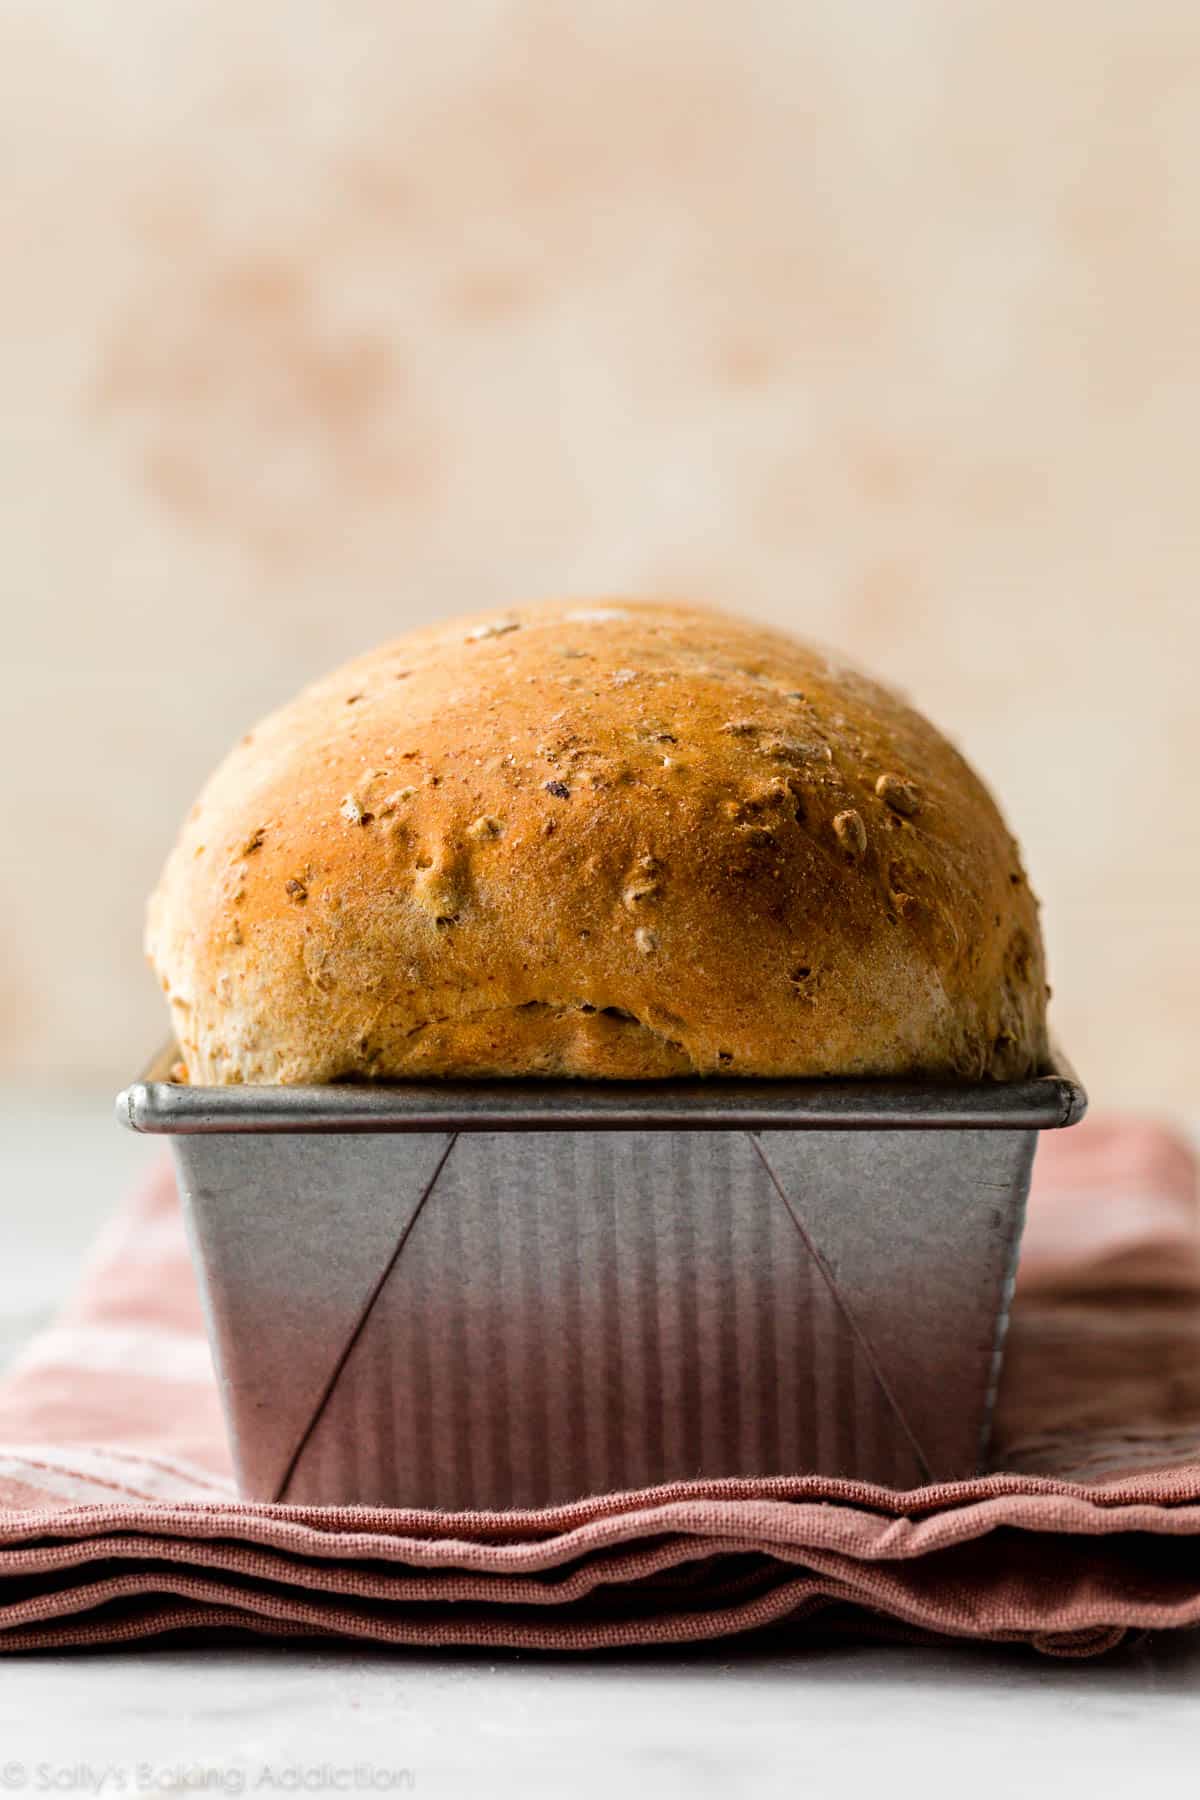
Bake until golden brown:
How do I test for doneness? Give the loaf a light tap. If it sounds hollow, it’s done. For a more accurate test, the bread is done when an instant read thermometer reads the center of the loaf as 195–200°F (90–93°C).
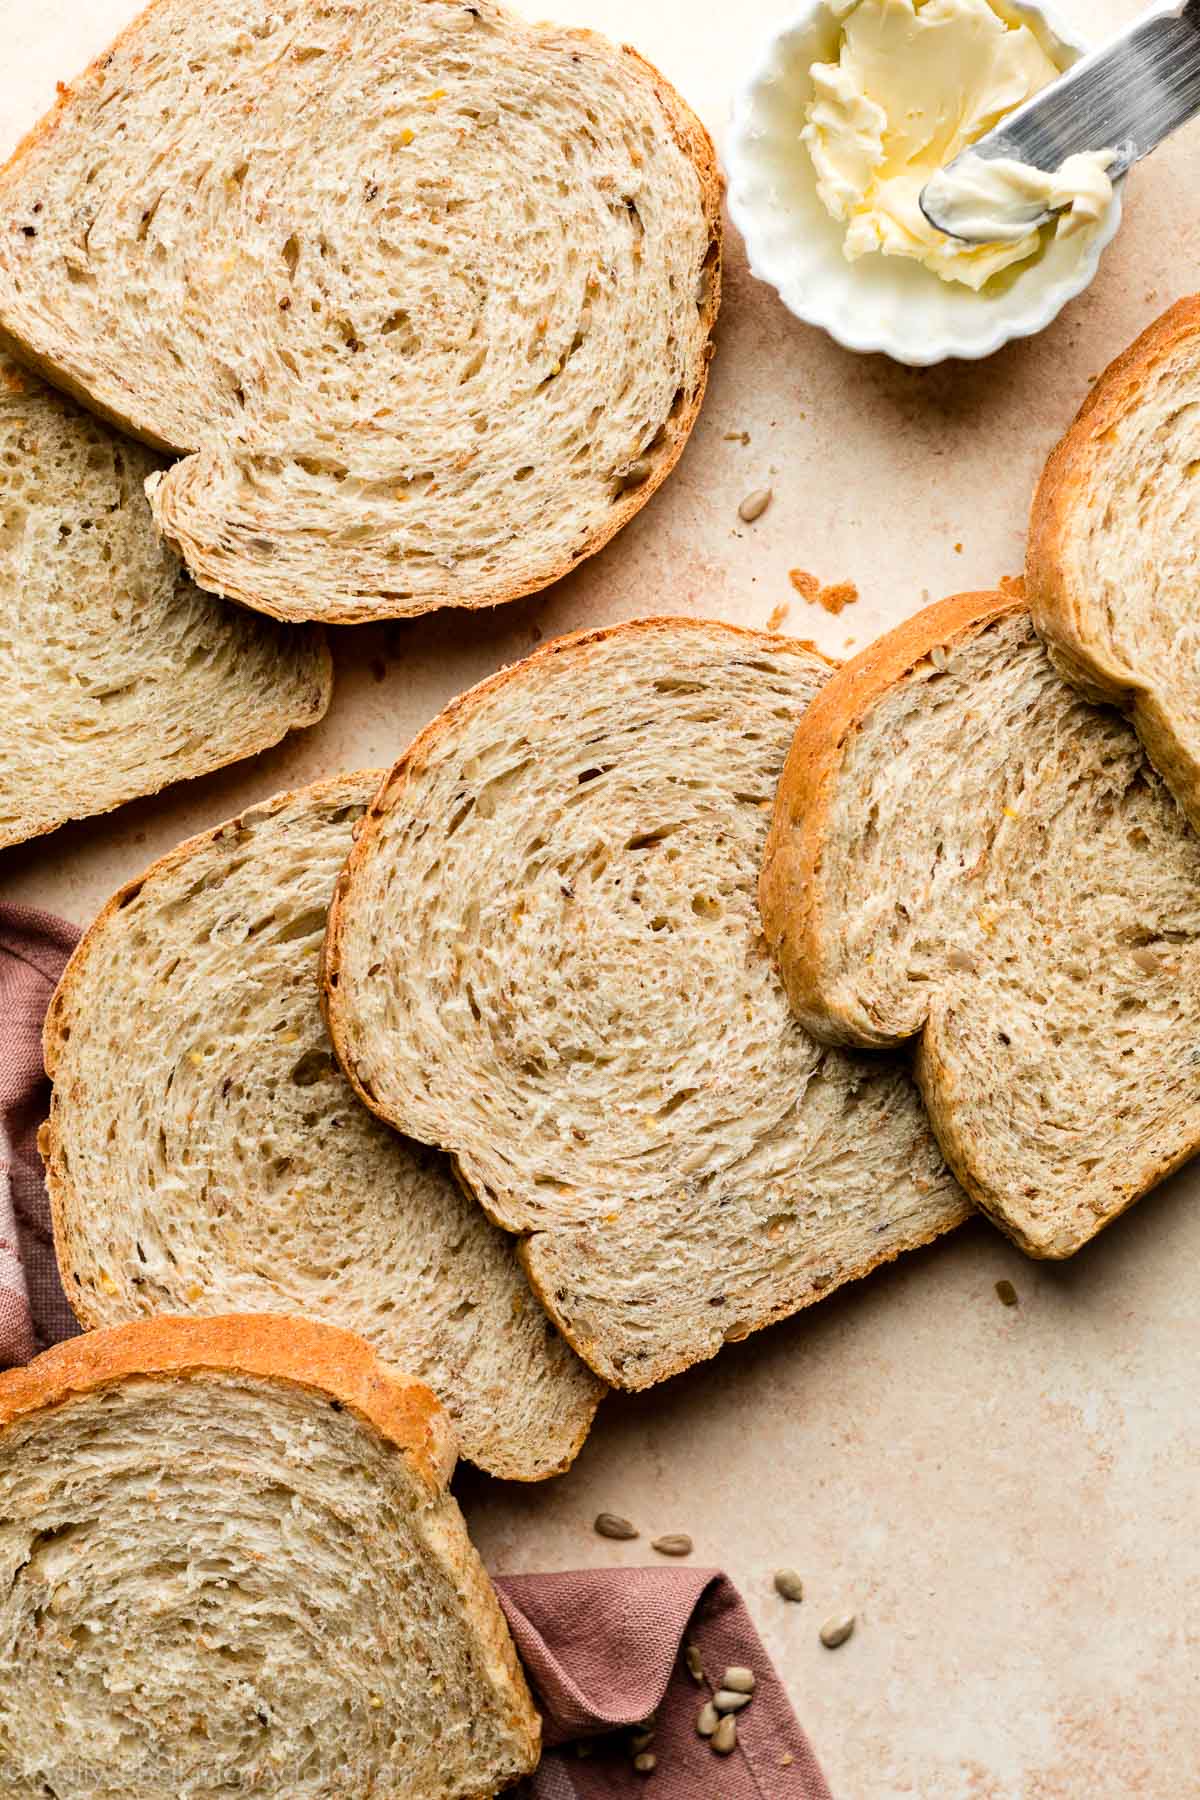
This multigrain bread is phenomenal when sliced and served warm. The exterior is crisp and crusty while cloaking a hearty, yet fluffy crumb inside. The whole slice is just so, so satisfying and cozy. And it’s fabulous with homemade honey butter. This is definitely a homemade bread to try!
If you happen to have any leftovers, day old bread is perfect for soaking up flavors in an easy breakfast casserole.
Can I Make This Into Rolls?
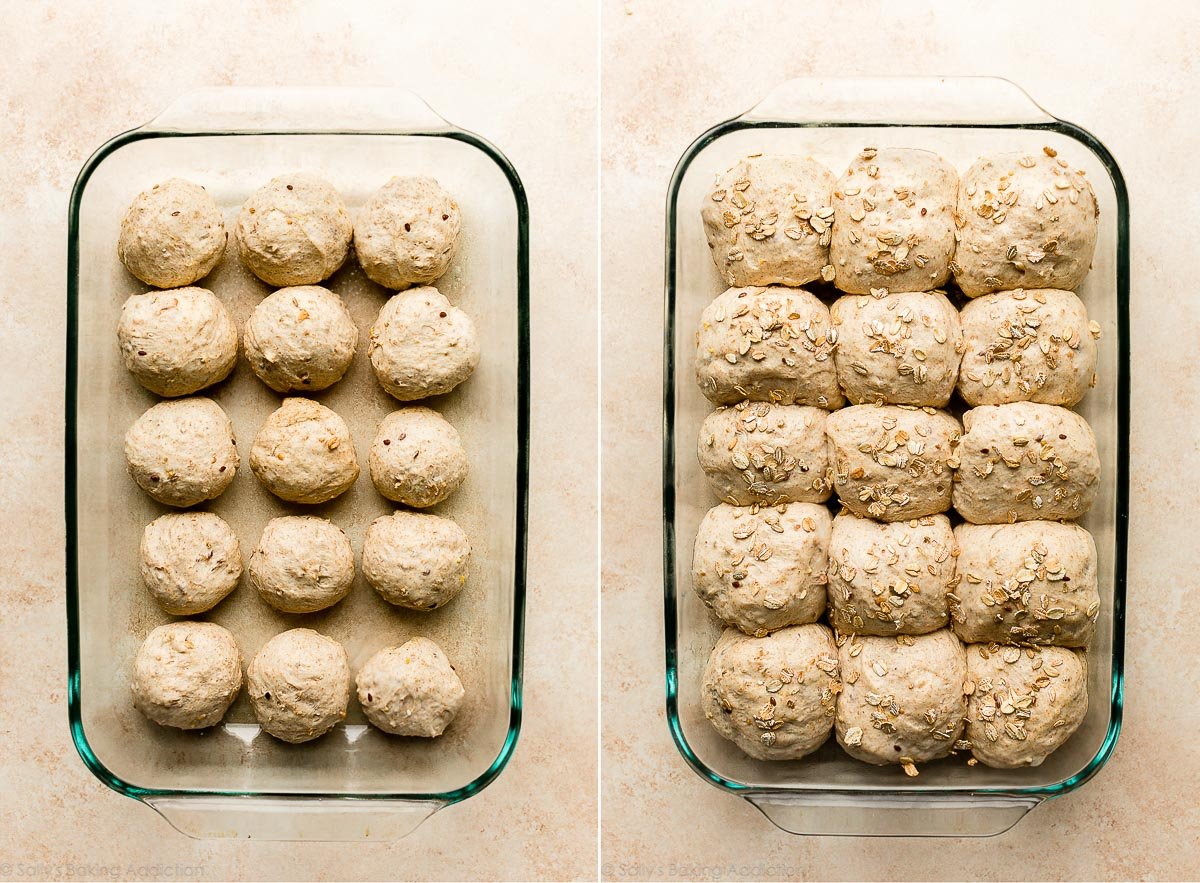
I thought you’d ask! I tested this dough to make multigrain rolls and it worked wonderfully. Not quite as soft as regular dinner rolls and not quite as heavy as whole wheat dinner rolls. I will say that I preferred the multigrain sandwich bread because it had a little more texture from the crust. Served warm with a pat of butter, however, the rolls were fantastic. See recipe note for instructions. Though I haven’t tested it, I imagine you could use this dough to make 3-4 bread bowls, too.
Multigrain AND multipurpose!

More Yeast Bread Recipes
Browse all of my yeast bread recipes.
Print
Soft Multigrain Bread
- Prep Time: 3 hours, 40 minutes
- Cook Time: 34 minutes
- Total Time: 4 hours, 15 minutes
- Yield: 1 loaf
- Category: Bread
- Method: Baking
- Cuisine: American
Description
This is wholesome multigrain bread with an irresistibly soft and fluffy interior. For best success, take the time to review the recipe notes before starting. Though not required, an instant read thermometer is helpful in a few of these steps.
Ingredients
- 1/2 cup (60g) dry multigrain cereal mix or old-fashioned whole rolled oats (see note)
- 1 and 3/4 cups (410ml) boiling water
- 2 and 1/4 teaspoons (7g) instant or active dry yeast (1 standard packet)
- 3 Tablespoons (37g) packed light or dark brown sugar
- 3 Tablespoons (43g) unsalted butter, softened to room temperature
- 1 and 1/2 teaspoons salt
- 3 and 1/3 cups (433g) bread flour (spooned and leveled), plus more as needed and for hands/work surface
- optional: 1/2 cup (60g) sunflower seeds, chopped nuts, pepitas, raisins, or dried cranberries
Instructions
- Prepare the dough: Place cereal mix in a large heatproof bowl (you can also use the bowl of your stand mixer). Pour boiling water on top. Let the mixture cool until a digital thermometer reads about 110°F (43°C). This usually takes 20 minutes. Pay attention to the temperature because if it’s too hot, it will kill the yeast. If it became too cool, however, it’s not a problem—the dough may just take a few extra minutes to rise.
- Whisk the yeast, sugar, and all of the warm water/cereal mixture in the bowl of your stand mixer fitted with a dough hook or paddle attachment. Cover and allow to sit for 5-10 minutes or until foamy and bubbly on the surface.
- Add the butter, salt, and 1 cup (about 130g) flour. Beat on low speed for 30 seconds, scrape down the sides of the bowl with a silicone spatula, then add another cup of flour. Beat on medium speed until relatively incorporated (there may still be chunks of butter). Add all of the remaining flour and the seeds/nuts (if using), then beat on medium speed until the dough comes together and pulls away from the sides of the bowl, about 2 minutes. If it seems too sticky, add more flour, 1 Tablespoon at a time until it begins to pull away from the sides of the bowl. *If you do not own a mixer, you can mix this dough with a large wooden spoon or silicone spatula. It will take a bit of arm muscle!*
- Knead the dough: Keep the dough in the mixer and beat for an additional 3-5 full minutes, or knead by hand on a lightly floured surface for 3-5 full minutes. (If you’re new to bread-baking, my How to Knead Dough video tutorial can help here.) If the dough becomes too sticky during the kneading process, sprinkle 1 teaspoon of flour at a time on the dough or on the work surface/in the bowl to make a soft, slightly tacky dough. Do not add more flour than you need because you do not want a dry dough. After kneading, the dough should still feel a little soft. Poke it with your finger—if it slowly bounces back, your dough is ready to rise. You can also do a “windowpane test” to see if your dough has been kneaded long enough: tear off a small (roughly golfball-size) piece of dough and gently stretch it out until it’s thin enough for light to pass through it. Hold it up to a window or light. Does light pass through the stretched dough without the dough tearing first? If so, your dough has been kneaded long enough and is ready to rise. If not, keep kneading until it passes the windowpane test.
- 1st Rise: Lightly grease a large bowl with olive oil or nonstick spray. Place the dough in the bowl, turning it to coat all sides in the oil. Cover the bowl with aluminum foil, plastic wrap, or a clean kitchen towel. Allow the dough to rise in a relatively warm environment for 1-2 hours or until double in size. (I always let it rise on the counter. Takes about 2 hours. For a tiny reduction in rise time, see my answer to Where Should Dough Rise? in my Baking with Yeast Guide.)
- Grease a 9×5-inch loaf pan.
- Shape the bread: When the dough is ready, punch it down to release the air. Lightly flour a work surface, your hands, and a rolling pin. Roll the dough out into a large rectangle, about 8×15 inches. It does not have to be perfect– in fact, it will probably be rounded on the edges. That’s ok! Roll it up into an 8 inch log and place in the prepared loaf pan.
- 2nd Rise: Cover shaped loaf with aluminum foil, plastic wrap, or a clean kitchen towel. Allow to rise until it’s about 1-2 inches above the top of the loaf pan, about 1 hour. (See photo above for a visual.)
- Adjust oven rack to a lower position and preheat oven to 350°F (177°C). (It’s best to bake the bread towards the bottom of the oven so the top doesn’t burn.)
- Bake the bread: Bake for 35-40 minutes– if you notice the top browning too quickly during bake time, loosely tent the pan with aluminum foil. How to test for doneness– give the loaf a light tap. If it sounds hollow, it’s done. For a more accurate test, the bread is done when an instant read thermometer reads the center of the loaf as 195°F-200°F (90°C-93°C).
- Remove from the oven and allow bread to cool for a few minutes before slicing and serving. Feel free to let it cool completely before slicing, too.
- Cover leftover bread tightly and store at room temperature for 2-3 days or in the refrigerator for up to 10 days.
Notes
- Freezing Instructions: This dough isn’t ideal for freezing. The dough has a hard time rising after thawing. Instead, try the overnight instructions (next) or freeze the baked loaf. To freeze the baked loaf, allow the bread to cool completely, then freeze for up to 3 months. Thaw in the refrigerator or at room temperature, then reheat as desired.
- Overnight Instructions: Prepare the recipe through step 7. Lightly cover the shaped bread and refrigerate for up to about 15 hours. At least 2 hours before you need the bread the next day, remove from the refrigerator, keep covered, and allow to rise on the counter for about 1 hour before baking. Alternatively, you can let the dough have its 1st rise in the refrigerator overnight. Cover the dough tightly and place in the refrigerator for up to 12 hours. Remove from the refrigerator and allow the dough to fully rise for 2 more hours. Continue with step 6.
- Special Tools (affiliate links): Electric Stand Mixer | 9×5-inch Loaf Pan | Rolling Pin | 7 Grain Hot Cereal
- Grain Cereal: Use dry multigrain cereal that you would use to make hot cereal, such as 5 grain, 7 grain, or 10 grain cereal. You can also use quick or whole oats, but I do not recommend steel cut oats. There are many variations of hot cereal available in grocery stores– a multigrain version may include rye, barley, oats, whole wheat, and/or more. Honestly any grain cereal you mix with hot water works assuming there’s no flavors or sugars added (for example, don’t use brown sugar cinnamon oatmeal mix). If you can’t find any multigrain hot cereals at the store, you can purchase online– or just use plain oats. I really like this 7 grain + flax seed hot cereal. Multigrain baby cereal works too.
- Yeast: You can use active-dry or instant yeast. The instructions are the same no matter which you use.
- Flours: If you have both bread flour and all-purpose flour on hand, I recommend using bread flour. All-purpose flour definitely works, but you get a sturdier and more bread-like texture from bread flour. I love using whole wheat flour when I can, but this dough is not fit for all whole wheat flour. In my recipe testing, I found that replacing up to 1 cup (around 130g) of the bread/all-purpose flour with whole wheat flour worked just fine. The bread was a bit denser, but had great flavor. I usually make it with 3 cups of bread flour and 1/3 cup whole wheat flour.
- Seeds/Add-Ins: The pictured loaf was prepared with 1/2 cup (60g) of sunflower seeds. I love extra flavor and texture, so I’ve been increasing that amount to 2/3 cup (80g). Use any of the suggested add-ins like sunflower seeds, pecans, walnuts, pepitas, raisins, dried cranberries, or a blend of these. If you want to use smaller seeds, such as poppy, chia, flax, or sesame, I recommend reducing the amount to 2 or 3 Tablespoons. You could, however, blend these smaller seeds with larger seeds/nuts/dried fruit for a total of 1/2 or 2/3 cup (60 or 80g).
- Multigrain rolls: Make the dough as written above through the first rise (steps 1-5), then follow steps 5-10 in my dinner rolls recipe. Bake time is 25-26 minutes.
- If You Want to Top with Oats or Seeds: If you want to top the dough with oats or seeds prior to baking, carefully brush the dough after the 2nd rise (step 8) with 1 egg white beaten with 1 Tbsp water, then sprinkle 2 Tbsp of oats or seeds on top. Neither will stick without the egg white brushed on first. I did this with the pictured rolls.
- Doubling this recipe: For best results, I recommend making two separate batches of dough. However, if you want to double the recipe all in 1 mixing bowl, double all of the ingredients except for the yeast. Use 2 and 1/4 teaspoons yeast. This amount of dough may overwhelm your stand mixer, so I recommend mixing the dough with a large wooden spoon or silicone spatula instead. It will take a bit of arm muscle.


Reader Comments and Reviews
I really liked this! Only change I made was adding vital wheat gluten to my AP flour to transform it into bread flour. An old trick I’ve used a lot.
I loved the 1st rise, second rise and oven spring.
Made a nice high loaf with a soft crumb.
Very pleased.
I have used a similar recipe from ATK that incorporates whole wheat and has other differences. Still like that one but if I want a high rise soft crumb – this is where I’ll go.
Great job – thanks for sharing
I just made this. Easy to make. It is almost TOO good. Great flavour. Light and fluffy but structured enough for sandwiches. I added raw unsalted pumpkin and flax seeds to my dough for texture and extra nutrients . Perfect.
I used Red River brand hot cereal since I could not find Bob’s Red Mill Hot Cereals at any larger grocers for some reason. Tip: If you also use Red River, follow the cereal and water amounts from the recipe but cook the mixture as directed on the Red River package- soaking the cereal in boiling water for 20 wasn’t enough as some of the cracked barley didn’t soften enough with just the soak.
Hi! Love the recipe! Do you happen to have the nutrition information for this recipe?
Hi Melanie, We don’t usually include nutrition information as it can vary between different brands of the same ingredients. Plus, many recipes have ingredient substitutions or optional ingredients listed. However, there are many handy online calculators where you can plug in and customize your exact ingredients/brands. Readers have found this one especially helpful: https://www.verywellfit.com/recipe-nutrition-analyzer-4157076 Glad you enjoyed the bread!
Hi Michelle,
I decided to make this recipe this morning using my bread maker. As I didn’t have multigrain cereal, I used quick oats and added flax seed. The bread turned out nice and high with a soft and fluffy texture. Certainly going to make this again using a multigrain cereal and dried fruit. Bread maker .
Thank you for sharing this wonderful recipe.
Susan
Hello Sally,
Can I use my bread maker for this recipe?
Thank you.
Susan
Hi Susan, we have not tested this recipe in a bread machine, but several readers have reported success doing so. Let us know if you try it!
This is my go to sandwich bread recipe! I double the recipe and get 3 loaves out of it when doubled.
I am not a novice bread baker but have acquired something new for me. I bought some barley malt syrup and am wondering if it could be substituted for the brown sugar in this recipe. If so, would the amount be the same? That is 3 tbsp or 37g.
I would appreciate you thoughts on this. Thank you very much.
Hi Carolyn, we haven’t tested barley malt syrup in this bread, but it should be delicious. Let us know if you try!
I did make a loaf using the barley malt syrup. It turned out quite well but wasn’t very malty tasting which I would have liked. I will make it again using the brown sugar to see it there is any difference in the end product. Either way, it’s a lovely loaf. Thank you.
Carolyn
Our new daily bread! I double the recipe and make two loaves each time, one for the freezer. So soft and delicious!
Best bread recipe I’ve tried so far. I used dairy free butter as I forgot to buy unsalted butter, and the results were still fantastic.
Love love the recipe.. it’s one of favourites.. my question is why does the top go wrinkly once it starts cooling
Hi Patti, some wrinkles can be normal when cooling, but make sure not to over-proof your dough because that can weaken the gluten structure leading to more wrinkles.