
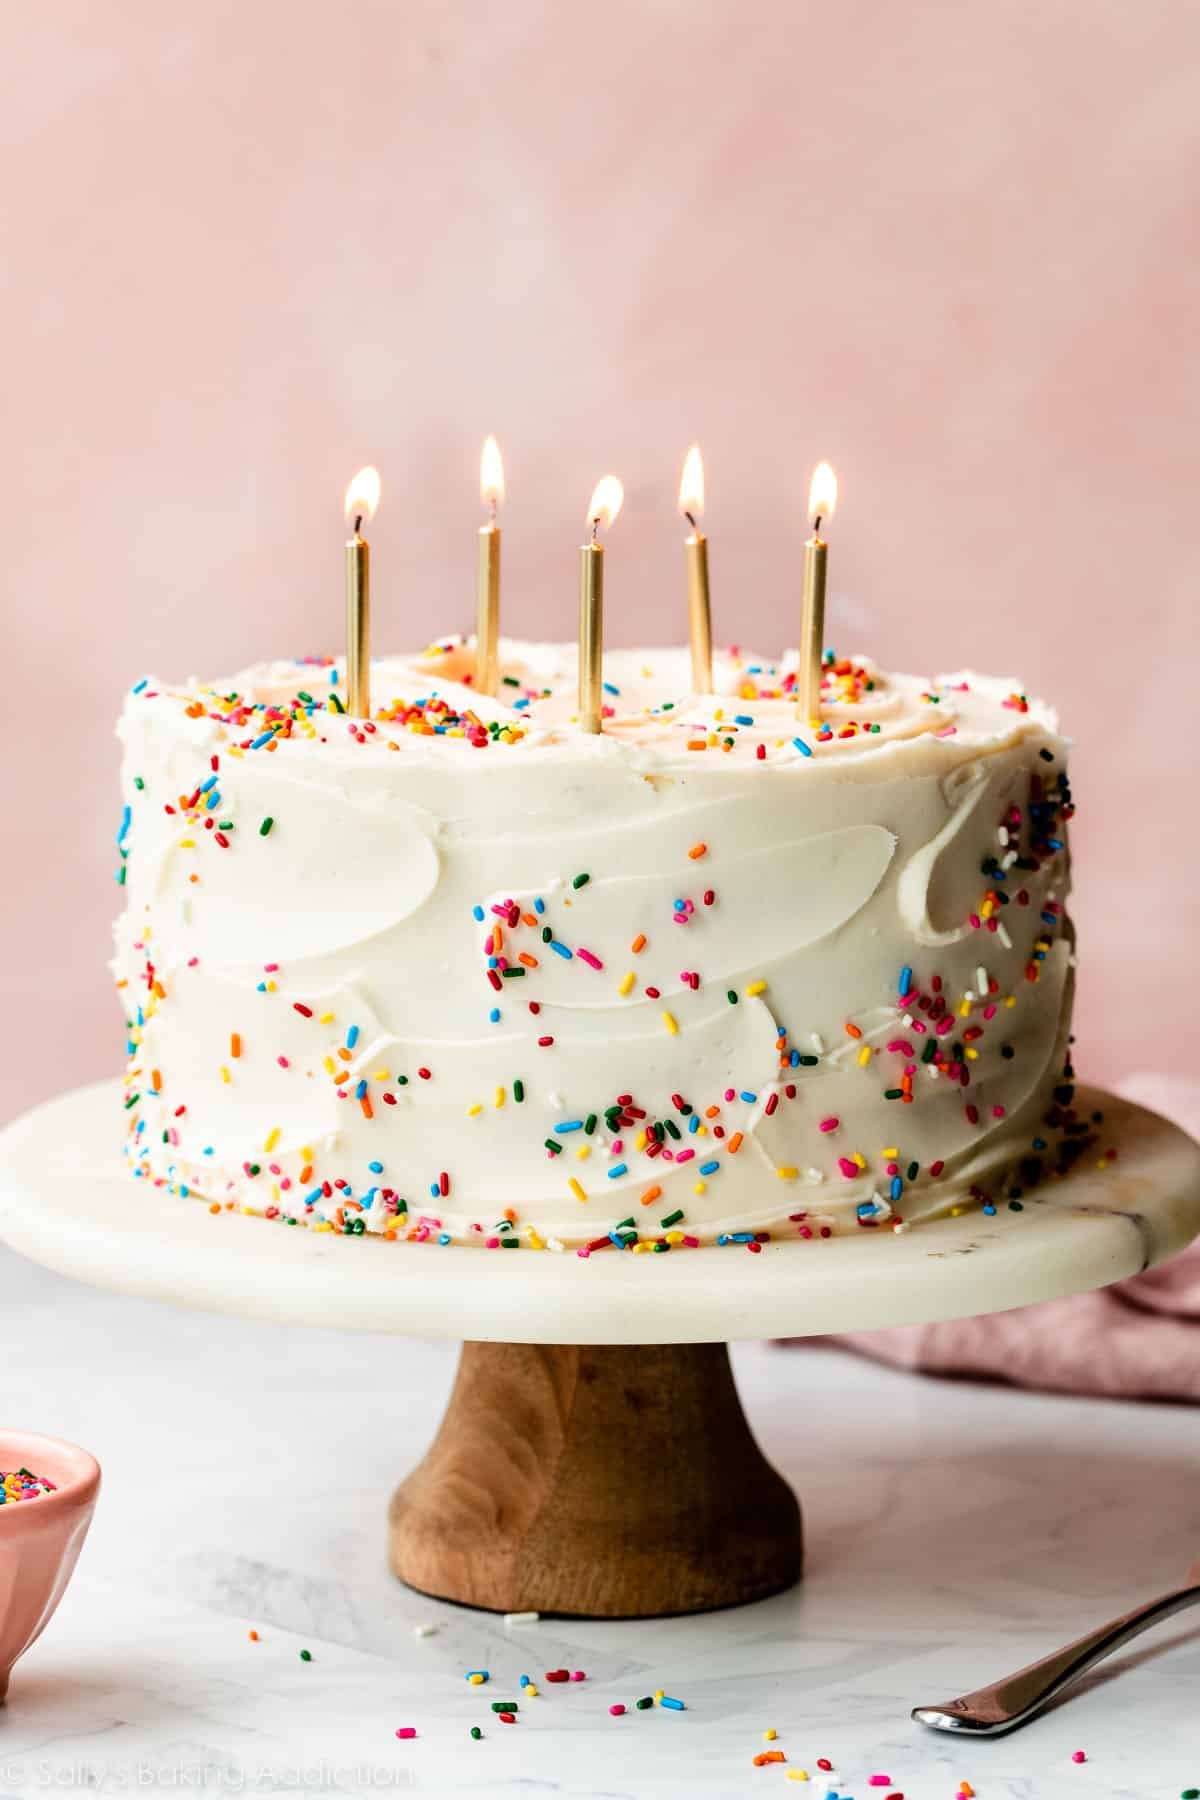
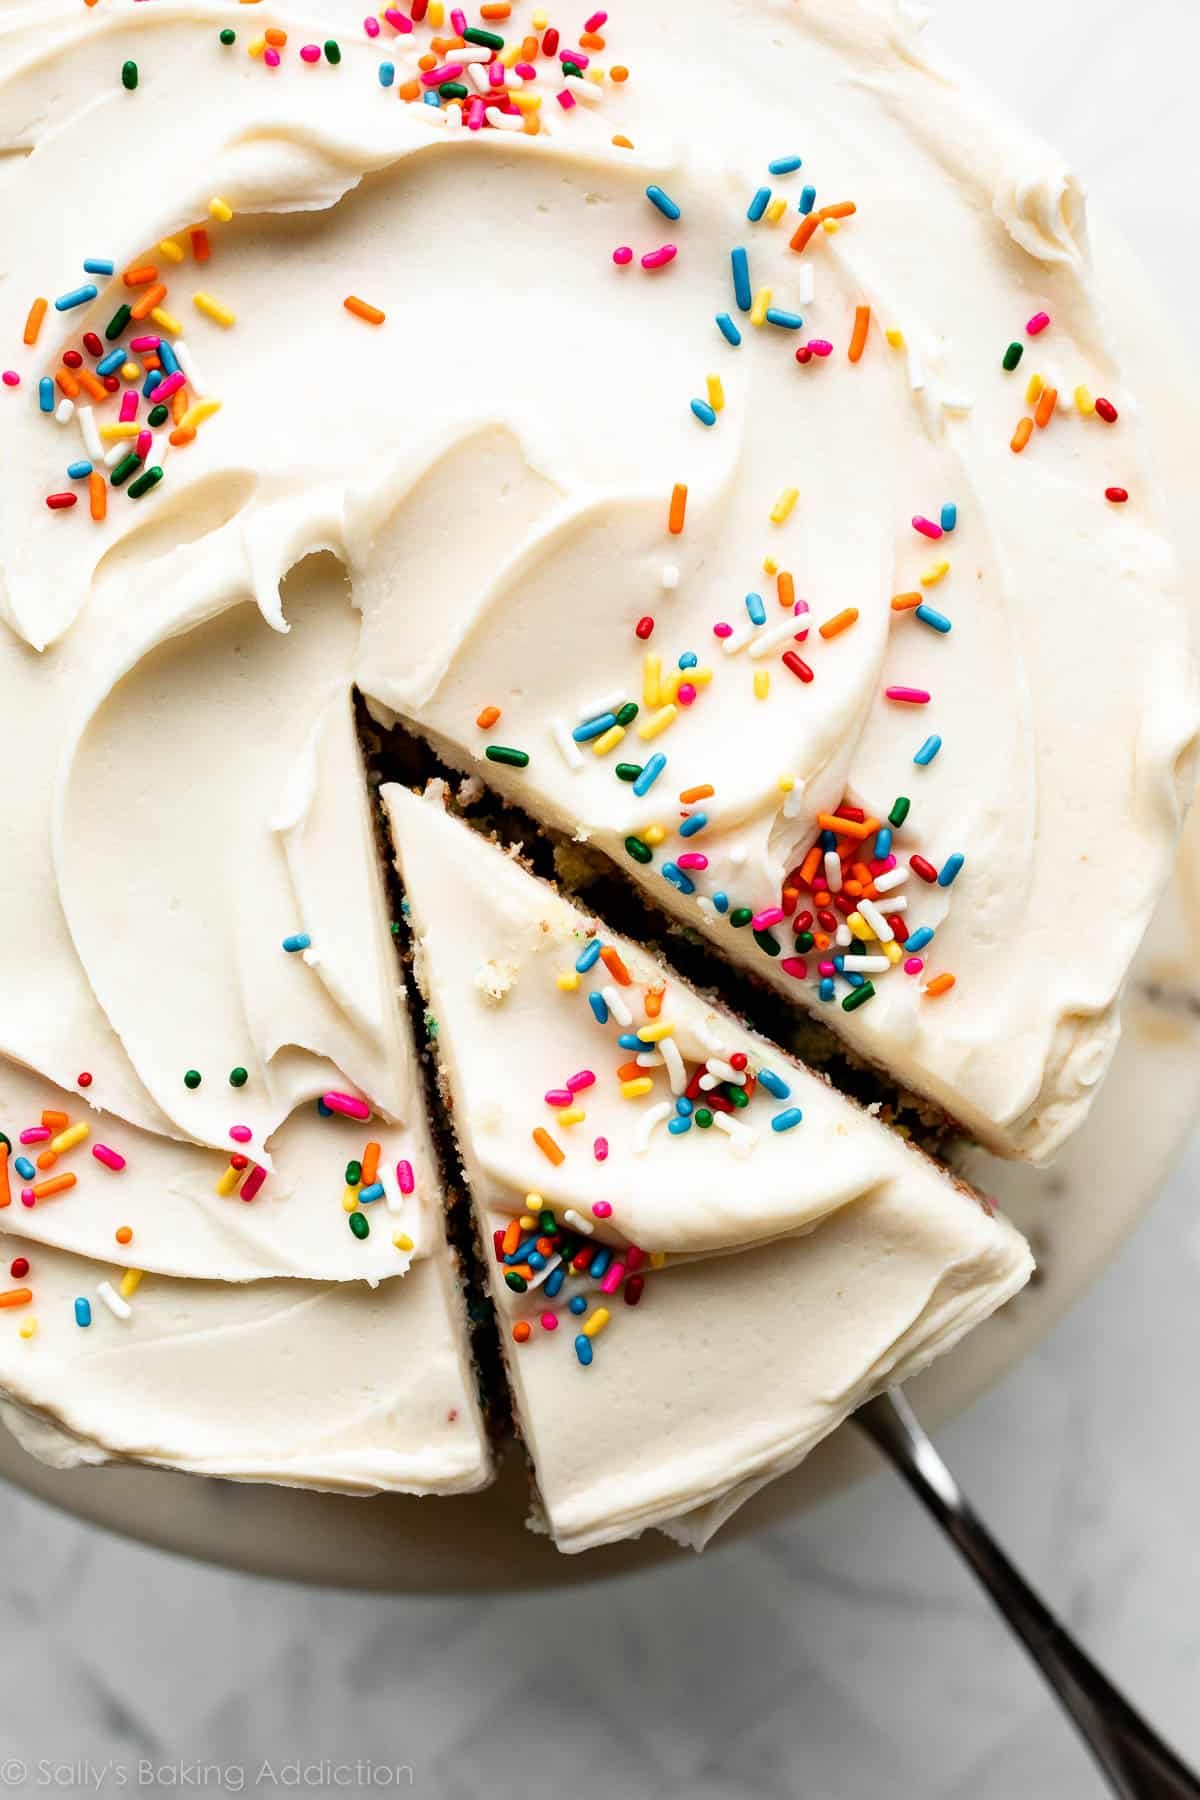
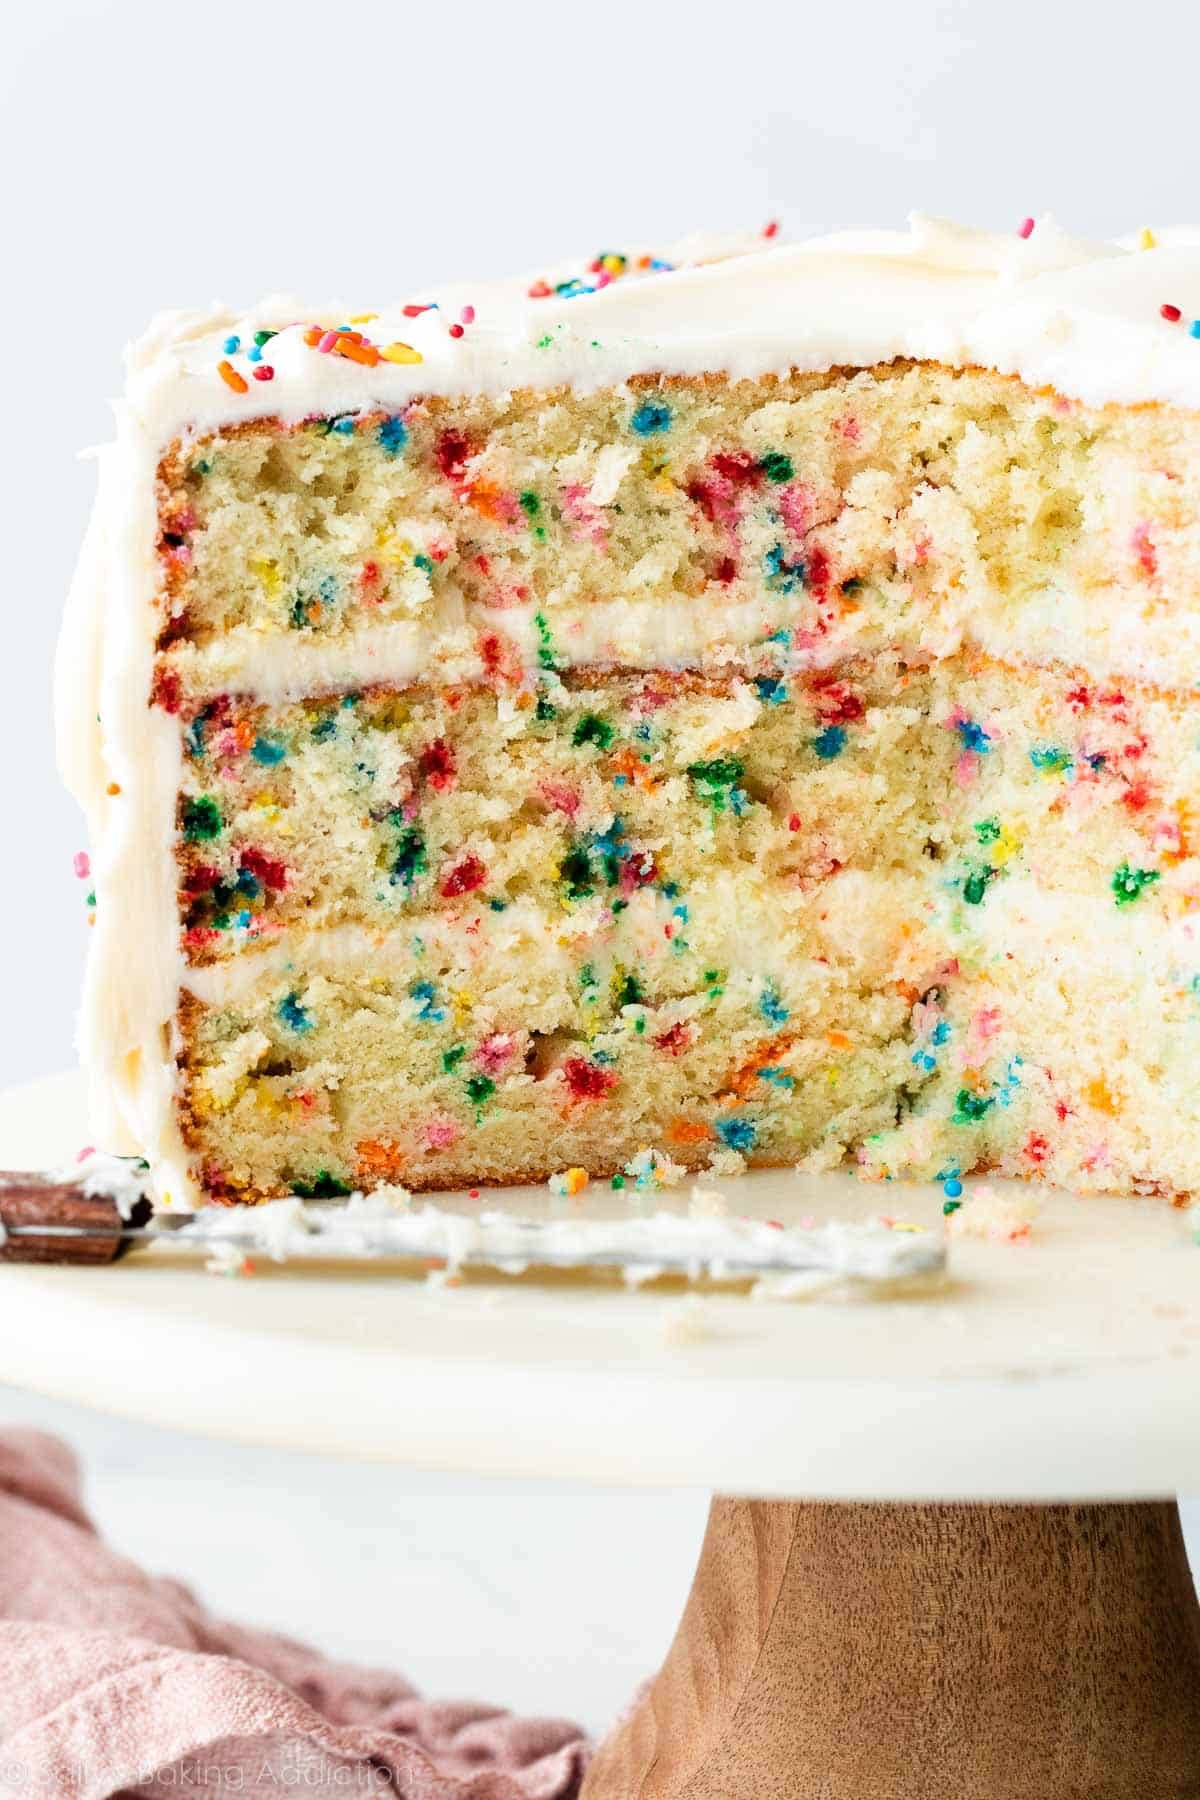
This is a tall, towering confetti layer cake filled to the brim with rainbow sprinkles and finished off with sweet vanilla buttercream frosting. It’s classic and party-perfect in every way! The recipe has lived on my website since 2014 and has become a popular favorite, even scoring #1 (out of 9!) in a sprinkle cake bake-off. Below you’ll find my detailed recipe, video, and best success tips.
I originally published this recipe in 2014 and have since added new photos and a few more success tips. I’ve also made a few changes to the recipe, which you can read about in the post below and in the recipe notes following the printable recipe.
Just Like Box Funfetti Cake
This thick, plush confetti birthday cake is filled with the flavors of childhood party nostalgia: butter, vanilla, sugar, and rainbow sprinkles. Close your eyes and you can practically hear the sound of balloons being blown up and smell the extinguished birthday candles. But this cake shouldn’t be limited to birthday parties—or to childhood! This happy cake is a joy to serve and eat at any celebration. It’s like the boxed Funfetti cake, but better.
One reader, Christina, commented: “You have never steered me wrong, and this cake is no exception! I first found your website on my daughter’s first birthday (4 years ago), and I swore it was the best cake I’ve ever made! Since then, I have used recipes from your website for every family birthday cake I’ve made! This one is another hit and possibly my daughter’s (now her fifth birthday cake) new favorite! ★★★★★“
Why You’ll Love This Confetti Layer Cake
- From-scratch and loaded with happy colorful sprinkles
- Topped with sweet & creamy classic vanilla buttercream
- Soft crumb from cake flour
- Fluffy from extra egg whites
- Buttery & cakey from creamed butter & sugar
- Stick-to-your-fork moist (without tasting greasy!) from eggs, oil, & buttermilk
- Extra flavor from pure vanilla extract
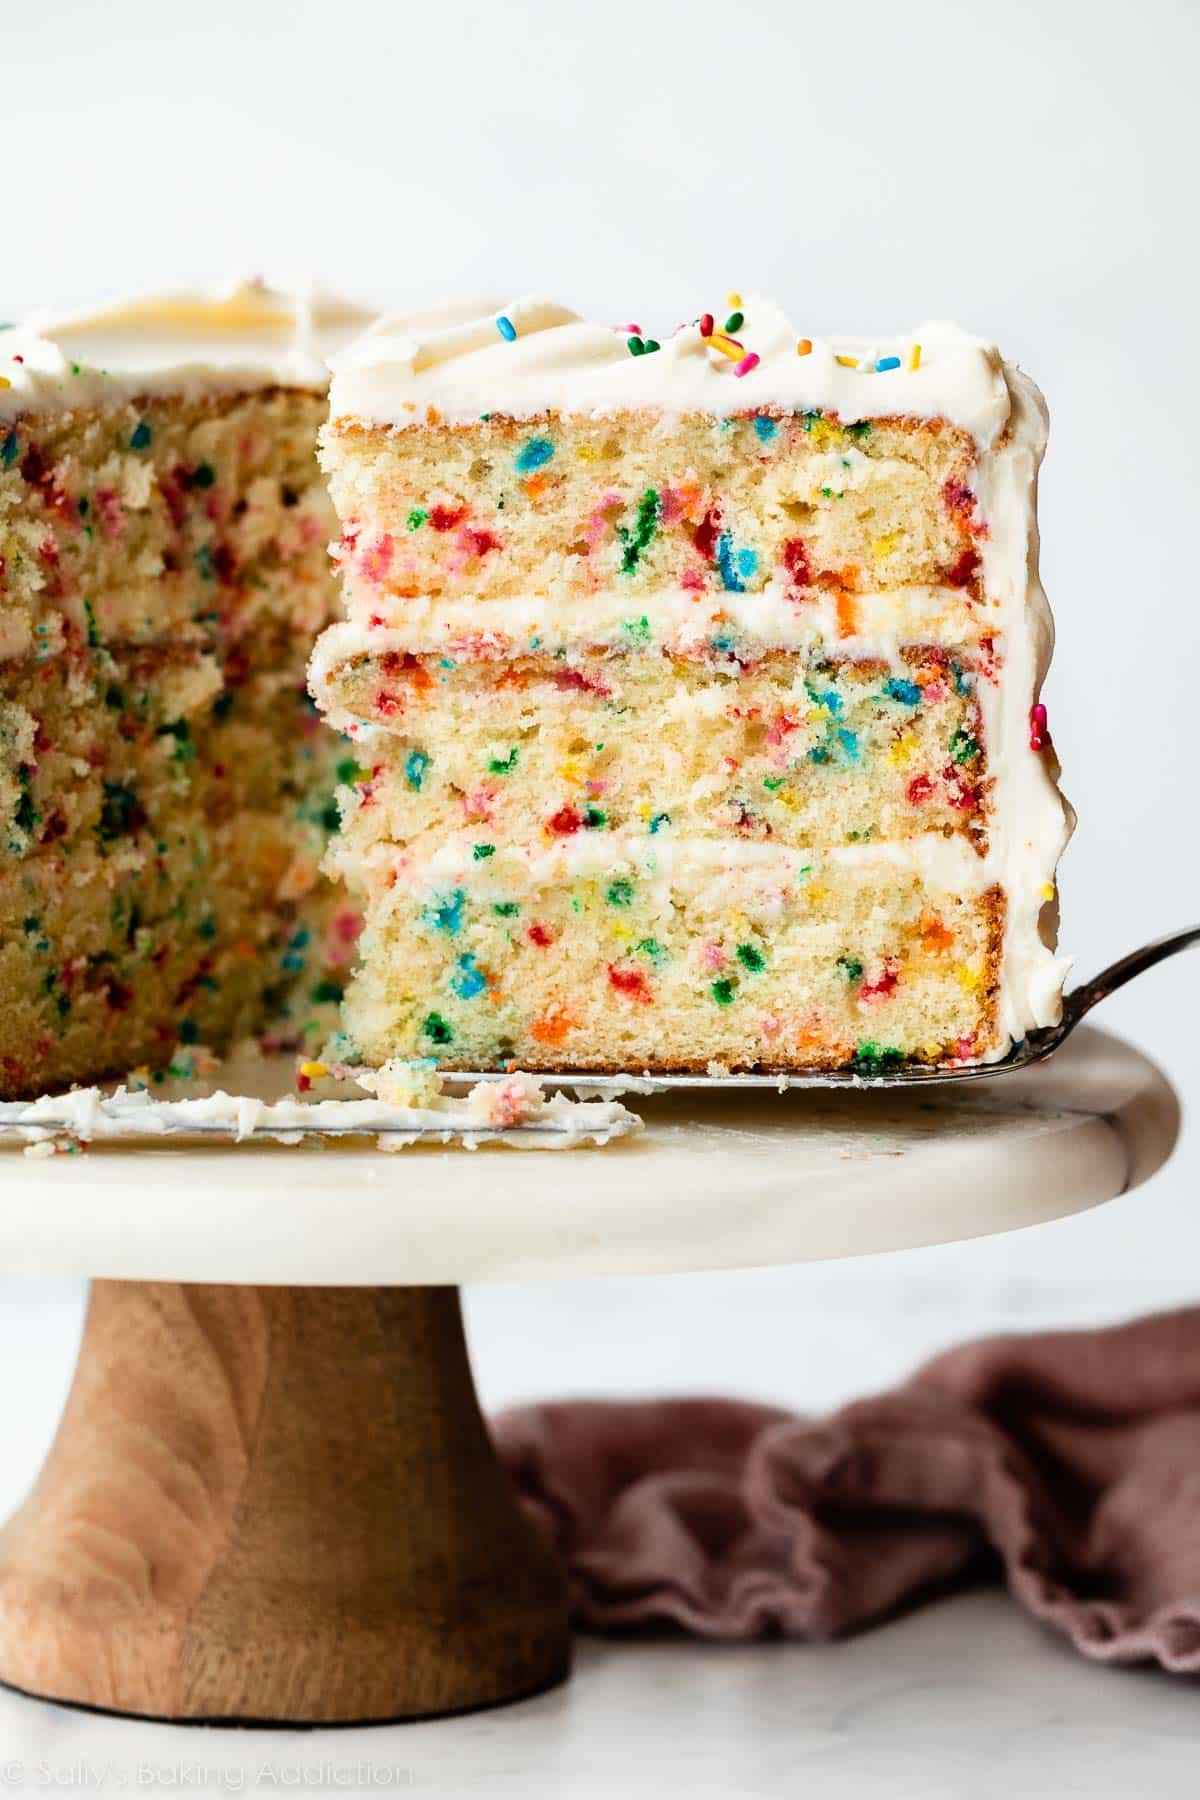
This towering rainbow dessert has been on my site for a number of years, and during that time, I’ve made a couple small updates. This was a great confetti birthday cake recipe before; in fact, it was rated No. 1 (of 9) in the Pancake Princess’ best sprinkle cake bake-off, and came in a close 2nd in the Kitchn’s Funfetti cake bake-off. But with 3 small updates, the cake is now even greater.
From the Kitchn’s review: “This cake was seriously delicious. It had a nice light texture but was still super moist. The vanilla flavor was bold without being overpowering, and the cake was sweet without being cloying. I loved how easy the frosting was to make and appreciated how smoothly it went onto the cake. My only critique is that you have to whip the egg whites in a separate bowl, so it’s a bit tedious, but that’s the only negative I can think of.”
I have some egg-cellent news: that egg-stra step is gone. (Sorry, I couldn’t resist.)
What’s New in This Birthday Cake Recipe?
- Add the egg whites at the same time as the whole eggs: 4 whole eggs provide structure, moisture, and richness. 2 extra egg whites keep the cake lighter. Though whipping the whites separately does assist in preventing a dense cake, in recent testing, I discovered that removing this whipping step can be offset by 2 other changes to keep the batter light. (Both are next.)
- Decrease the butter and add oil: Previously, the recipe called for 1.5 cups of butter (3 sticks, about 345g), but using all creamed butter in a cake can certainly weigh down the crumb. I love using oil in cake recipes because it adds moisture and a delicate texture. And I love using butter in cake recipes because of its unparalleled flavor. Finding the right proportion of each? Now that’s the sweet spot, and I found it by reducing the butter by ¼ cup and adding in ⅓ cup oil in its place.
- Use cake flour: If you want a fluffy and soft bakery-style cake, use cake flour.
After years of testing cake recipes, I’m more confident than ever in this updated version. The cake closely resembles my vanilla cake, but uses a bit less sugar because we’re adding sweet sprinkles.
These Step Photos Will Help
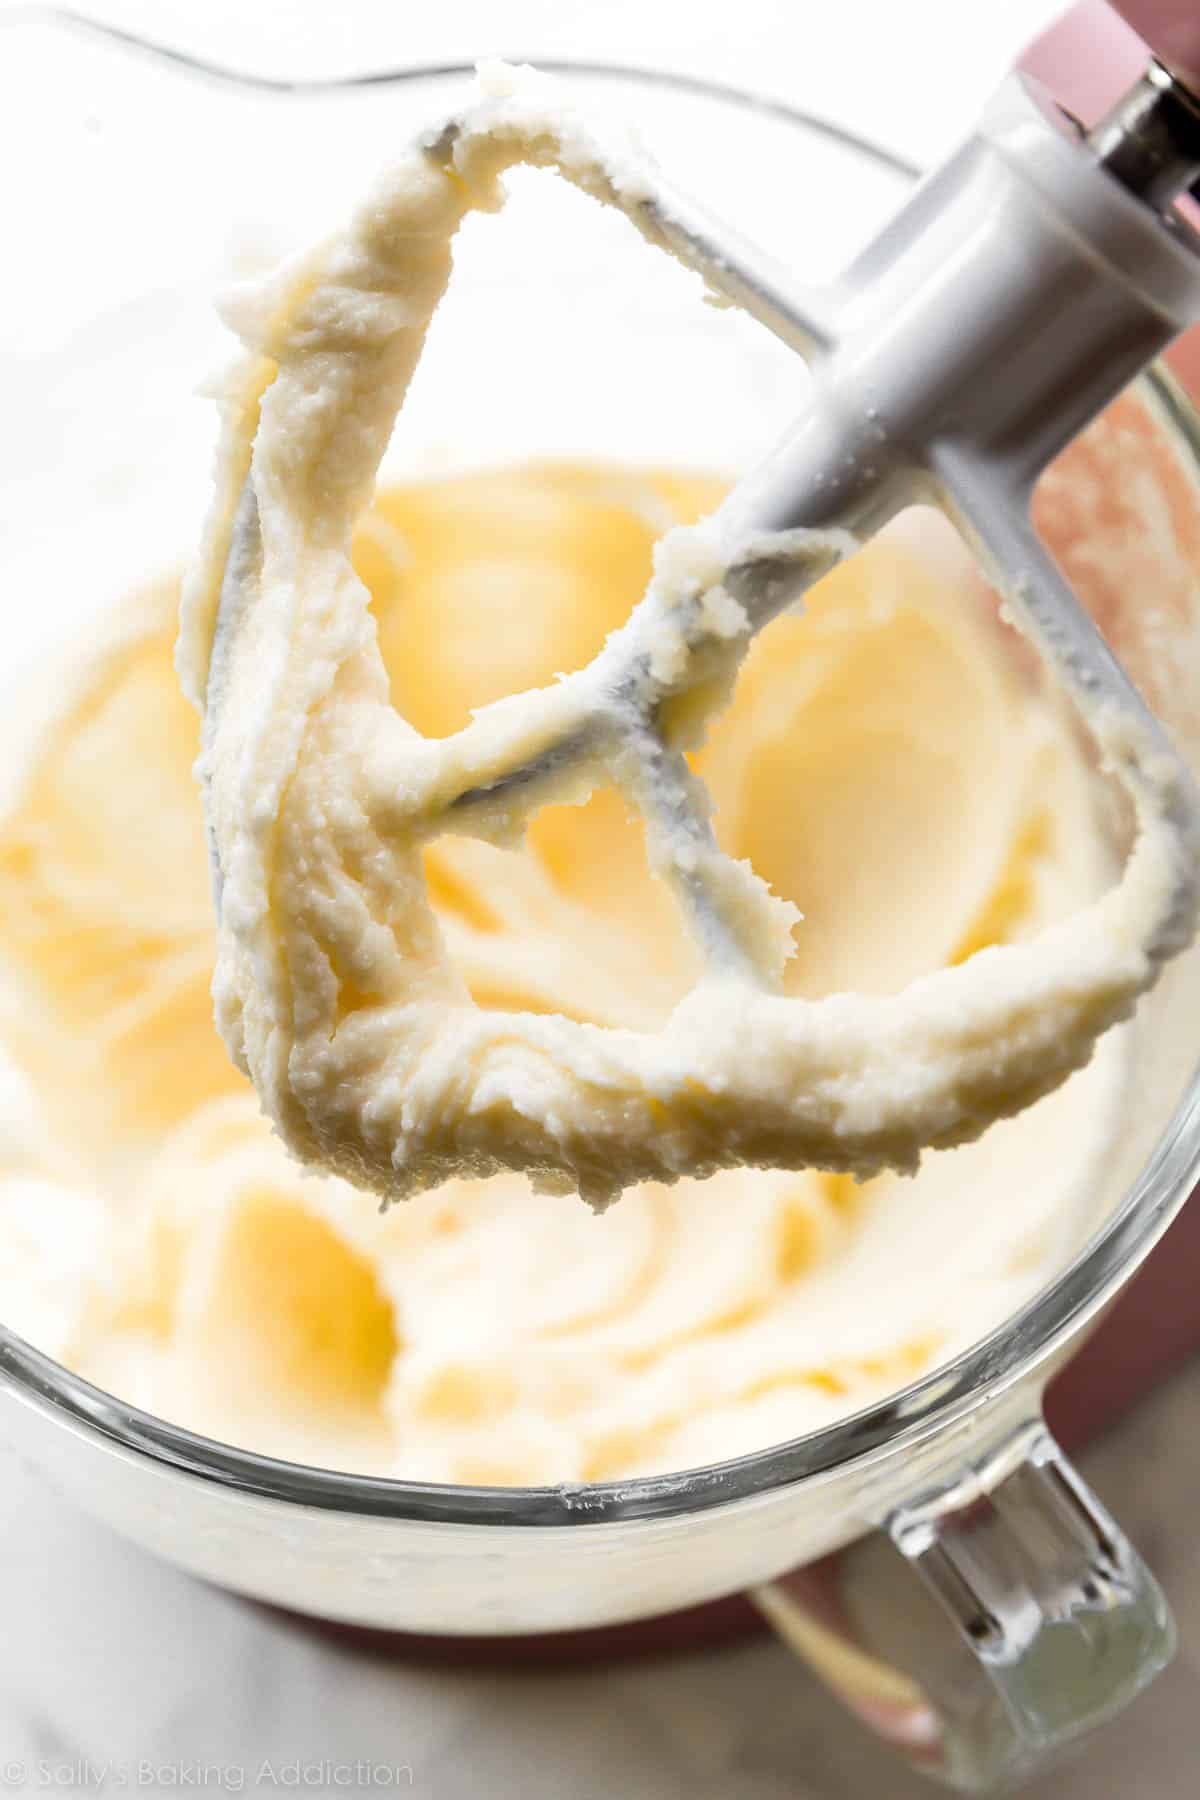
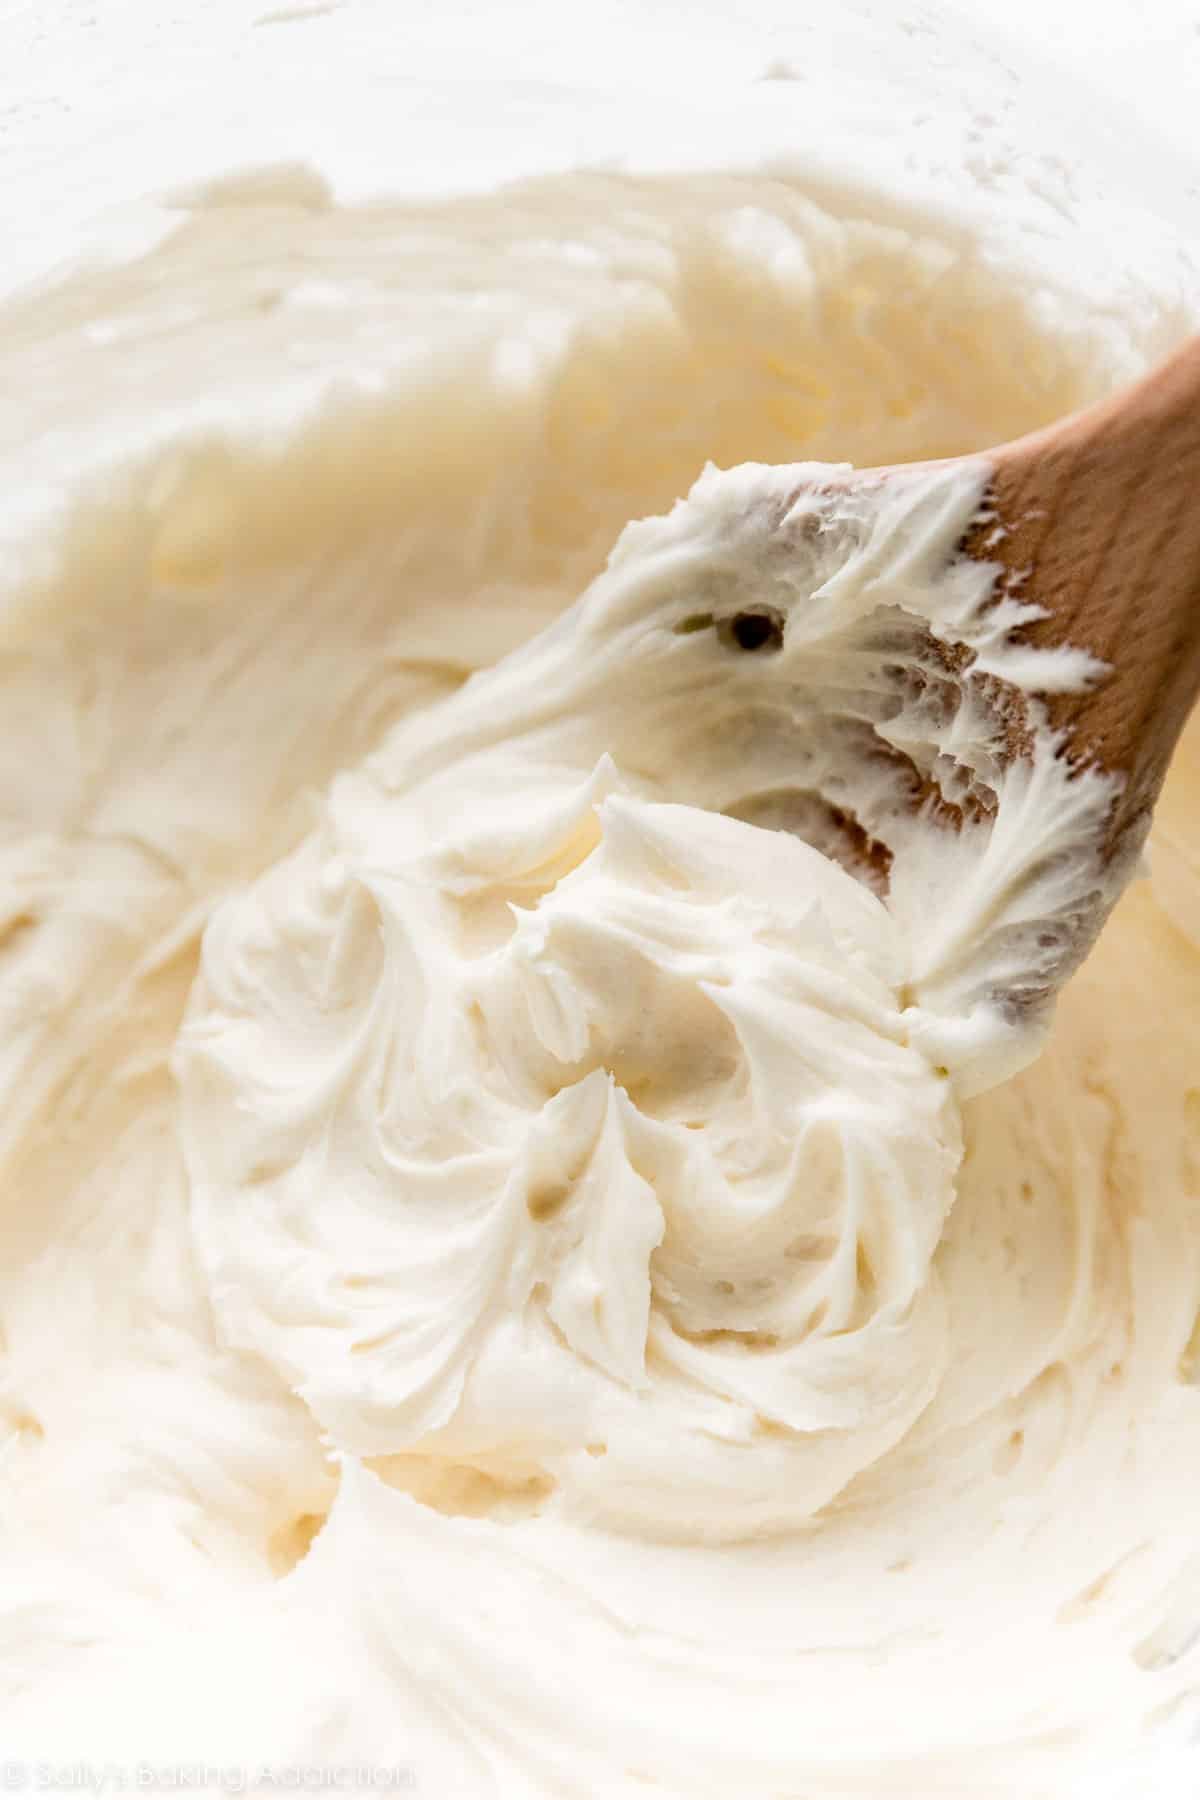
Here is the butter, sugar, and oil mixture. You’ll cream butter and sugar together first, and then mix in the oil. Mixture will be creamy and mostly smooth:
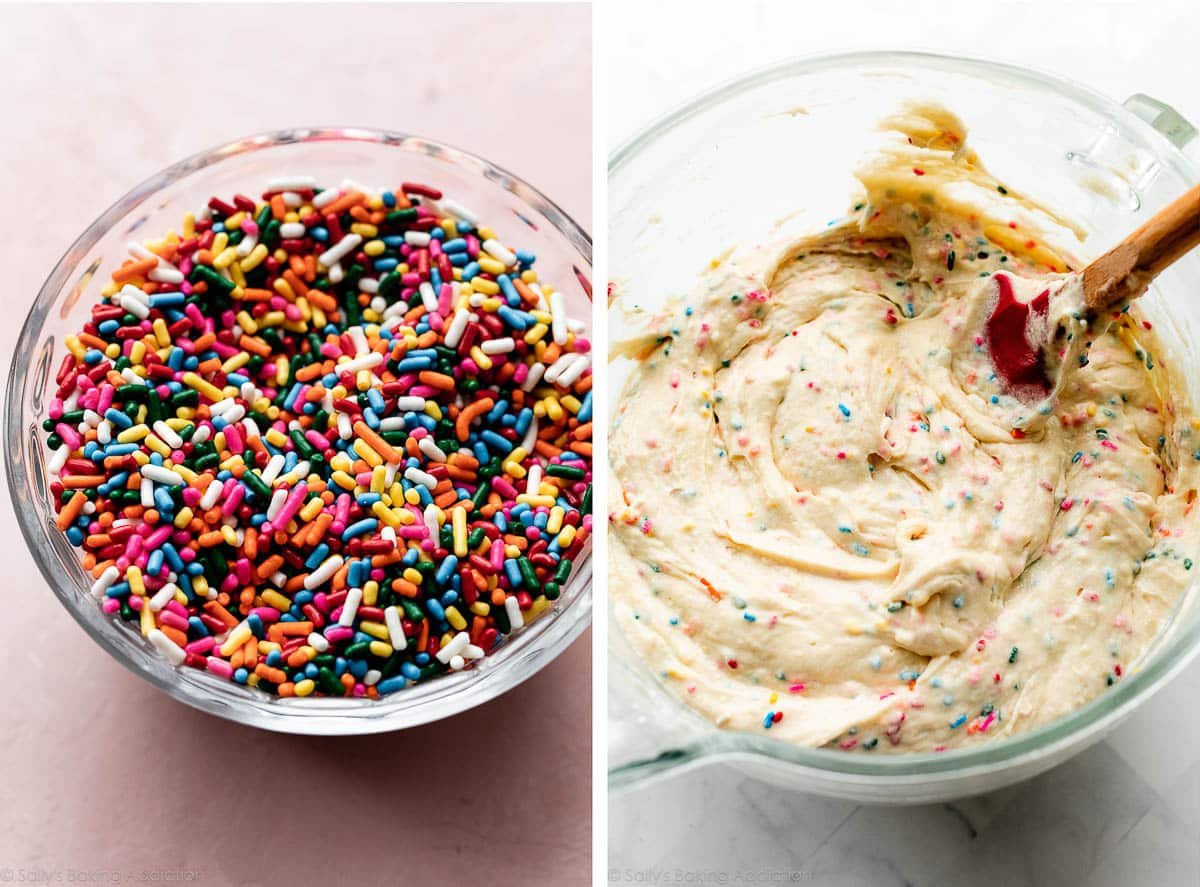
Jimmies-type sprinkles are best for this Funfetti-style homemade cake. Expect a thick batter:
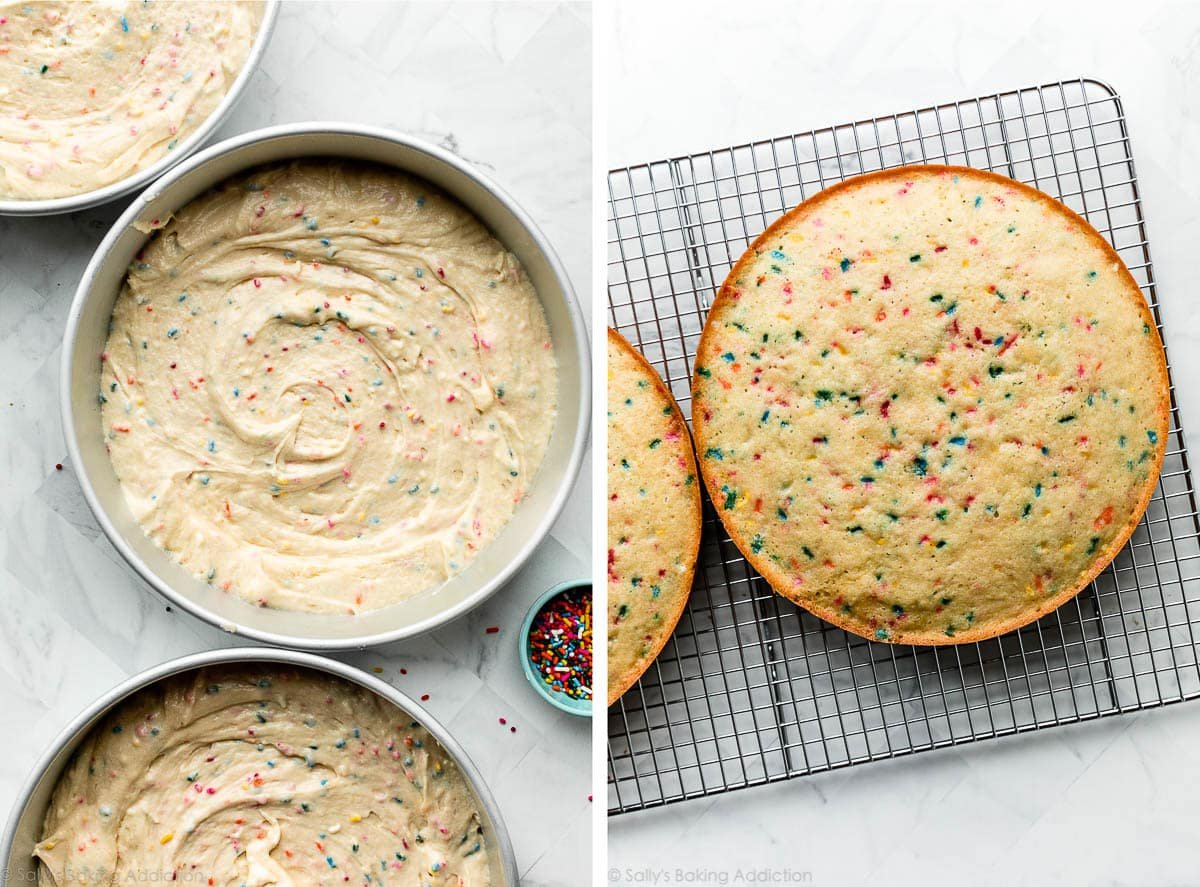
Divide the batter between 3 9-inch cake pans. You can squeeze the cake batter in 3 8-inch cake pans if needed, but be sure to extend the bake time as noted in the recipe. Always line your round pans with parchment paper rounds before adding the batter. Cool baked cakes for 20 minutes in the cake pans, and then remove the warm cakes and place on a wire rack to cool completely.
Sprinkle Success Tips
I’ve been baking sprinkles into cake & cupcake batters for years and have learned exactly which sprinkles work, and which don’t. Happy to share my best advice:
- My top sprinkle tip: Do not use nonpareils (the little balls) in cake batter. They will bleed their color as you fold them in, result in a less-than-appetizing-color cake.
- Rainbow sprinkles (aka “jimmies”) sold in the U.S. are intensely colored, but sprinkles sold in other countries may lose their color when baked. “Sugar strands” may be the same shape as jimmies, but they dissolve in the wet batter. For best results, try to use American-style rainbow sprinkles. The pictured cake uses Betty Crocker “Parlor Perfect” rainbow sprinkles. I also really like Canadian-brand Sweetapolita sprinkles.
- Confetti quins (the little discs) are also great to use in a sprinkle birthday cakes & cupcakes. They rarely bleed their color in batter.
- Naturally colored sprinkles are wonderful as decoration, but—depending on the brand—can lose their color in cake batter.
Buttercream Frosting
I use the same frosting as my 3-layer vanilla cake, but add a little more vanilla. It’s basically my vanilla buttercream recipe, only scaled up to yield enough for a tall layer cake. If you prefer chocolate frosting, use the chocolate fudge frosting from my piñata cake recipe. (It’s enough for this size cake.)
For a less sweet frosting option, use this recipe for Swiss meringue buttercream.
Can I tint this frosting? Yes! Feel free to add gel food coloring to the frosting to change its color.
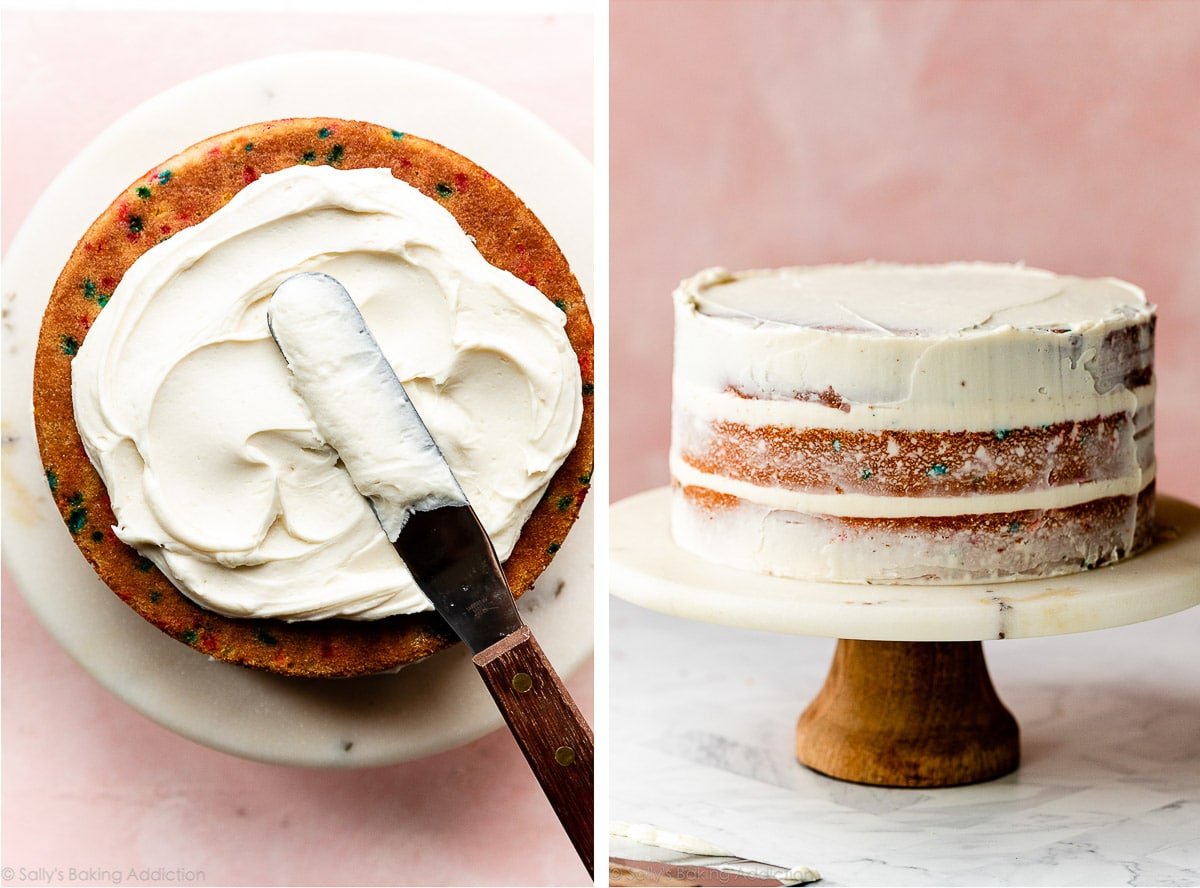
Decorating Success Tip: Add a Crumb Coat
Because it’s so moist, the confetti cake can be a little crumbly when you’re decorating it. I recommend applying a thin crumb coat, which is a layer of frosting around the exterior of the cake to catch any crumbs. The frosting recipe below includes enough frosting for that thin crumb coat, then another thin layer of frosting on top of that. Note that I applied a slightly thicker crumb coat in the video tutorial below. Doesn’t matter either way; you’ll just have less or more frosting for that final frosting layer.
Use a flat icing spatula to spread on the frosting. Icing spatulas are handy if you decorate cakes and cupcakes often. Then you can run a bench scraper around the sides of the cake to smooth out the crumb coat as well as the top layer of frosting. You can watch me use both in the video tutorial below.
Chill the crumb-coated cake for 30 minutes, and then apply the final frosting layer.
Looking for a fun sprinkle cake that requires less effort than a 3-layer cake? Try these recipes:
- 1-Layer Sprinkle Cake
- 6-Inch Birthday Cake
- 12×17-inch Sprinkle Sheet Cake
- Super-soft Confetti Cupcakes
- Buttery Funfetti Cupcakes
- Prefer cheesecake? Try confetti sprinkle cheesecake
- How about a giant birthday cookie? Here’s my confetti sugar cookie cake.
- Or for breakfast try birthday cake pancakes or birthday cake cinnamon rolls
And here are the 10 best cake decorating tools.

Confetti Birthday Cake (Funfetti)
- Prep Time: 45 minutes
- Cook Time: 25 minutes
- Total Time: 4 hours (includes chilling & cooling)
- Yield: serves 12-14
- Category: Cake
- Method: Baking
- Cuisine: American
Description
Buttery vanilla layer cake filled to the brim with rainbow sprinkles and finished off with sweet vanilla frosting. Pictured cake is 9 inches; for thicker cakes, use 8-inch pans. Review the recipe notes and bring all ingredients to room temperature before you begin.
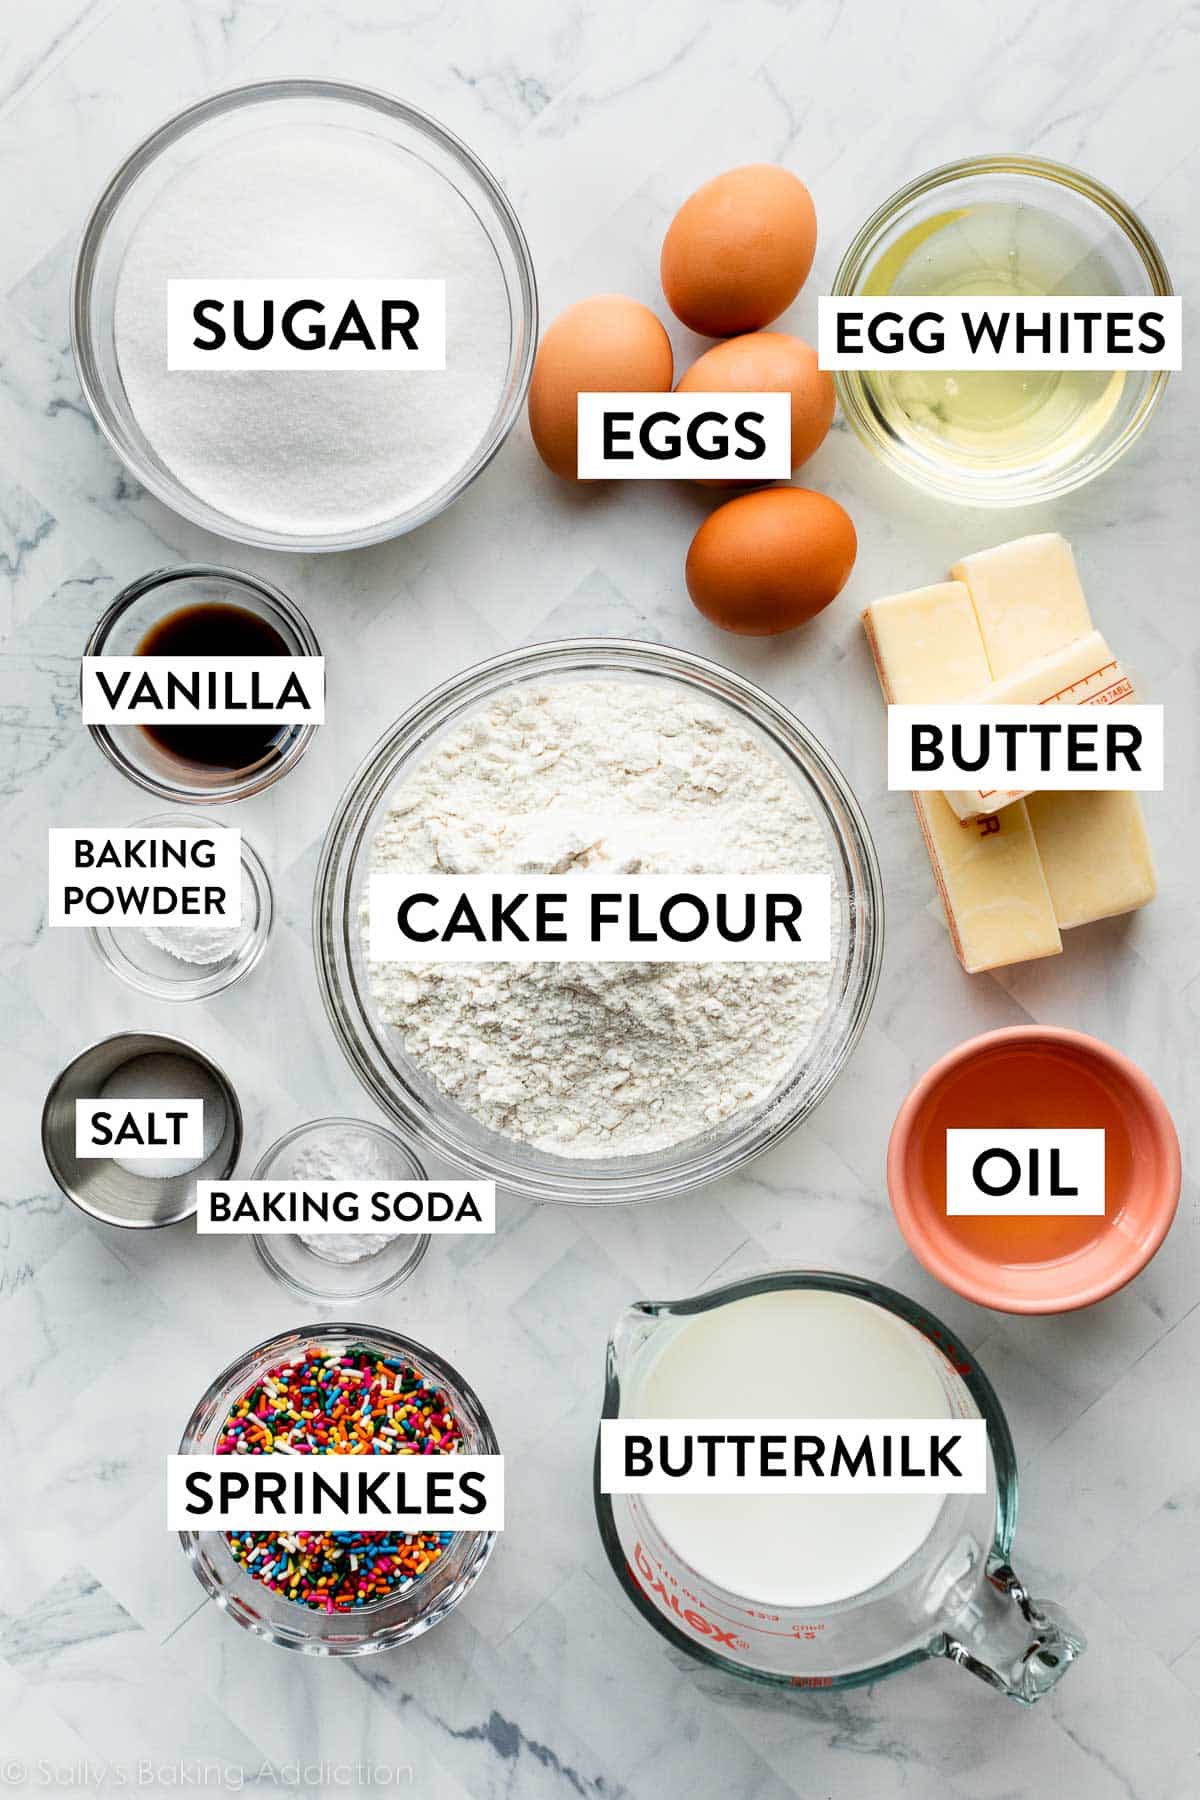
Ingredients
Cake
- 3 and 3/4 cups (443g) cake flour (spooned & leveled)
- 1 teaspoon baking powder
- 1 teaspoon baking soda
- 1 teaspoon salt
- 1 and 1/4 cups (282g) unsalted butter, softened to room temperature
- 2 cups (400g) granulated sugar
- 1/3 cup (80ml) vegetable oil
- 4 large eggs, at room temperature*
- 2 large egg whites, at room temperature*
- 3 teaspoons (15ml) pure vanilla extract
- 1 and 1/2 cups (360ml) buttermilk, at room temperature*
- 3/4 cup (135g) rainbow sprinkles*
Vanilla Buttercream
- 1 and 1/2 cups (340g) unsalted butter, softened to room temperature
- 5 and 1/2 cups (650g) confectioners’ sugar
- 1/3 cup (80ml) heavy cream, at room temperature
- 3 teaspoons (15ml) pure vanilla extract (or use clear imitation vanilla extract for stark white frosting)
- 1/8 teaspoon salt
- optional: additional sprinkles for garnish
Instructions
- Preheat oven to 350°F (177°C). Grease three 8-inch or 9-inch cake pans, line with parchment paper rounds, then grease the parchment paper. Parchment paper helps the cakes seamlessly release from the pans. (If it’s helpful, see this parchment paper rounds for cakes video & post.)
- Make the cake: Whisk the cake flour, baking powder, baking soda, and salt together in a large bowl. Set aside.
- Using a handheld or stand mixer fitted with a paddle attachment, beat the butter and sugar together on high speed for 5 full minutes until completely creamed together and fluffy. Scrape down the sides and up the bottom of the bowl with a rubber spatula as needed. Add the oil and beat for 1 minute until combined. Add the eggs, egg whites, and vanilla extract and beat on medium-high speed until combined. Scrape down the sides and up the bottom of the bowl with a rubber spatula as needed.
- Add dry ingredients and buttermilk in three additions, mixing after each addition just until incorporated. Do not over-mix this batter. The batter will be velvety and thick. Gently fold in the sprinkles. Pour and spread the batter evenly into each cake pan.
- Bake for around 25–26 minutes or until the cakes are baked through. (8-inch cakes may take about 27–28 minutes.) Tent the cakes with foil after about 15 minutes to prevent the sides and top from over-browning. To test for doneness, insert a toothpick into the center of the cake. If it comes out clean, it’s done.
- Allow cakes to cool in the pans set on a wire rack for 20 minutes. Run a knife around the edges and then remove cakes from pans. Place cakes directly on wire racks to cool completely. The cakes must be completely cool before frosting and assembling.
- Make the frosting: In a large bowl using a handheld mixer or stand mixer fitted with a whisk or paddle attachment, beat the butter on medium speed until creamy, about 2 minutes. Add confectioners’ sugar, cream, vanilla extract, and salt. Beat on low speed for 30 seconds and then switch to high speed and beat for 2 minutes. Add more confectioners’ sugar if frosting seems too thin; more cream if frosting is too thick; or an extra pinch of salt if frosting is too sweet.
- Assemble cake + apply crumb coat: First, using a large serrated knife, slice a thin layer off the tops of the cakes to create a flat surface. Discard (or crumble over ice cream!). Place one cake layer on your cake stand, cake turntable, or serving plate. Using a flat icing spatula or small offset spatula, evenly cover the top with about 1 cup (about 250g) of frosting. Repeat with second cake layer, 1 more cup of frosting, and then the top cake layer. Spread a thin layer of frosting on the top and around the sides as a crumb coat. Run a bench scraper around the cake to smooth out crumb coat. Chill uncovered in the refrigerator for at least 30 minutes and up to 3 hours to set the crumb coat.
- Spread the remaining frosting all over the top and sides. Garnish with extra sprinkles, if desired.
- Serve cake immediately, or if you need to store it for a few hours, place it in a cake carrier at room temperature for up to 4 hours. For longer storage, refrigerate covered cake for up to 1 day. Cake is best served at room temperature, though, so if it’s been refrigerated, let it sit out at room temperature for 30 minutes before serving.
- Cover leftover cake tightly and store it in the refrigerator for 5 days. Again, I like using a cake carrier for storing and transporting.

Notes
- Make Ahead & Freezing Instructions: The cake layers can be baked, cooled, and covered tightly at room temperature overnight. Likewise, the frosting can be prepared and then covered and refrigerated overnight. When ready to decorate, let the frosting sit at room temperature to slightly soften for 15 minutes, then give it one more mix with the mixer on medium speed for about 1 minute before frosting cake. (Add a splash of cream to thin out frosting if needed.) See step 10 if you want to store the frosted/decorated cake before serving it. Frosted cake or unfrosted cake layers can be frozen for up to 2–3 months. Thaw overnight in the refrigerator and bring to room temperature before decorating/serving. See how to freeze cakes for detailed instructions.
- Special Tools (affiliate links): 8-inch Round Cake Pans or 9-inch Round Cake Pans | Glass Mixing Bowl | Whisk | Electric Mixer (Handheld or Stand) | Silicone Spatula | Cooling Rack | Cake Turntable | Flat Icing Spatula or Small Offset Spatula | Bench Scraper | Cake Carrier (for storage)
- 2022 Update: Recipe above was slightly updated in 2022. Old version used to call for 3 sticks (about 345g) of butter and no oil. The slight reduction of butter and added oil makes a moister cake, but feel free to use the old version. Also, the extra egg whites are now added when you add the whole eggs. You used to have to whip them separately until soft peaks form and then fold them in before adding the sprinkles. This step isn’t really necessary because we’re using a little oil and cake flour now. (See next Note.)
- Eggs: 4 whole eggs provide structure, moisture, and richness. 2 extra egg whites keep the cake light. I don’t recommend using 5 whole eggs as a replacement; stick to the 4 eggs + 2 egg whites combination.
- Buttermilk: If you don’t have buttermilk, you can make a DIY buttermilk substitute. Add 1 Tablespoon of white vinegar or lemon juice to a liquid measuring cup. Then add enough whole milk to the same measuring cup until it reaches 1 and 1/2 cups. (In a pinch, lower-fat or nondairy milks work for this soured milk, but the cake won’t taste as moist or rich.) Stir it around and let sit for 5 minutes. The homemade “buttermilk” will be somewhat curdled and ready to use in the recipe.
- Sprinkles: Avoid using sprinkles that will dye your batter. Steer clear of nonpareils, which are the little balls. The pictured cake uses Betty Crocker “Parlor Perfect” rainbow sprinkles, which I find in my regular grocery store. I also like to use these rainbow jimmies or confetti quins. Note that naturally colored sprinkles may lose their color in cake batter.
- Chocolate Frosting: Use the frosting from this piñata cake recipe. It makes enough for this size cake.
- Amount of Cake Batter & Other Size Cakes: This recipe yields nearly 8 cups of batter, which is helpful if you need it for different Cake Pan Sizes & Conversions. For a 1-layer cake, 12×17-inch sheet cake, or 6-inch layer cake, see the list of recipe links in the post, above the recipe card. For a 2-layer cake, divide batter between 2 9-inch cake pans instead of 3. (This is too much batter for 2 8-inch pans.) Increase bake time to about 30 minutes and use a toothpick to test for doneness. For a Bundt cake, use a 10–12-cup generously greased Bundt pan and bake for about 60 minutes, or until a toothpick inserted in the center comes out clean. There is too much batter for a 9×13-inch quarter sheet cake. I have 2 recipes on my website that would work for a 9×13-inch sprinkle cake. You could use this light and fluffy white cake recipe and fold 1/2 cup (about 90g) sprinkles into the batter before pouring into the pan. See those recipe Notes for a 9×13-inch cake. Or you can use this buttery sprinkle sheet cake recipe. See those recipe Notes for a 9×13-inch cake.
- Cupcakes: Use this batter for 3 dozen sprinkle cupcakes. Fill cupcake liners about 2/3 full to avoid over-flowing. Bake at 350°F (177°C) for 19-22 minutes, or until a toothpick inserted in the center comes out clean. Or use my confetti sprinkle cupcakes or funfetti cupcakes recipes.


Reader Comments and Reviews
Hi Sally, I have tried a few of your recipes and they always turn out amazing.
Question for you.
In the ingredients it says – 3 and 3/4 cups – does this mean that 6 3/4 cups of cake flour are needed.
If you can, can you respond ASAP, as I am making this cake on Friday April 4th.. thank you so much.
Hi Jo-Anne, this recipe calls for 3 and 3/4 cups of flour, so three cups plus 3/4 of a cup.
Hi! My daughter’s birthday is coming up, I’ve been studying your recipe and I need some help. We will probably have about 18 kids over, would this cake be enough? I’m not thinking of doubling the amounts ’cause it would seem too much, but can I increase the ingredients to add another layer, or make a 2 tier cake? What do you suggest?
Thank you!
Hi Alexandra, you could definitely get 18 smaller slices from this cake – especially if baked in 9 inch pans. We would do a quick search for cake cutting guides.
Hi, I don’t want to make a three layer cake because it would be too much for the occasion. What would be the measurements for just a two layer cake, or is there another recipe I can use? Thank you!
Hi Addison, We recommend making our white layer cake, which is soft, fluffy, and only 2 layers. You can add 1/2 cup of sprinkles to the cake batter.
Hello! I am baking this cake for a birthday and was wanting to use a ganache filling in the middle.. do you think the cake will hold up to the weight of that when stacked? Looking forward to trying this cake! Thanks!
Hi Hayley, you can use a ganache filling here, we just recommend using a frosting dam around the edges to prevent it from coming out the sides when stacked. Enjoy!
I used this recipe, your buttermilk recipe, and the not-so-sweet whipped frosting to make the most delicious rainbow cake for my son’s seventh birthday! The kids ate two slices each and wanted more, and even my husband, who doesn’t usually like cake, had a very generous helping. 10/10 Absolutely scrumptious, thank you!
Hi I’d love to make this Funfetti cake but just in a single 9×13 glass pan. Do you have the same recipe with ingredient amounts for that size cake? Thanks!
Hi Ethan, There is too much batter for a 9×13-inch quarter sheet cake. We have 2 recipes on our website that would work for a 9×13-inch sprinkle cake. You could use this light and fluffy white cake recipe and fold 1/2 cup (about 90g) sprinkles into the batter before pouring into the pan. See those recipe Notes for a 9×13-inch cake. Or you can use this buttery sprinkle sheet cake recipe. See those recipe Notes for a 9×13-inch cake.
Hi, I just want to confirm that for the cake batter, the buttermilk should be at room temperature as the recipe states? So I should take the buttermilk out of the fridge to let it get to room temp?
That’s correct!
Been wanting to try a sprinkle cake ever since I’ve eaten a “sprinkles” sprinkle cupcake. This recipe was light, moist and tall and colorful! I’d send a pic but there’s only one piece left!! My family raved! It will be my go to sprinkle cake!!!
I’m baking a birthday cake this week and planning to try this recipe out but I only own one cake pan. I’m fine doing three separate bakes but worried about the best technique so I have two questions. 1. How do you recommend making sure that the same amount/weight of batter goes into the pan for each bake? 2. What’s the best way to store the raw batter in the fridge between bakes so the consistency doesn’t change too much?
Hi Veronica, this recipe yields about 8 cups of batter. If it’s helpful, you could spoon the batter evenly into three different bowls to ensure they’re even before adding to the pan. You can leave the remaining batter covered at room temperature while waiting for the current layer to bake. Hope you enjoy the cake!
Hi Sally! Does the buttercream in this recipe yield enough to also add piping details? I’m going to do piping trim on the top and bottom, as well as a buttercream picture transfer. Should I make additional icing, or a larger batch? Thank you!
Hi Jocelyn, If you’re planning to do piping decorations, you can 1.5x or double it to ensure you have enough frosting.
Hi Sally, I would like to make this for my birthday but in a 6inch size.. and tall…trouble is I don’t have the pans, can I bake this as 1 whole cake 6 ” x 8″ deep and then cut in 3…how long should I bake i ok thanks
Indi
your biggest fan
Hi Indira, we fear the batter would have trouble baking properly all in one pan, even if it’s that deep. We’d recommend diving the batter into thirds, then baking one single layer at a time.
I don’t understand how to tent the cakes with foil after 25 minutes then bake another 15 minutes. How do you tent a cake with foil when the pan is hot and the cake not done yet without messing up the cake top? Your video doesn’t show that step. I don’t know how to go about it.
Hi Treva, take a piece of foil, bent it a little in the middle, and place it on top of the cake while the cake is still in the oven. Does that make sense? It can be tricky to visualize!
Okay, I guess I was thinking it was crimped or fastened to the sides of the pan, and what I interpret your answer to say is that it tents over the whole pan and rests on the oven rack on two sides. I am doing it now, and thank you very much.
Is there a way to get the old recipe for this cake?
Hi Megan, You can see exactly what changes were made in the recipe notes (below the recipe). Hope this helps!
Can this recipe be used to make a bundt cake?
Thanks,
K. H.
Hi K, For a Bundt cake, use a 10–12-cup generously greased Bundt pan and bake for about 60 minutes, or until a toothpick inserted in the center comes out clean.