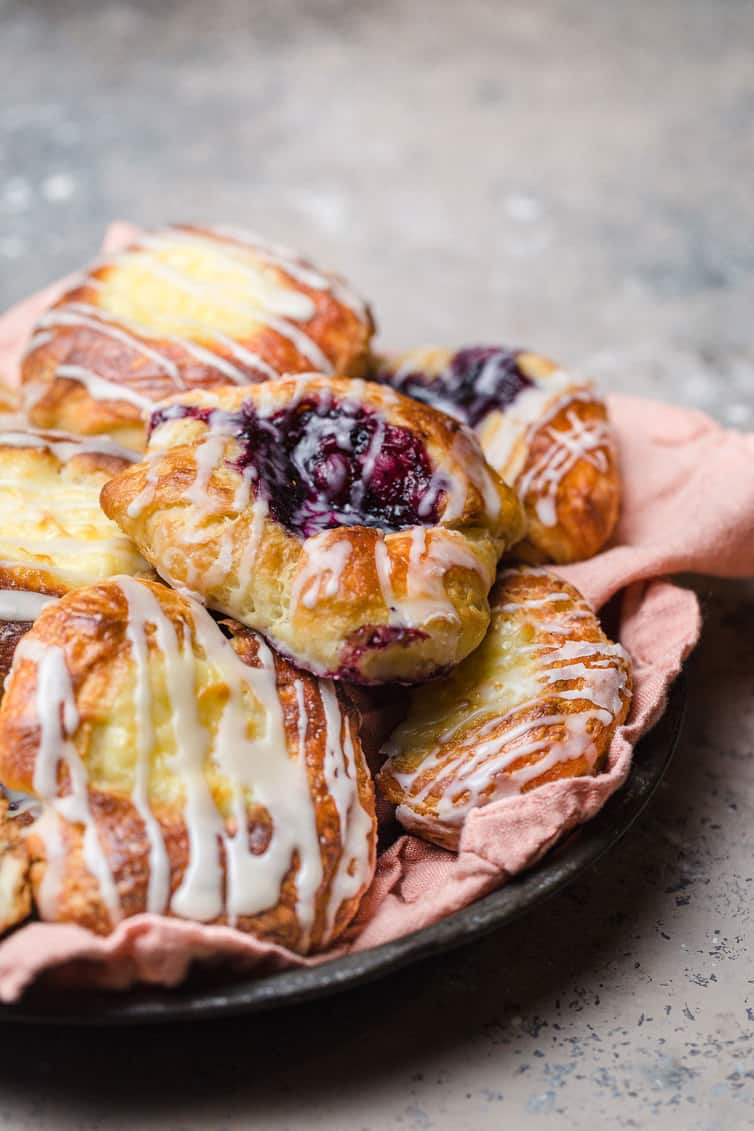
Danish Pastries

These Danish pastries are made completely from scratch (no puff pastry here!), taste like they came straight from the fanciest of bakeries, and are easier than you’d think. The topping possibilities are endless; choose from cream cheese, fruit, chocolate, lemon curd, or a combination of those! A perfect baking project for overnight guests or special breakfast or brunch.
I know you might be intimidated by homemade pastries, but believe me when I tell you that they are SO doable and you will be absolutely thrilled when you get to sink your teeth into the final product. I’m going to walk you through the process below and there are very detailed directions in the recipe.
Let’s get going on these gorgeous Danish pastries!
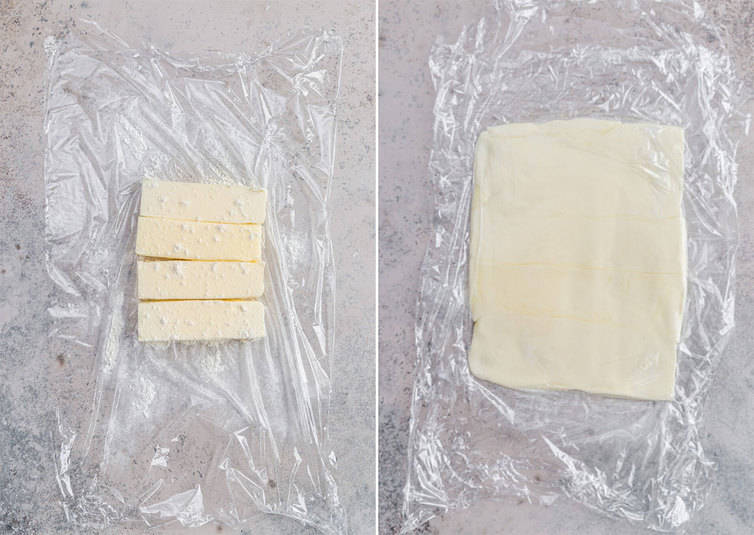
The Butter Block
The most important component of the Danish pastry dough is the butter block. You’ll roll out two rectangles of butter and layer them into the dough before it gets rolled out and folded multiple times. This is what allows those gorgeous (and delicious!) flaky layers to develop.
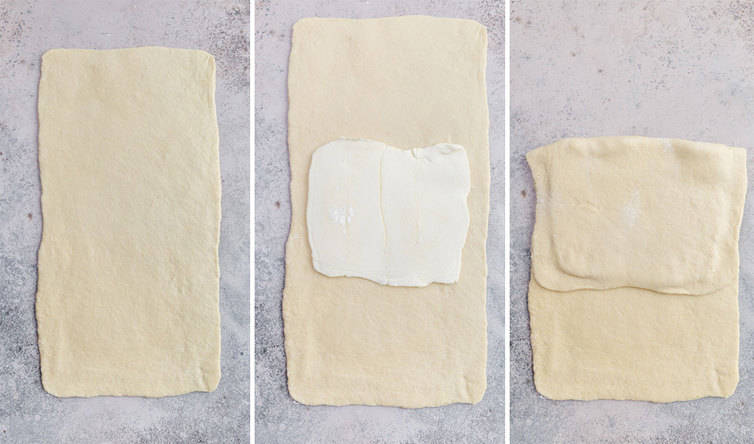
Laminating the Dough
In order to take full advantage of the butter block we made above, we need to make sure there are layers upon layers of that delicious butter throughout the dough. In order to do that, we roll the dough out, place two layers of butter block between the dough, then fold it up and roll it out.
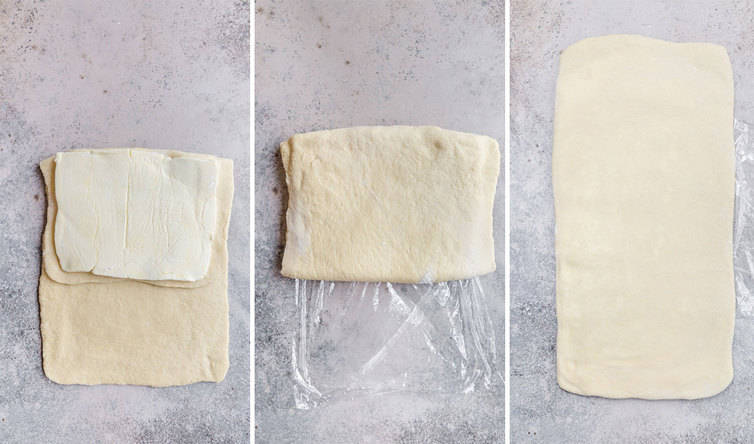
Then we fold and roll twice more, for a total of three times.
It may initially seem a little over the top, but once you bite into a finished Danish and see those flaky layers, you’ll be reaping the rewards big time!

Assemble the Pastries
After a long chill in the refrigerator, the dough is ready to be divided up and the Danish pastries assembled. I experimented with some different sizes and shaping methods and kept coming back to this simple, delicious, and classic circle. It’s virtually foolproof and has a perfect ratio of flaky pastry to filling.
First, working with one-third of the dough at a time, you’ll portion it out into 12 pieces each, and then roll them into balls…
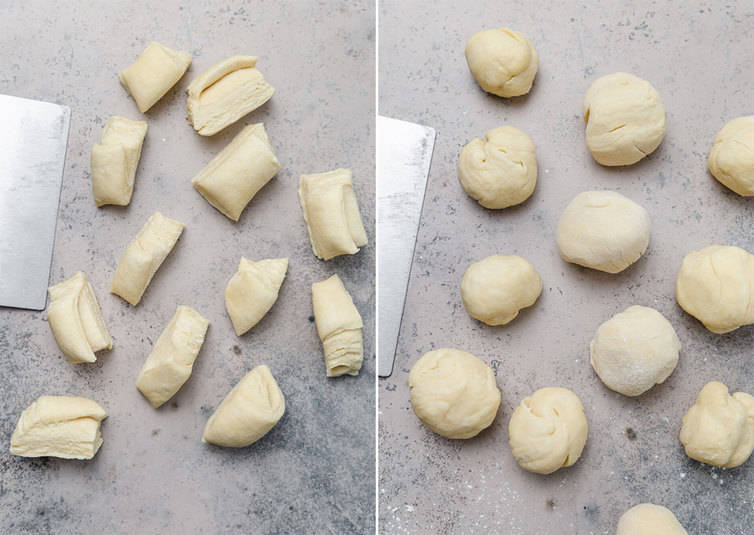
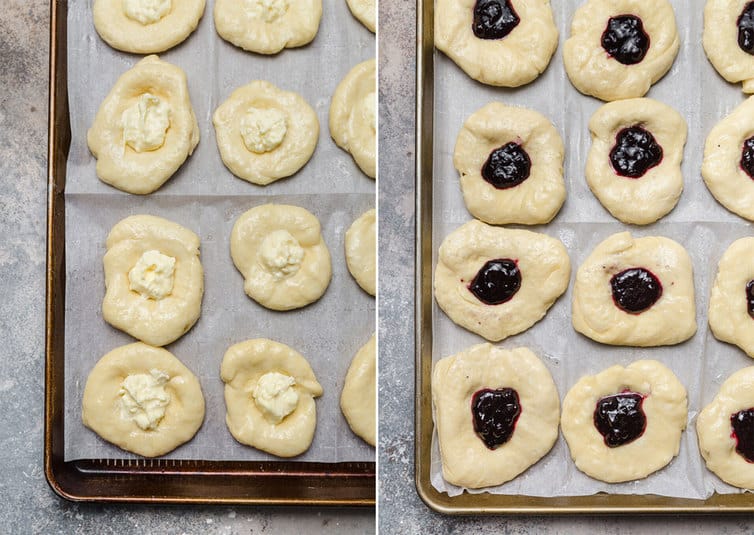
Next, you’ll flatten them into discs, place on baking sheets and allow to rise for about 1 hour – they will puff up but will not double in size. Then it’s time to fill them!
Filling Ideas
My all-time favorite Danish flavor is cream cheese, so that’s obviously my recommendation, but most of the rest of my family love cherry, so I made some of those, as well ;-) If you’re looking for ideas beyond those basics, here’s a list to get you started:
- Cream cheese (recipe is below)
- Fruit jam, preserves, or canned pie filling
- Fresh fruit
- Lemon curd
- Chocolate ganache
- Nutella
- Feta and caramelized onions for a savory Danish!
You can also mix and match many of the combinations above! Cream cheese and berries or chocolate and orange would be fabulous together!
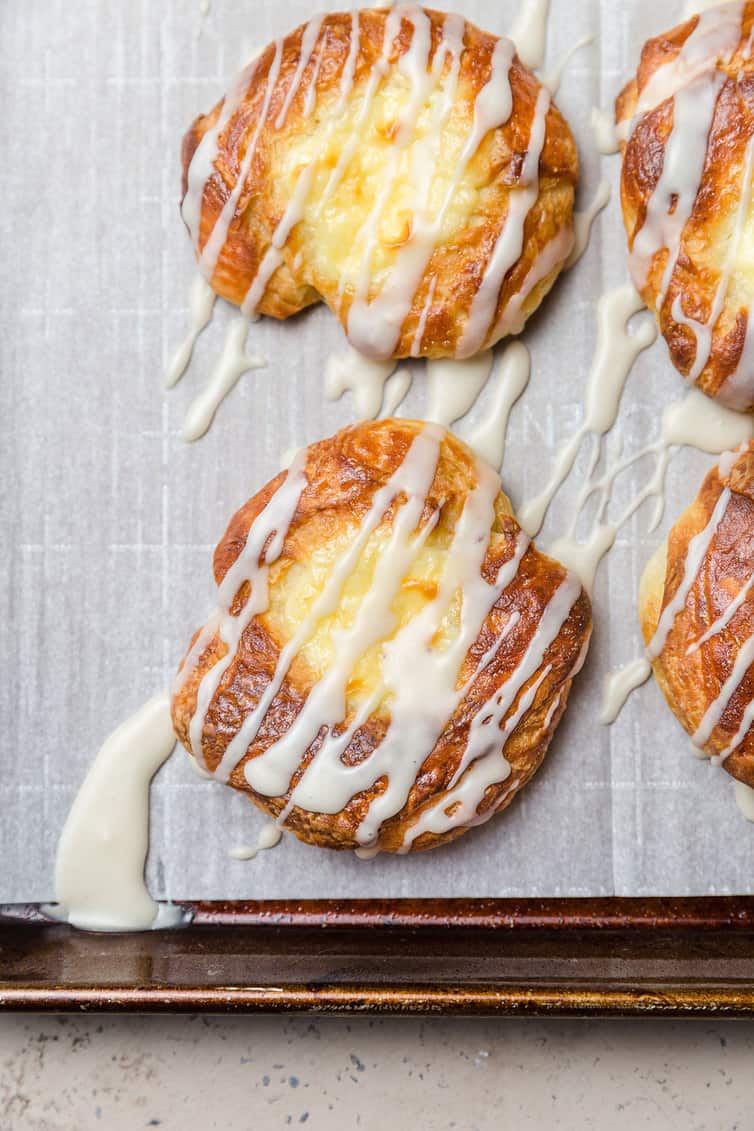
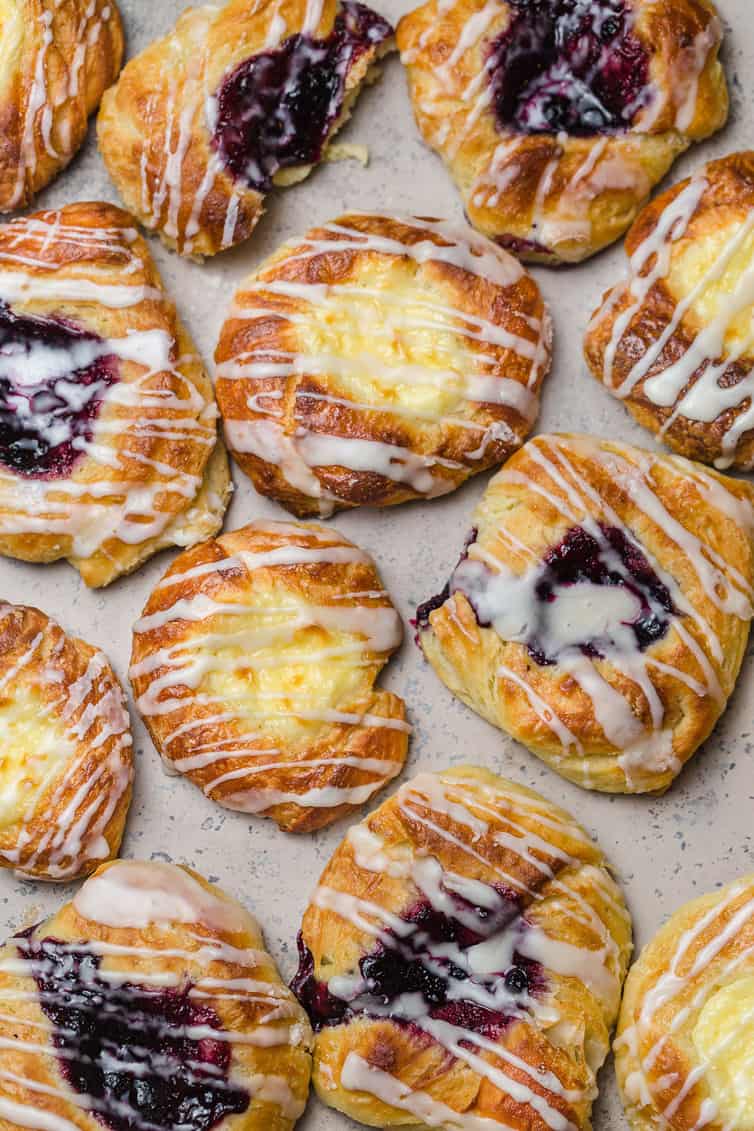
A Final Drizzle
Last but not least, we drizzle on a simple powdered sugar and milk glaze to make these Danish pastries really look like they just came from the bakery.
If you’d like, you could also sprinkle on some chopped nuts on top of the pastries before drizzling for a little crunch and texture contrast.
Recipe Success Tips
Some notes to help you make the best Danish pastries ever!
- When you make the butter block, be sure that your butter is on the cool side or it will be too warm to work into the dough. If it seems too soft when you start working with it, just pop it into the refrigerator to firm up before continuing with the recipe. Or, get it rolled into your rectangle then refrigerate your butter block rectangle until it firms up a bit before laminating the dough.
- You can tackle this recipe all in one day, or split it up into a more manageable two-day project. Simply leave the laminated dough in the refrigerator overnight and continue with the shaping and baking the next day.
- Feel free to experiment with different shapes if you’d like, but as I mentioned above, I had the most consistent success with these circular Danishes.
- These are best enjoyed the same day they are made for optimal flakiness and freshness, however, they will keep in an airtight container at room temperature or in the refrigerator for up to 3 days.
- Freezing the Dough: If you’d like to freeze all or part of the Danish pastry dough, you can do so after Step #11. Refrigerate for at least 2 hours, then wrap the portion you want to freeze in two layers of plastic wrap, place in a freezer-safe zip-top bag and freeze for up to 3 months. Thaw the dough overnight in the refrigerator, then proceed with the recipe as written.
- Freezing Assembled Pastries: To assemble the pastries and freeze before baking, complete the recipe through Step #17 (filling the pastries). Then, place on a baking sheet in a single layer and place in the freezer until they are completely frozen, at least 3 hours. Transfer the pastries to an airtight container or resealable freezer bag and freeze for up to 1 month. Bake from frozen (don’t forget the egg wash!), adding an extra 10 to 15 minutes to the bake time.
- Freezing Baked Pastries: To freeze already-baked Danish pastries, allow them to cool completely to room temperature, then wrap tightly in plastic wrap and place in an airtight container and freeze for up to 3 months. Thaw in the refrigerator overnight, then reheat in a 350-degree oven for 8 to 10 minutes, or until warmed through.
Watch How to Make Danish Pastry:
If you make these pastries and love them, I would so appreciate it if you would take a moment to leave a rating below. Thank you! ❤️️

Danish Pastry Recipe
Ingredients
For the Dough
- 2 cups (454 g) unsalted butter, divided
- 5½ cups (663 g) all-purpose flour
- ½ cup (99 g) granulated sugar
- 4½ teaspoons instant yeast
- 2 teaspoons salt
- 2 teaspoons vanilla extract
- 1½ cups (360 ml) milk
- 2 eggs
For the Cheese Filling
- 8 ounces cream cheese, at room temperature
- 3 tablespoons granulated sugar
- 1 egg
- ¼ teaspoon salt
For the Fruit Filling
- 1 cup fruit jam, preserves, or canned pie filling
For the Egg Wash:
- 1 egg white
- 1 tablespoon water
For the Glaze:
- 1½ cups (170 g) powdered sugar
- 2 tablespoons milk
Instructions
- Make the Dough: Cut ½ tablespoon off the ends of each of the four sticks of butter (for a total of 2 tablespoons).
- In the bowl of a stand mixer, whisk together the flour, sugar, yeast, and salt. Add the 2 tablespoons cold butter and work it in with a pastry blender or your fingers until no large lumps remain. Add the vanilla, milk, and eggs.
- Mix with the paddle attachment on low speed until a dough begins to form, then switch to the dough hook and knead until a cohesive, but quite sticky dough forms, about 5 to 7 minutes. The dough won't completely clean the bowl and will stick a bit at the bottom. (You can also complete this step in a bread machine on the dough cycle.)
- Scrape the dough into a ball, and transfer it to a floured work surface. Cover it with plastic wrap, and let it rest for 10 minutes while you prepare the butter.
- Make the Butter Block: Cut each stick of butter in half lengthwise, to make 8 long rectangles. On a piece of floured parchment or plastic wrap, line up 4 of the butter pieces side by side, to form a rectangle. Sprinkle lightly with flour, and cover with another piece of parchment or plastic wrap.
- Gently pound and roll the butter until it's about 6" x 9". The pieces may or may not meld together.
- Repeat with the remaining 4 pieces of butter. You should now have two butter rectangles, about 6" x 9" each.
- Laminate the Dough: Roll the dough into a rectangle 12" wide x 24" long. Place one of the butter pieces onto the center third of the dough. Fold one side over the butter to cover it. Place the other butter piece atop the folded-over dough, and fold the remaining dough up over it. Pinch the open ends and side closed.
- Turn the dough so a 12" side is closest to you. Roll the dough into a 10" x 24" rectangle. Fold each side into the center; then fold one side over the other to make a rectangular packet about 6" x 10".
- Dust the surface of the dough with flour, wrap it in plastic wrap, and chill in the refrigerator for 20 minutes.
- Remove the dough from the refrigerator, and again roll it into a rectangle about 10" x 24". Fold it into a packet as you did in step #9; it'll be about 7" x 12". Roll one final time, fold into a packet, and flour the dough lightly. Wrap loosely (but completely) in plastic, and chill it for at least 2 hours, or up to 16 hours.
- Make the Cheese Filling (if using): Combine all of the ingredients in a medium bowl, stirring until smooth.
- Assemble the Pastries: When you're ready to make pastries, remove the dough from the refrigerator, unwrap it, and cut off one-third. You'll work with this piece first; re-wrap and return the remainder to the refrigerator.
- Divide the dough into 12 pieces. Roll each into a smooth ball, then flatten the balls into 3" to 3 1/2" rounds, making the center thinner than the edges. You want to build up a slight wall of dough all around the circumference; this will help hold the filling. Place the rounds on a baking sheet lined with parchment paper or a silicone baking mat.
- Working with one-half of the remaining dough at a time, repeat the process; you'll finish with three baking sheets, each with 12 dough rounds.
- Cover the Danish lightly with greased plastic wrap, and let them rise for about 1 hour; they'll become slightly puffy. Towards the end of the rising time, preheat the oven to 400°F.
- Use your fingers to press the centers of the dough rounds as flat as possible, leaving the "sidewalls" puffed. Spoon a heaping teaspoon of filling into the well of each round.
- Make the Egg Wash: In a small bowl, whisk together the egg white and water. Brush the exposed edges of the pastries with the egg wash.
- Bake the Pastries: Bake the pastries, one pan at a time, until golden brown, 15 to 18 minutes. Remove them from the oven, and transfer to a wire rack to cool.
- Make the Glaze: In a small bowl, whisk the powdered sugar and milk to make a "drizzlable" glaze. If the glaze is too thick, add just a splash more milk at a time until the correct consistency is reached.
- Drizzle the glaze atop the pastries. Serve warm or at room temperature.
Notes
- Use very cool butter. Make sure the butter is extremely cold when you make the butter block. Even slightly warm butter won’t work into the dough. If the butter blocks seem too soft once they’re shaped, pop them into the refrigerator to firm up before continuing with the lamination process.
- This can be a two-day recipe. Don’t feel you need to rush through this recipe in one afternoon. You can tackle this recipe in one day or split it into a more manageable two-day project. Simply leave the laminated dough in the refrigerator overnight and continue assembling and baking the next day.
- Use different shapes. Feel free to experiment with different shapes of dough. As mentioned above, I had the most consistent success with circular Danishes, but trying something new is always fun!
- Enjoy right away. Baked Danish pastries are best enjoyed the same day they are made for optimal flakiness and freshness. However, they keep well in an airtight container at room temperature or in the refrigerator for up to 3 days.
- Freeze the Dough: If you’d like to freeze all or part of the Danish pastry dough before assembling and filling, follow the recipe through Step #11. Refrigerate for at least 2 hours, then wrap the portion of dough you want to freeze in two layers of plastic wrap, place in a freezer-safe zip-top bag, and freeze for up to 3 months. Thaw the dough overnight in the refrigerator, then proceed with the recipe as written.
- Freeze Assembled Pastries: To freeze assembled, unbaked pastries, follow the recipe through Step #17 (filling the pastries). Place pastries on a baking sheet in a single layer and freeze until they are completely frozen through, at least 3 hours. Transfer the pastries to an airtight container or freezer-safe zip-top bag and freeze for up to 1 month. Bake from frozen (don’t forget the egg wash!), adding an extra 10 to 15 minutes to the bake time.
- Freeze Baked Danishes: To freeze baked Danish pastries, allow them to cool completely to room temperature, wrap tightly in plastic wrap, and place in an airtight container or freezer-safe zip-top bag and freeze for up to 3 months. Thaw in the refrigerator overnight, then reheat in a 350-degree oven for 8 to 10 minutes, or until warmed through.
Did you make this recipe?
Leave a review below, then snap a picture and tag @thebrowneyedbaker on Instagram so I can see it!
(Recipe adapted from King Arthur Flour)
[photos by Ari of Well Seasoned]


This recipe is daunting for amateurs new to the butter block, yet it was so well-explained, I felt at ease and like a brilliant pro with the results. The only step not described was while preparing the dough for the butter block, the parchment sheets of butter needed to go into the freezer in order to peel off in one intact rectangle, twice. The Family is loving this with a mixture of Lebanese Black Mulberry jam and cream cheese mix. Thank you once again for your clear explanations, this recipe is delicious & one to savour!
I’m a first time Danish baker so I wanted an easy recipe to try. I had plan to make these for my husband. I read through it several times to get an idea of what to expect. Then I baked them and it was easier than I expected. I do plan on making this again because it was super easy to follow.
I did a half recipe except a full recipe on the cheese filling and froze half. Used mixed berry preserves with some frozen berries mixed in after thawing. These turned out great. Made 18 vice 36. Dough started out very sticky but was surprised my marble rolling pin did not stick. Had two pans and rotated after 7 minutes, for an additional 7 or 8 minutes.Thanks for a great recipe. Hope to try some variations next time.
You never say what temp for the milk. I have my dough in the fridge. So fingers crossed i used the right temp…
Hi Jay! I’m sure they came out great, but ingredients in baking should be at room temperature unless stated otherwise. Happy baking!
Can I use active dry yeast? I don’t have instant yeast.
This recipe is excellent. It’s the perfect amount of dough to make (4) Danish Braids. The dough is beautiful to work with. I opted to let the braids do a cold rise in the fridge for 1 hour before baking and it worked out perfectly. Im eager to use it to attempt croissants.
First, I’ve made this recipe once and it was amazing! Thank you! My question is can this be refrigerated longer than 16 hours? I’d like to pre make the dough Friday morning and bake Saturday but that’s longer than the recommended timeframe. Thanks so much.
This recipe is the best! I’ve been making these for Christmas morning the past few years, and my husband says it’s his favorite tradition! Thank you for sharing such detailed directions!
Is it essential to take a 1/2 tablespoon off ALL ends of the four butter sticks? Or could I take one whole table spoon off one side of the butter sticks?
Thanks hoping mine turn out!!!
Absolutely the best thing I have ever tasted 👍🏻👍🏻👍🏻
Danish pastries are a delicious treat that are known for their flaky, buttery layers and sweet filling. They typically have a rich, slightly sweet flavor and a light, airy texture that melts in your mouth. contexto
Followed the recipe and they turned out amazing. I make them for my daughter who has food allergies and cannot have store or bakery items and she loves them.
This recipe for Danish pastries is awesome! What a flaky crust! I used the cream cheese filling plus guava paste. Could I freeze baked pastries?
Is there any instructions to make the dough if I don’t own a stand up mixer or a bread maker?
Amazing recipe…..I changed it up a bit though based on a professional baker friend. I used 1/2 butter and 1/2 crisco. The crisco gives the dough a lighter texture while the butter gives it flavor. Overall much easier to make than I had always thought. Thank you!
I made a few changes to this recipe but absolutely loved it
My danishes came out more like a biscuit. Do you know what might have went wrong?
This recipe is word for word the king arthur recipe. I understand that every danish recipe will be more or less the same ( you didn’t invent it after all!)- but copy/pasting the directions seems…sketchy for a food blog. At least describe it in your own words.
That was harsh even if it is true. I have used KAF for years and have made some recipes my own. It’s the ultimate compliment😉.
A lot of people don’t know about KAF so she was sharing. Have you ever shared and called it your own? I think everyone on the planet has shared something from someone else. No harm no foul. Don’t take it personal.
A compliment would be “This is the King Arthur recipe – I simply can’t beat it”. What they’ve done here is pure plagiarism, passing off someone else’s work as their own. Don’t make excuses for por ethics.
I followed this recipe to the T but I have a dairy allergy so I used vegan butter and dairy free “whole milk” that was soy. It turned out so well!
I cannot wait to make these. They look incredible! One question – could I assemble these the night before, pop them in the fridge, then take them out to rise and bake the next morning?
I made these danishes & they are exquisite. Great Recipe.
Although I’ve been baking for over 30 years, I had only tried Danish pastry once years ago, and it was a disaster. But I had great success this time around with this recipe – really glad I tried it. To shape the dough I used the rolled ball and flatten technique and also tried the rolled method used by Chelsea and both worked well. This success is just what I needed to try classic croissants! Thanks.
hi, i would like to try these but i have a question about the final rise (step 16) do they rise in the fridge or at room temp? thank you so much! :)
Hi Anne, They rise at room temperature. Enjoy!
I made these a few times now. They are unbelievably delicious. First recipe I tried for danish and it was a keeper for me. I now make them for a diner and family and friends. Thankyou!!
If I cut the recipe in half, what would be the correct measurements to roll out the butter sheets and the dough?
Hi Seth, I would make them half as big.
Great recipe! For shaping I rolled out my dough, used the lid of a large jar to cut out circles, let them rise for an hour, and then I used the bottom of a small jar to flatten the center. After that I spooned in the filling and baked as per directions. They came out looking just like the ones I buy at the store!
I would just like to comment to Chelsea, what you did with the lids and the glass jar, smart, what a great idea! I think I’ll do that too. Thank you. 😄
Mic drop, Chelsea! Thanks for posting this tip. I will do that when I make these. Can’t wait!
Can I split this recipe in half?
Yes, you definitely can.
This recipe was easy to follow with the video and instructions.
The end results were amazing.
Thank you for teaching me how to make these amazing Danish.
I shared your recipe with some other bakers.
Thank you so much for the recipe, your clear instructions, and the video! I made these yesterday for my husband’s birthday and he loved them! Bonus, the kids did too. They were fun to make and delicious. I made a two pocket danish out of several cuts of the dough and used lemon curd and fresh cherry jam.
Love, love, love these. My family thanks you! I love to bake and try new things. The video was a priceless tool to making these. Thank you for sharing ❤️
These were amazing! I filled them with cream filling and apple. They do freeze well and then you can heat them up by putting them on the rack in a 350F oven for 5 to 10 minutes
These were delicious! Thanks for the great recipe, Michelle. I baked them over Zoom with my son, and they were so flaky and delicious. Everyone loved them.
If folks have never laminated dough before, they should just watch your video. You are very clear and precise.
We put raspberry jam AND the cream cheese filling in them. :0) Divine!
Somehow, it didn’t take my stars – these are 5 STAR for sure……
Hello! Looking forward to making these this weekend. Is it okay to use almond milk for making the dough?
This was my first time making pastry, ever! These turned out amazing on the first try and the pictures and video helped a lot. Didn’t last a day in ,my house; thank you!
Used this recipe to make the dough, struggled a bit with the butter block but got it to work. Used a different assembly method rolling out the dough, adding cinnamon, then folding over and cut in strips. Twisted the strips and rolled in a spiral shape then added the fruit filling. Brought them into work and they didn’t believe I made them. I was told they were as good or better than bakery bought danish. Thank you for the wonderful recipe!!!!
I made these after I went wild blackberry picking in northern Wisconsin and made so much jam. I followed the recipe exactly, except for the part where you use instant yeast. I used what I had, dry active and used 1/2 c warm water and a spoonful of sugar to activate. Then, for the milk, I used about 3/4 c half and half and 1/4c milk since I knew the water would dilute. I also only did the 2hrs of proofing , and everything went great! Highly recommend this recipe as I’ve been trying many and have only found this one to be as good/better than a very nice bakery. The dough is delicious and buttery, and cream cheese filling divine (used a little more sugar though, I have a bad sweet tooth). Will definitely be using again! Thank you!
So let’s see how my math is. If you’re using a double block of butter as shown, after the 3rd turn you’ll have 216 layers of dough? That’s a great idea – I’ll have to try that next time I’m making croissant dough. 216 layers instead of 81 should be better!
I made these yesterday and they were a HUGE hit! I’m making more today for my coworkers. There was also enough dough left over to make some tasty croissants too! 5 out of 5 stars for this recipe!
The dough turned out pretty stiff – not very pliable or sticky out of the mixer. I laminated as best I could – rolling the dough literally had me in a sweat! Letting it rest in the fridge overnight…fingers crossed the yeast/dough does it’s magic. The pictures of the folds is great – thanks for that!
I made these today and they are awesome! The recipe was easy to follow and not as difficult as I expected them to be.
This is wonderful. Thanks for the instructions! I made them for the first time, and they came out fluffy with tons of layers. I put the dough after step 4 in the fridge for 20 mins (before making the butter pieces). I put the butter pieces in the fridge right after making them along with the dough. Roll out the dough before taking the butter pieces out. Basically, I made sure the dough was always cold.
I used a small spoon to press down the middle of the dough before filling, but some of the Danish’s sides were still too high. I’ll press them down more next time prior to baking. Delicous and not difficult to make.
Perfect. Three dozen gone in hours. Follow the recipe exactly. Make sure you leave the rim to fold over the butter pat so it does not leak out. And do not pound the dough roll it gently. Easy and perfect. Will make again. Thank you!
Michelle,
I’ve been faithfully following you for years and made many of your recipes but never posted a comment before. Me in Denver, my brother in Northern CA and my niece in Southern CA all made this recipe over the weekend. It was fabulous way to be together during this incredibly stressful time. Thank you for helping us be together and for a wonderful recipe! All 3 turned out great! Carrie
I made these over the weekend and they came out ok but the butter was leaking everywhere with the first batch I made – I filled some with the cream cheese filling and some with jam. The first batch was cream cheese and they didn’t brown too much on the top since they were swimming in butter. The 2nd batch were jam filled and they came out a little better but I’m not sure what I can do differently next time? Thank you for the recipe!
Hi Erin, Was the butter too soft when you started? Was the dough chilled enough? It sounds like the butter/dough was too warm at some point.
I never in my wildest dreams thought that I would ever make my own puff pastry! It turned out perfectly! The only downside is that I can’t stop eating them! Thanks so much for your hard work and for sharing your knowledge with amateurs like me!
Ahhhh I’m so thrilled you made them and loved them! Thank you for sharing your experience!
Good morning! I would love to make these for Easter morning but I only have Active Dry yeast on hand, not instant. How would I vary the recipe? Allow a longer rise time? Thanks for the help!
I had found a way to make the butter do what you want more… before rolling it oit you soften it and add some flour for a buttery paste…then spread it onto plastic wrap and chill until almost frozen, but not…so it peels off the plastic easily… and then use that instead of just the butter… it made it easier to handle bit didn’t affect the layers …it was for a croissant recipe and it was amazing
What always gets me about laminating yeasted dough is … whats more important, letting it rise or keeping it cool… for a regular yeasted dough i would want it to rise before baking which means leaving it out…letting it rise in the fridge takes a long time…so how do you know when it has rosen enough? If i did a double rise…it would be 2 days , the croissant took about 16 hours
They are a big hit. Everyone thinks I bought them at a bakery. I am thrilled to have found your recipe. Thankyou so very much!
Looks delicious. A few recommendations that may help. Make sure the butter block fits almost to the edge when you place it- if the butter isn’t well placed, it will leave a good bit of the dough on the edge without any butter ☹️ As you move through the turns.
When shaping, roll out in a rectangle, fold in half. Cut strips, twist them, then roll up the strips, This makes the base even and very attractive.
I’m amazed how easy these sound. I’ll have to try them . Especially since the few bakeries by me dont do them☹
These sound amazing! I’m a little nervous about laminating the dough because I’ve tried this before with another recipe and it turned out awful. My butter was all melty and seeping out of the dough and the dough was cracking.
Question: Do you think a homemade lemon curd would be good in the center of the danishes? I love lemon in pastries.
Thought I’d jump in – a local bakery (long closed) used to make danish using lemon curd & they were delish!
Yes absolutely! Definitely one of my recommendations!
And as for the melty butter, as I mentioned above, pop that butter block in the fridge if you need to in order to keep it juuuuuust pliable.
These are probably the best thing on your blog! LOVE them!!! They were surprisingly simple! I made mine with the cream cheese filling, as well as my favorite raspberry jelly.
BTW in the ingredient part for the dough you forgot to say how many eggs. I managed to figure it out by watching the video.
I’m so thrilled you enjoyed these! And thank you for letting me know about the eggs, I just edited the recipe, not sure how they disappeared!
My favorite danish of all time is cream cheese. I can’t wait to try this recipe.
Mine too :) Enjoy!
OhmyGod, LOVE!
I would love to try this recipe but the metric measurements are non-existent (see powdered sugar) and/or nonsense (122ml of flour?). I don’t measure by volume when baking as it takes more time and is inaccurate. Weighing ingredients is always the better choice.
Yes weighing is always better but I have been baking her recipes for years and everything turns out great.
Hi Lynn, Sometimes the code can get messed up, I just went in and manually fixed these. My apologies for the issue; they are correct now!
You were right on I love Danish have never tried so really looking forward to and also the lamenting of dough will make nice pastry. As soon as im done watching my granddaughter I will be on these I also have the cream cheese, cherry would be good to Thank You Michelle
You’re welcome, enjoy!
According to Paul Hollywood the best butter to use for this purpose is French. It has the highest fat content and is the best for laminated dough. Yes, I am Great British Baking fanatic!
I am sooooo excited you have taken this recipe on and I am planning now to make them this month!!! I’ve been wanting to learn how to make these
FOREVER!
I’m so glad you’re going to bake this month! Can’t wait to see your Danishes!
I’ve never made Danish pastry dough, but you make it look so easy I now have to try it! Your danish are beautiful! These have always been a bakery favorite for me, as well. Cream cheese with blueberry is my go to. Can’t wait to make this next weekend!!
Thank you! Enjoy the process and the Danish pastries!
Hi Julie, I want to encourage you to try this recipe. I am not a Baker but my first try was unbelievable. Everyone thought I got them from a bakery. They are amazing. Just follow step by step and watch your yummy danish turn out just like the picture. I now make them for a diner, family and friends. They are the best ever..
This look so fresh and delecious.
Your recipe sounds good with honey.
That sounds delicious!