Creamy and smooth from-scratch custard joins bananas, whipped cream, and a buttery flaky baked pie crust to make one epic banana cream pie. This classic dessert is 100% homemade, like my cherry pie, and the perfect make-ahead option because the layered beauty needs to set before garnishing and serving.
I originally published this recipe in 2016 and have since added new photos, a video tutorial, and have fine-tuned the process and recipe. See recipe notes for exact changes.
One reader, Stephanie, says: “…This is the first time I’ve used this particular recipe and it was AMAZING. Honestly the best one I’ve made. I will be bookmarking this one for the future! ★★★★★“
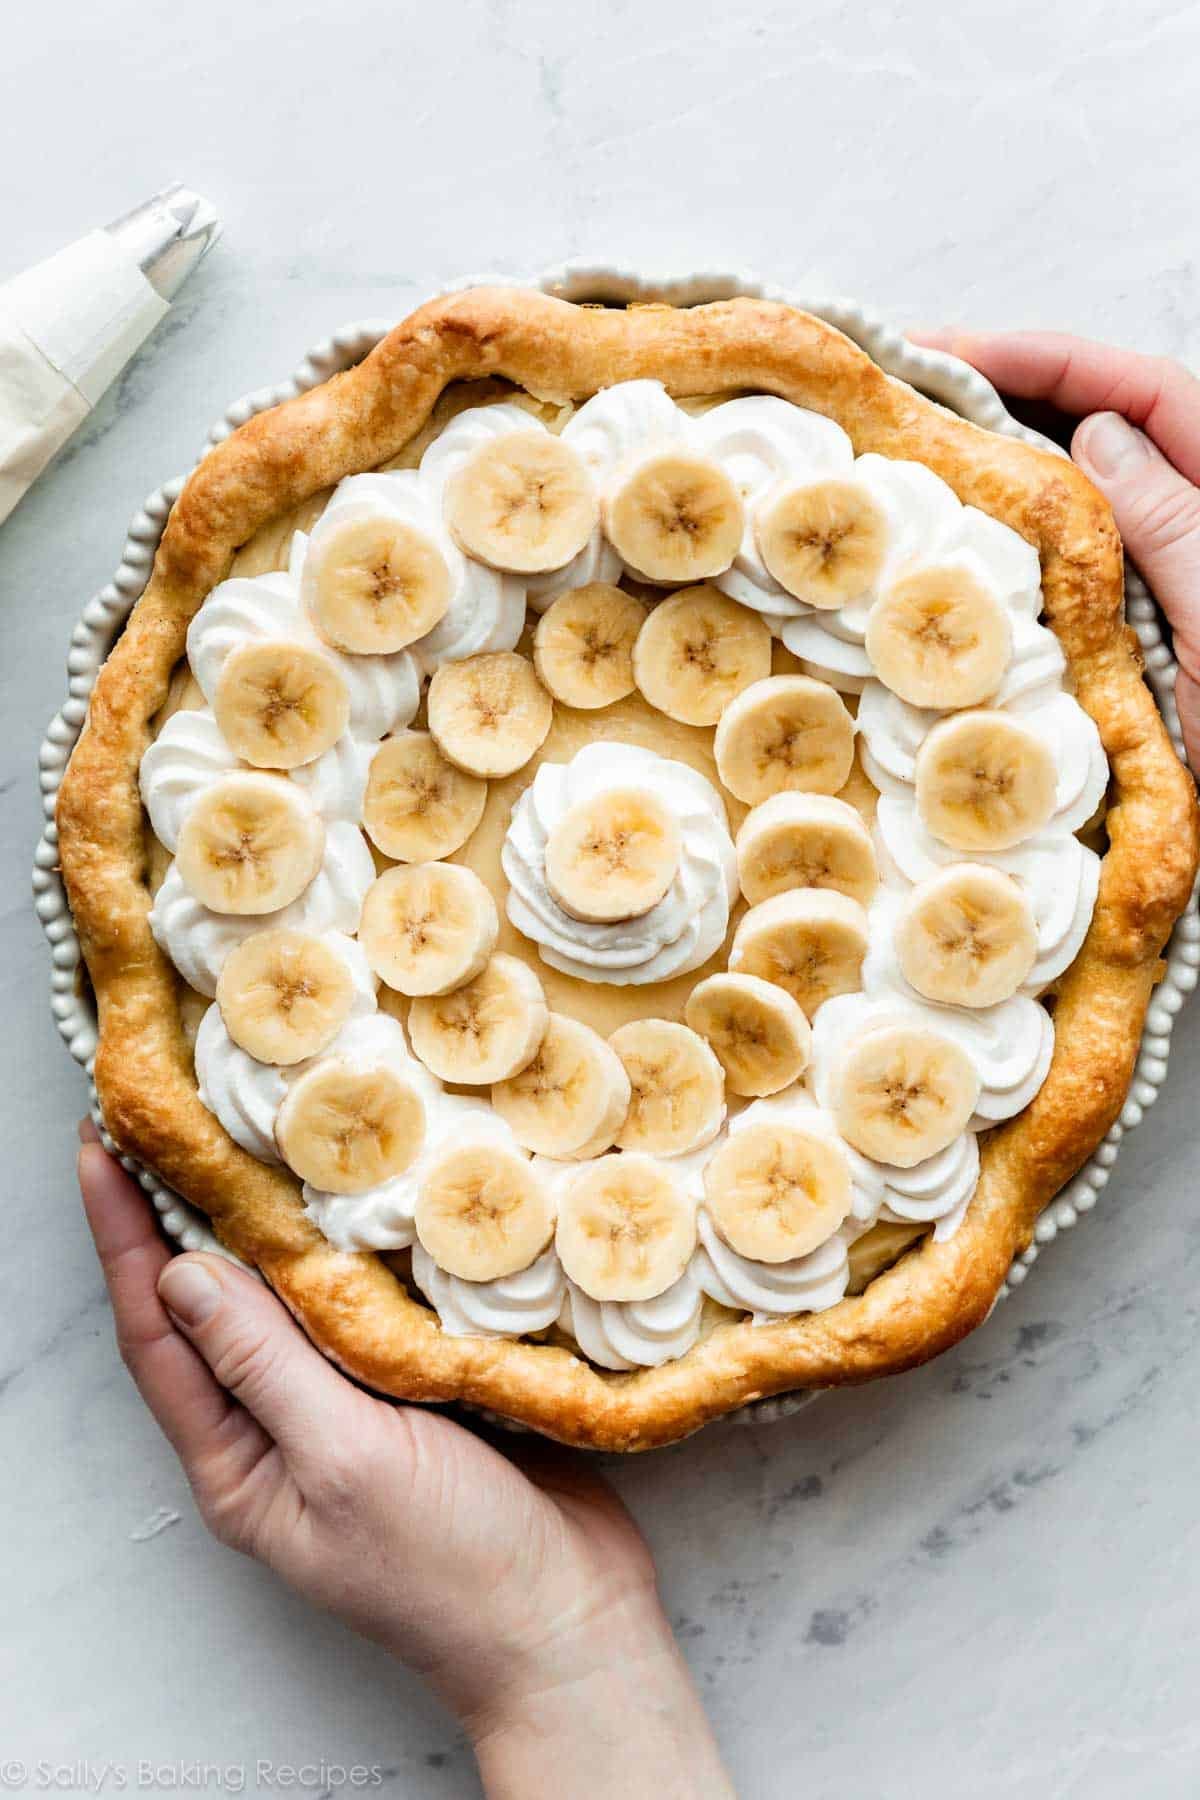
This is a completely from-scratch banana cream pie recipe. You won’t find any box pudding mixes or artificial flavors hiding inside. Get ready for a blissful banana experience where you can truly taste the homemade difference. And it will graciously satisfy your heart, soul… and your tastebuds.
Here’s Why You Will LOVE This Banana Cream Pie
- 100% from scratch dessert recipe, and you can taste the difference.
- Creamy and undeniably rich.
- If custard is cooked properly, it’s sturdy and smooth.
- Flaky pie crust shell, or try a graham cracker crust.
- An optional sprinkle of cinnamon adds a special and flavorful touch.
- Perfect make-ahead dessert.
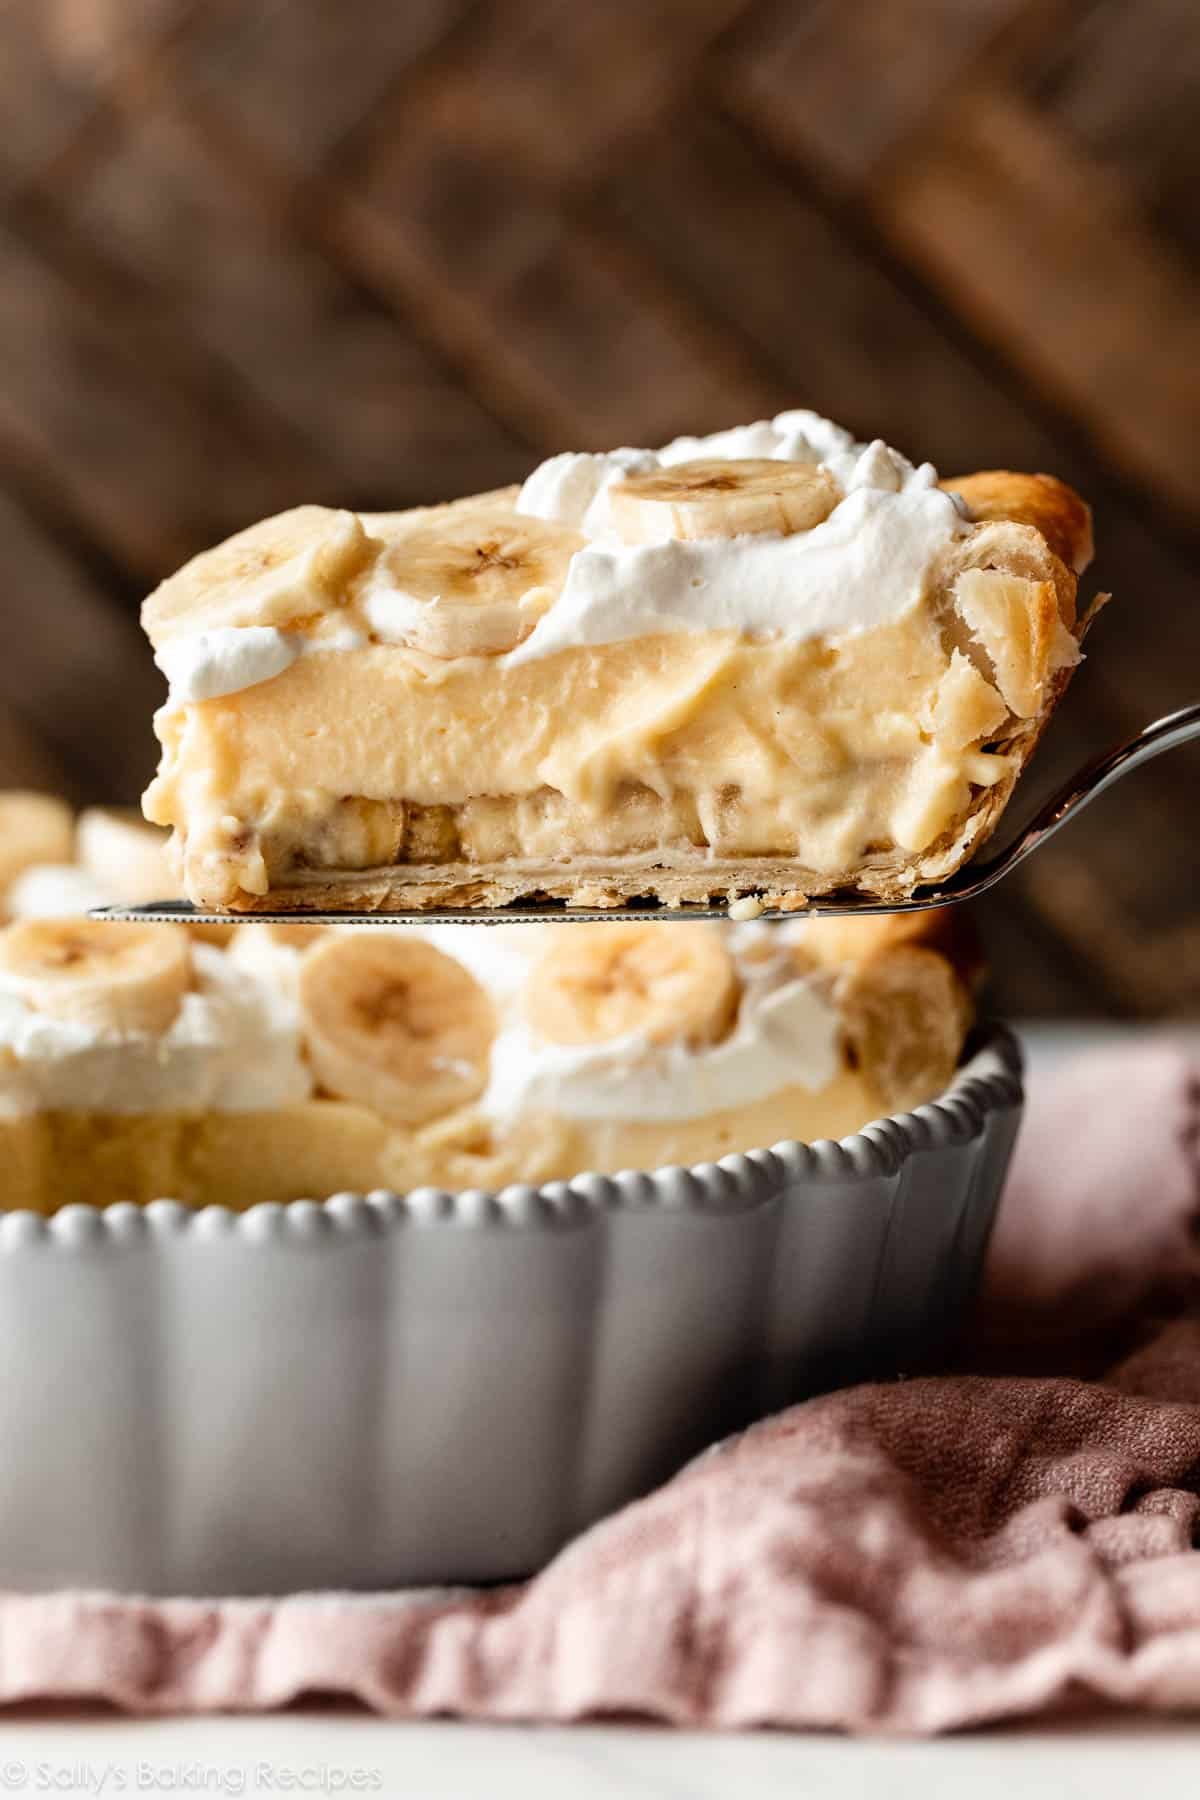
What Is Banana Cream Pie?
The combination of kitchen magic. 😉 Seriously, though, banana cream pie combines homemade pie pastry crust, fresh bananas, vanilla custard, and fluffy whipped cream.
- Baked Pie Crust Shell
- Banana Slices
- Homemade Vanilla Custard: This is a lot like my caramelized banana pudding, only a bit sturdier so it holds a nice slice.
- Whipped Cream
Let me walk you through each layer, so you’re fully prepared when it’s your turn to make it.
First, Bake Your Pie Crust
It’s helpful to review my how to blind bake pie crust tutorial before getting started. Blind baking a pie crust shell = baking it without a filling. Why do we do that? Well, if you have a no-bake pie filling like coconut cream pie, butterscotch pie, or today’s banana cream pie, you need a baked pie crust.
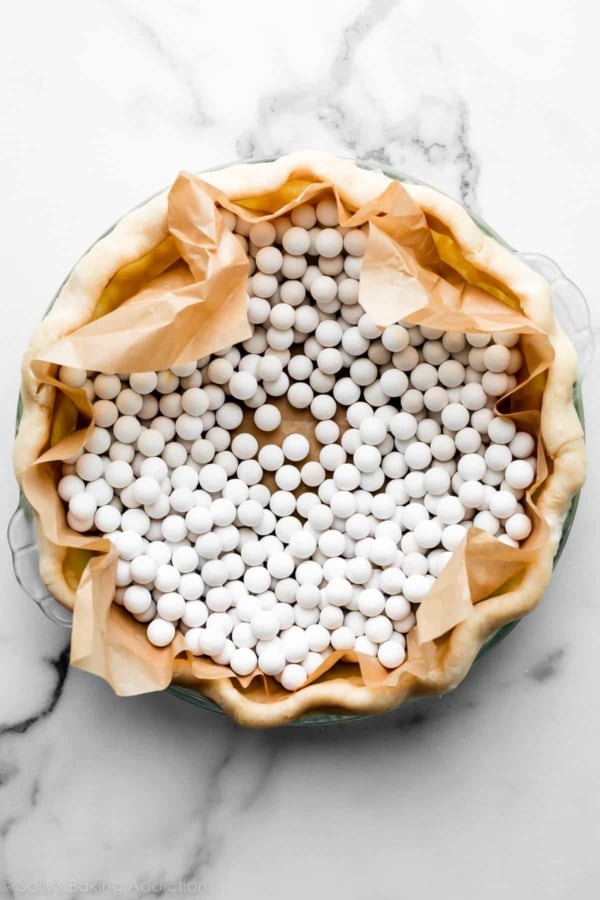
Start with homemade pie dough. I always use this pie crust recipe, or I have an excellent all butter pie crust option. To bake pie crust without a filling, you need to weigh it down to help prevent it from shrinking. I’m pretty loyal to these ceramic pie weights; they’re inexpensive and get the job done. You can also use dry beans. (Note: You’ll need 2 packs of the pie weights!)
Here are the steps:
- Make the pie dough ahead of time, and then refrigerate or freeze until you’re ready to make the pie. Pie crust must chill for at least 2 hours before rolling out.
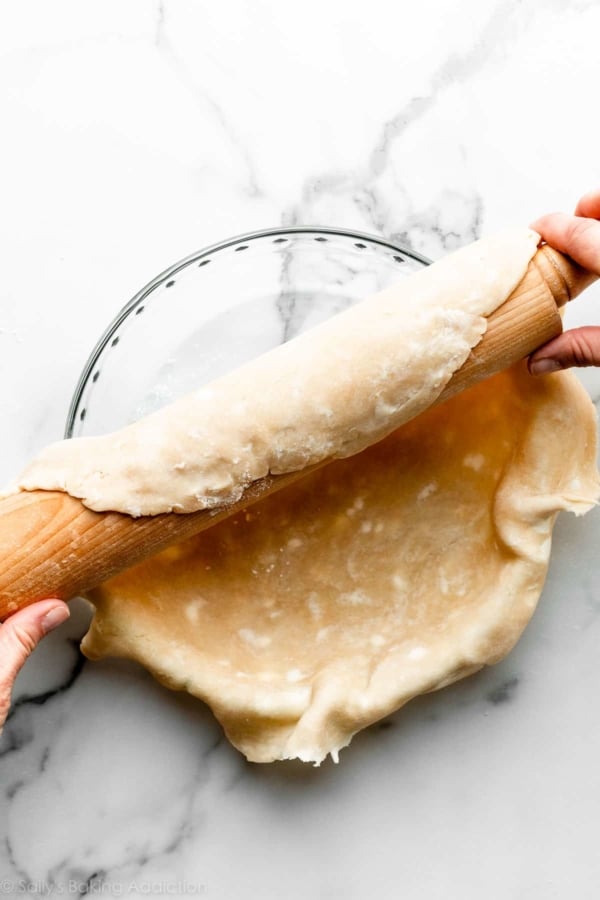
- Roll it out, then fit into your 9-inch pie dish. Crimp or flute the edges. See my how to crimp and flute pie crust tutorial for helpful tips and visuals.
- Chill the shaped pie crust for at least 30 minutes. This prevents shrinking. Remember that pie dough must be cold when it hits the oven.
- Line with parchment paper, and then fill with pie weights.
- Bake until the edges are lightly brown, about 15 minutes.
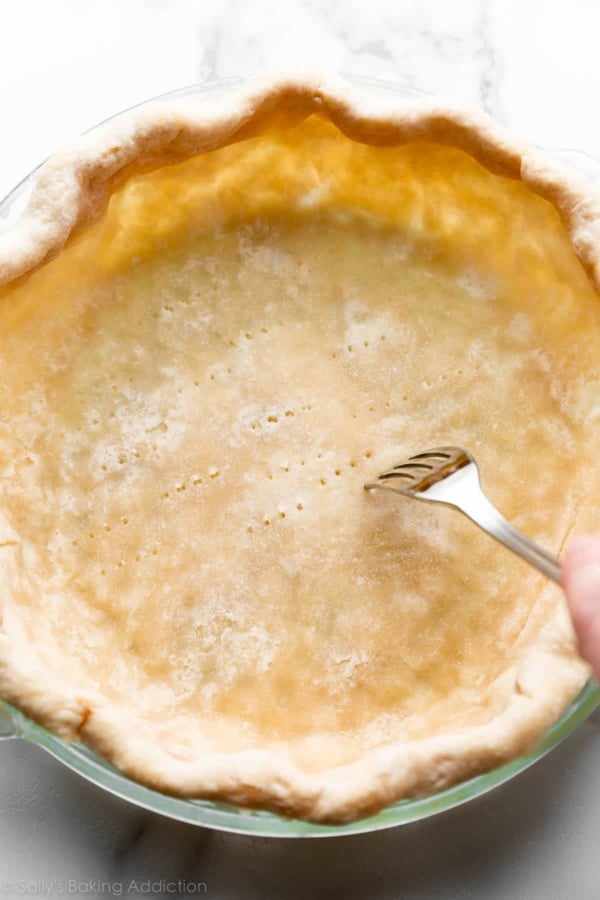
- Remove pie weights, then prick the bottom with a fork. This lets air escape the bottom.
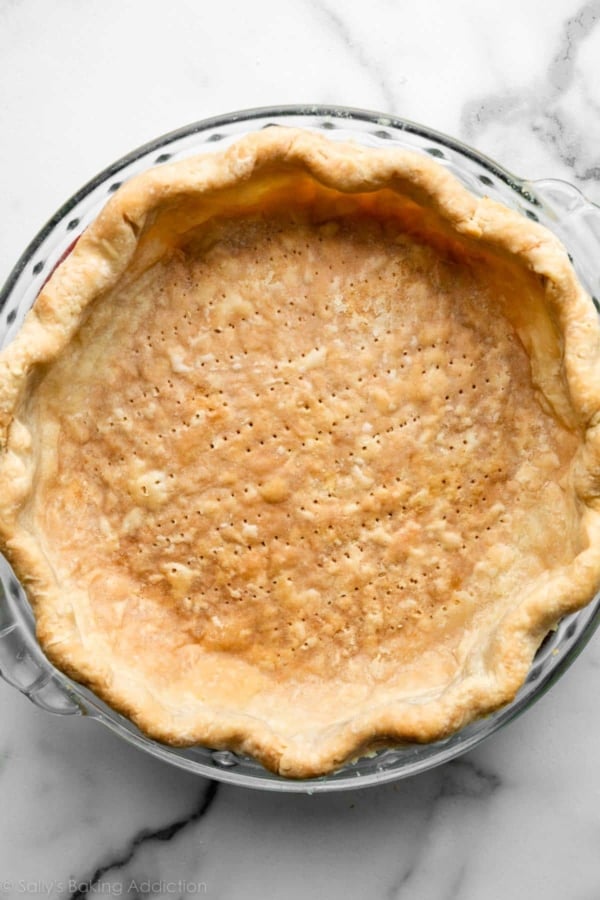
- Return crust to oven until the entire pie shell is golden brown.
- Cool pie shell completely. You can do this up to 3 days ahead of time!
This baked pie crust “shell” is crispy, flaky, and ready for your banana cream filling.
Other Crust Options:
- For something easier, you can use a graham cracker crust. Make sure you bake it for 10 minutes at 350°F (177°C), then let it cool completely before filling.
- Or try the peanut butter cookie crust from my peanut butter banana cream pie!
Now Let’s Work on the Filling
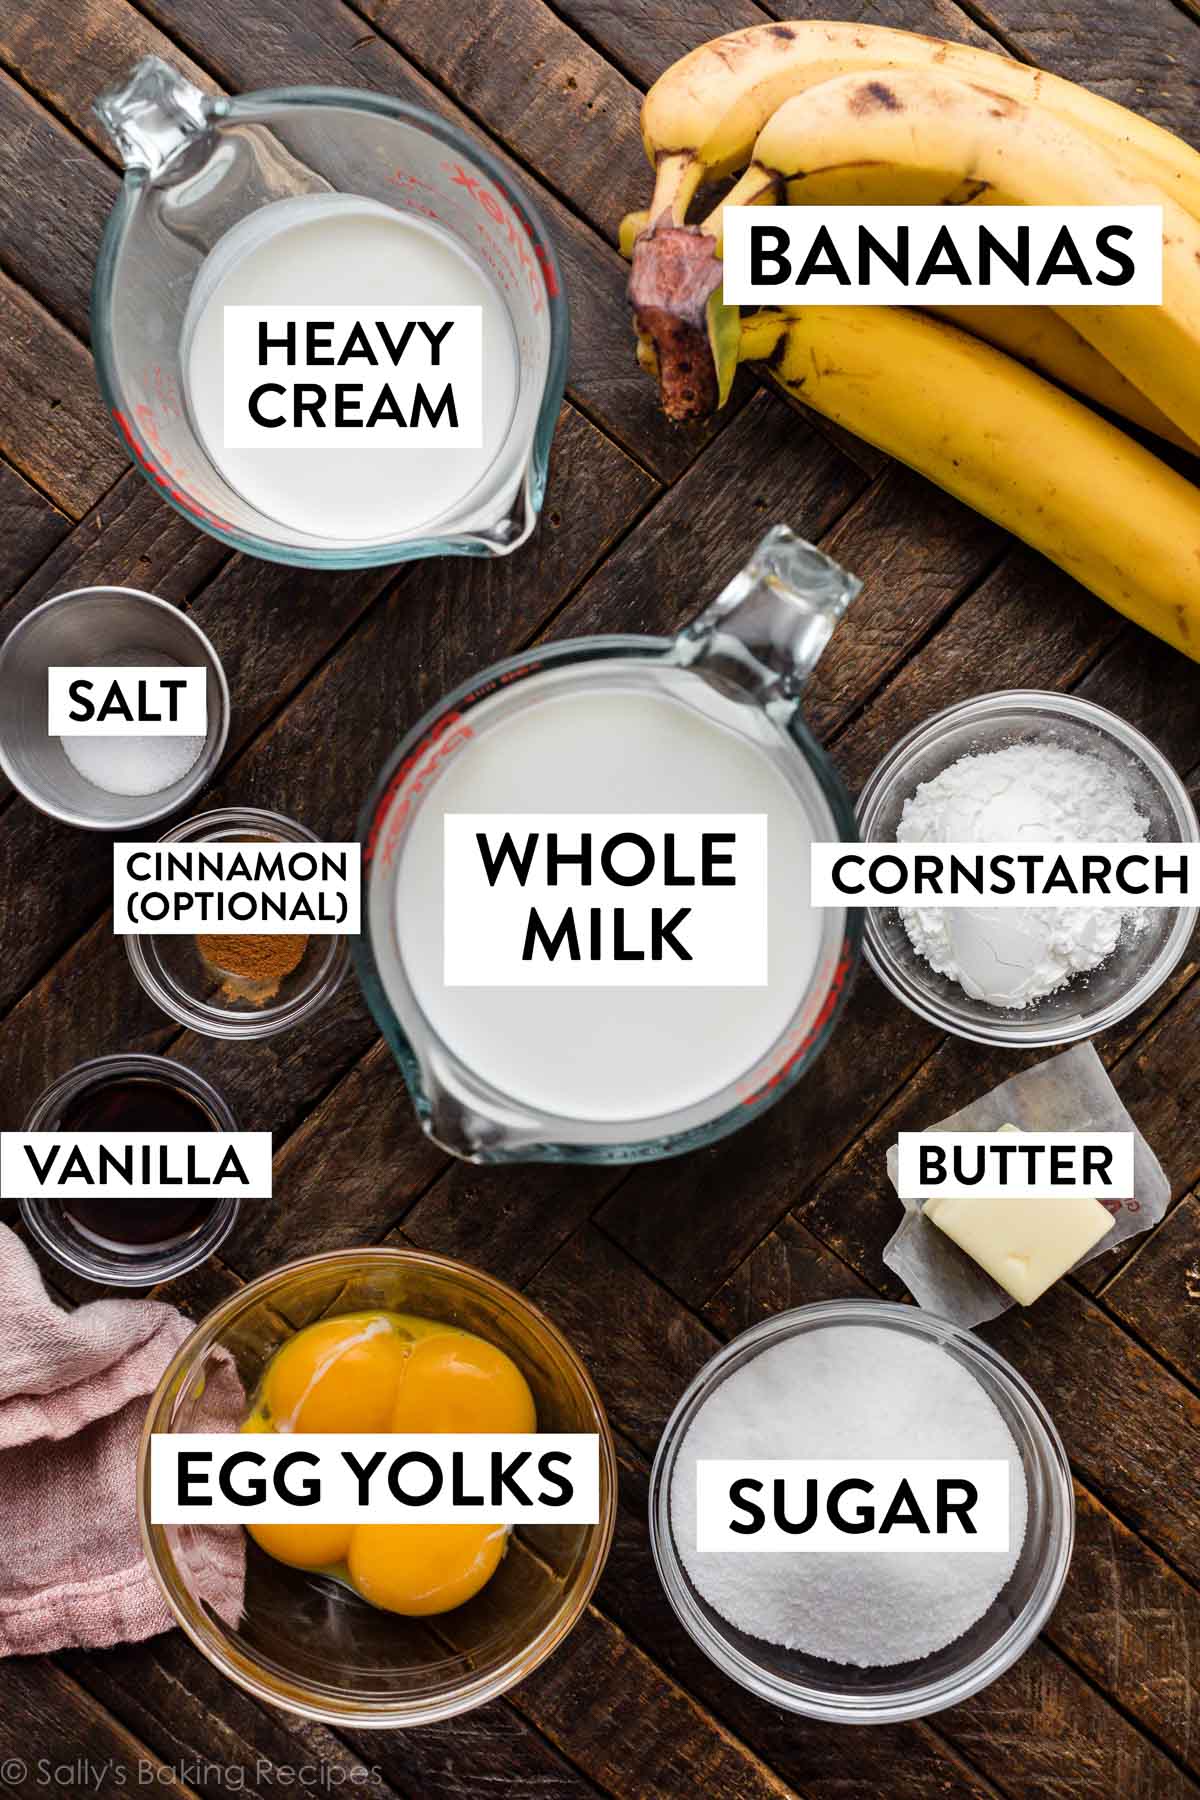
Here are the ingredients you need:
Layer in Your Banana Slices
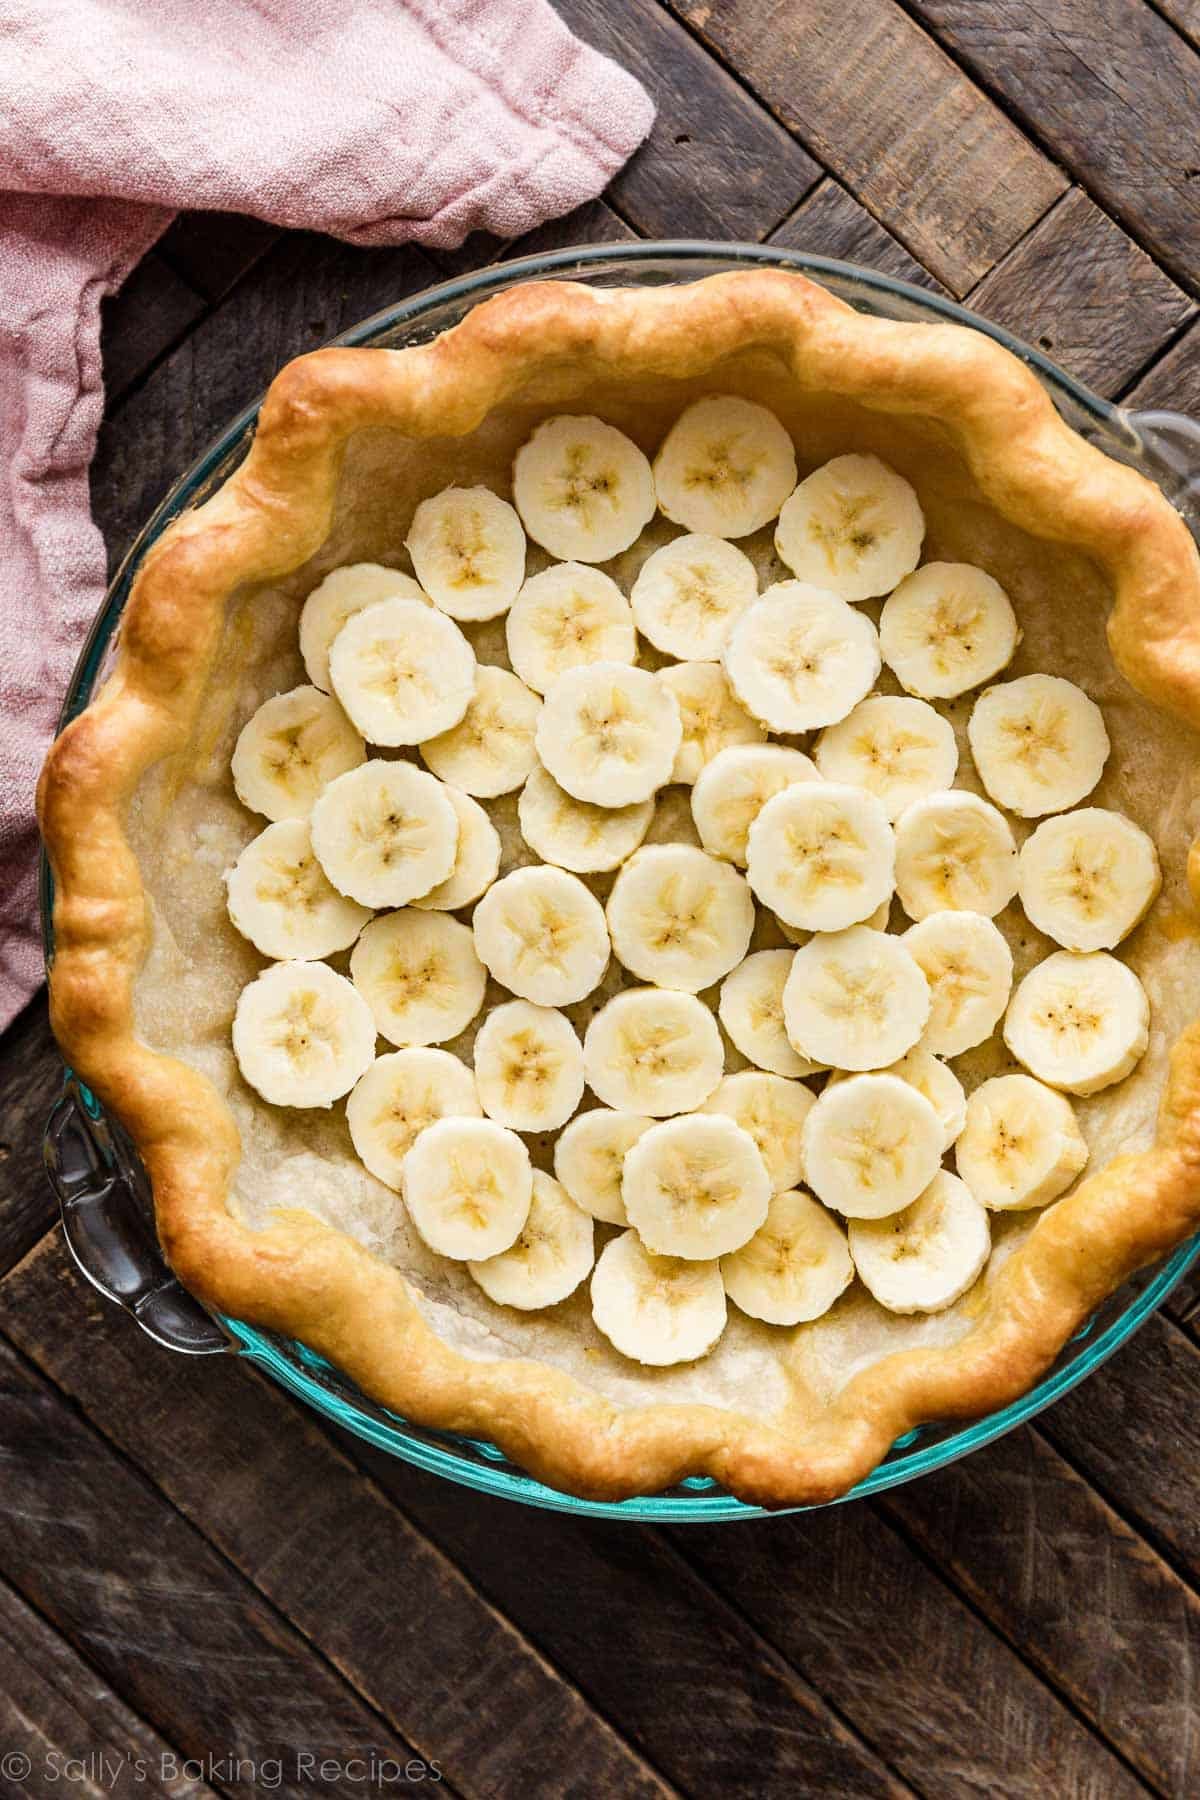
Layer banana slices into your baked pie crust shell. Sometimes I add a sprinkle of cinnamon on top of the banana slices. This is definitely a unique addition to BCP, but wow!!! It tastes unbelievable. I didn’t add it to the pictured pie, but taste testers and readers who have tried it usually rave about it.
Success Tip: Don’t use overly ripe bananas because they can seep liquid and break your thick custard filling. Save your brown spotty bananas for banana bread, and use the yellow ones for banana cream pie.
I squeeze in as many banana slices as I can:
Homemade Custard Filling
I’m here to squash any fears that you may have about from-scratch custard. It’s actually pretty easy—if you know how to whisk, you can make it. If you’ve ever made coconut cream pie, mocha chocolate pudding pie, homemade dirt pudding, pastry cream, or even mille-feuille, the process will look familiar. You’ll need sugar, whole milk, heavy cream (also needed for the whipped cream topping), and egg yolks. For flavor, you’ll add vanilla and butter. For thickening, you’ll use cornstarch. (The egg yolks and cream help, too.)
The first step is to mix egg yolks and cornstarch together:
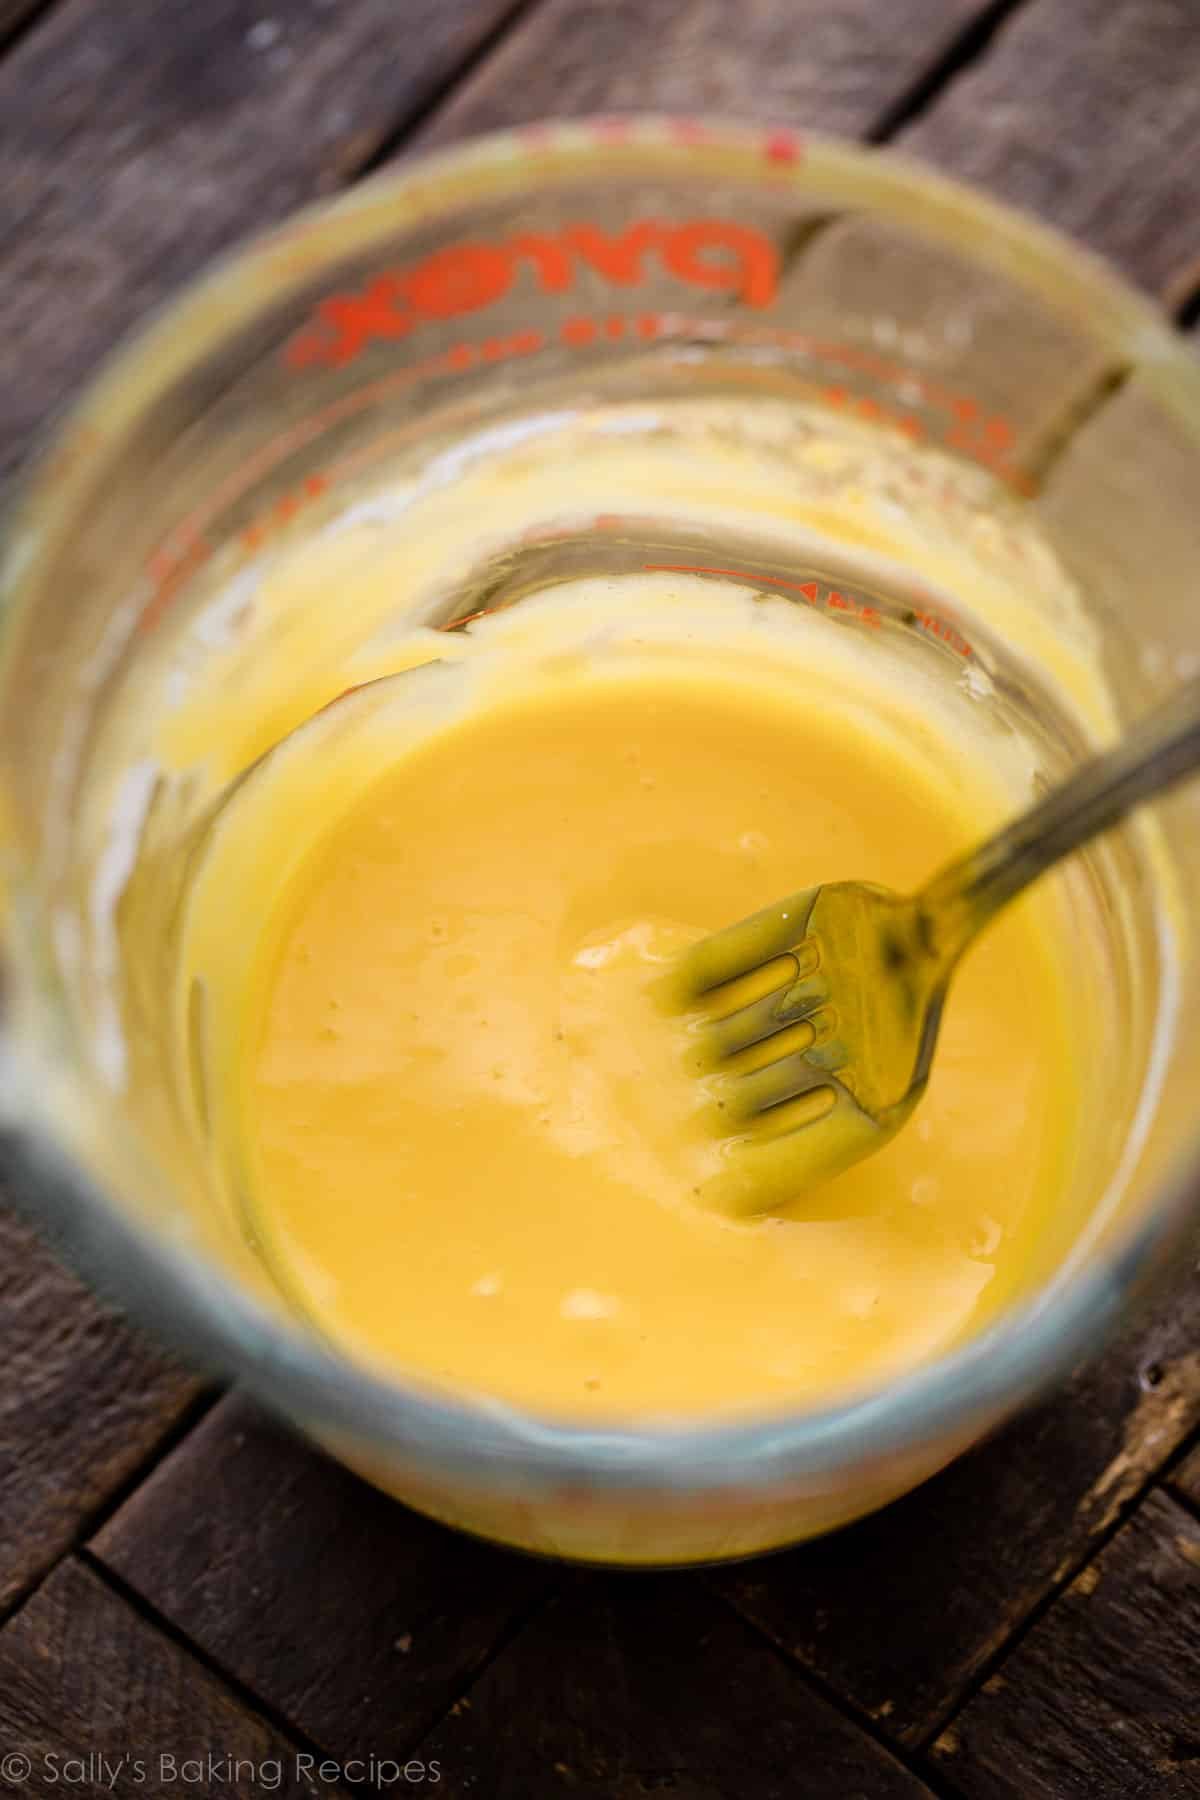
I usually do this with a fork in a liquid measuring cup, because we’ll eventually pour this into the cooking milk mixture.
Heat whole milk, cream, sugar, and a little salt on the stove. Once the milk/cream/sugar is gently simmering, slowly stream and whisk a little of this milk mixture into the egg yolk/cornstarch mixture. This is called tempering. The slow and steady stream of warm milk is bringing the egg yolks’ temperature up without scrambling them.
Then stream and whisk the heated egg yolk mixture into the rest of the milk/cream/sugar on the stove. Cook on low, and let it begin to bubble, which happens pretty quickly. Whisk it while it pops and bubbles for just 1 minute. Remove from heat, then stir in the vanilla and butter, and allow to slightly cool.
The custard will be smooth, rich, and silky:
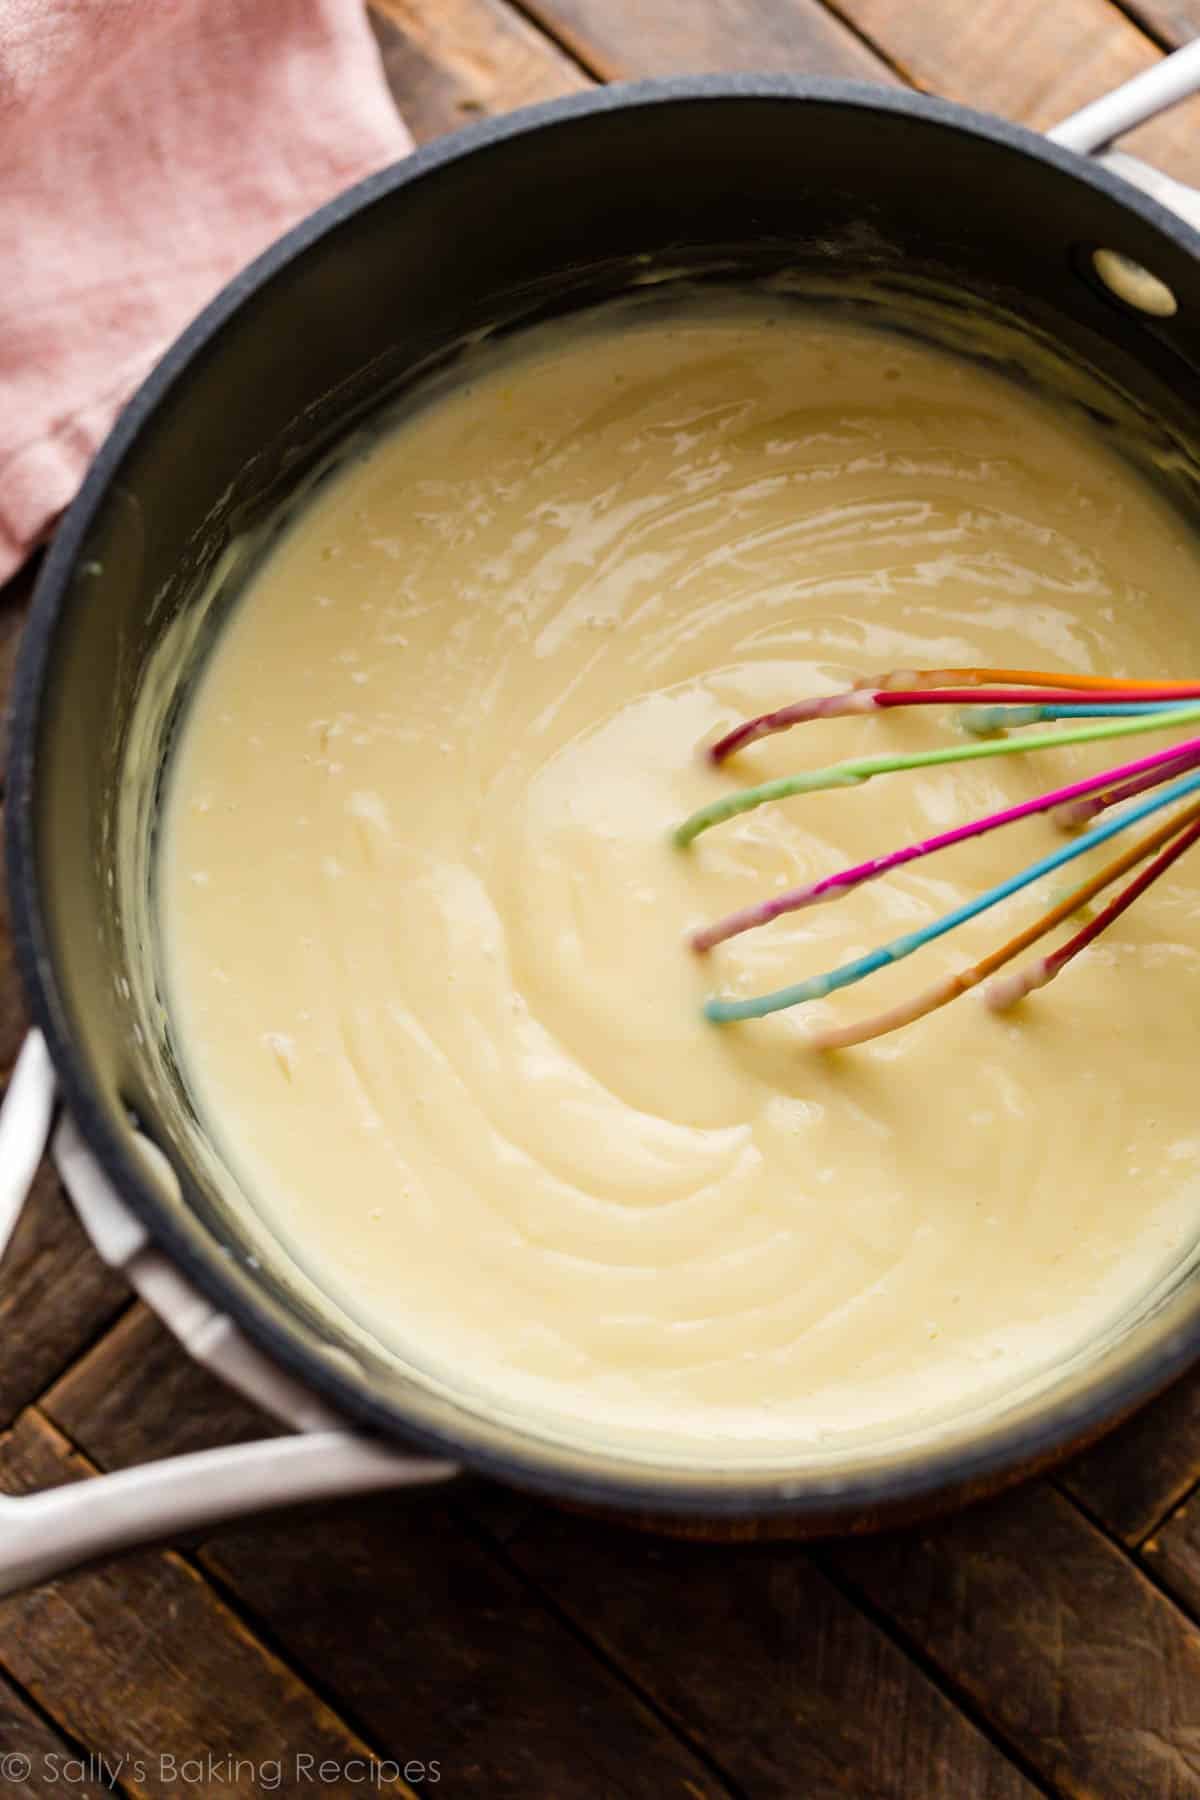
FAQ: Why Isn’t My Custard Smooth?
Do you notice little bits of egg yolks in your custard? You may not have tempered them slowly enough. Remember to *very slowly* stream and whisk some of the cooking milk mixture into the egg yolk/cornstarch mixture, and then *very slowly* stream and whisk it back into the pot. Whisk constantly.
If your best efforts still result in a few chunks, you can strain the finished warm custard through a fine mesh sieve. Or just leave it—you can’t really taste it.
How to Ensure Your Banana Cream Pie Sets
With 4 egg yolks, 4 Tablespoons of cornstarch, and some heavy cream, you can be certain this custard sets into a pretty sliceable texture. Be sure to whisk it on the stove often, and let it bubble and cook long enough for the heat to help bind the cornstarch to the fat. (1 minute is plenty.)
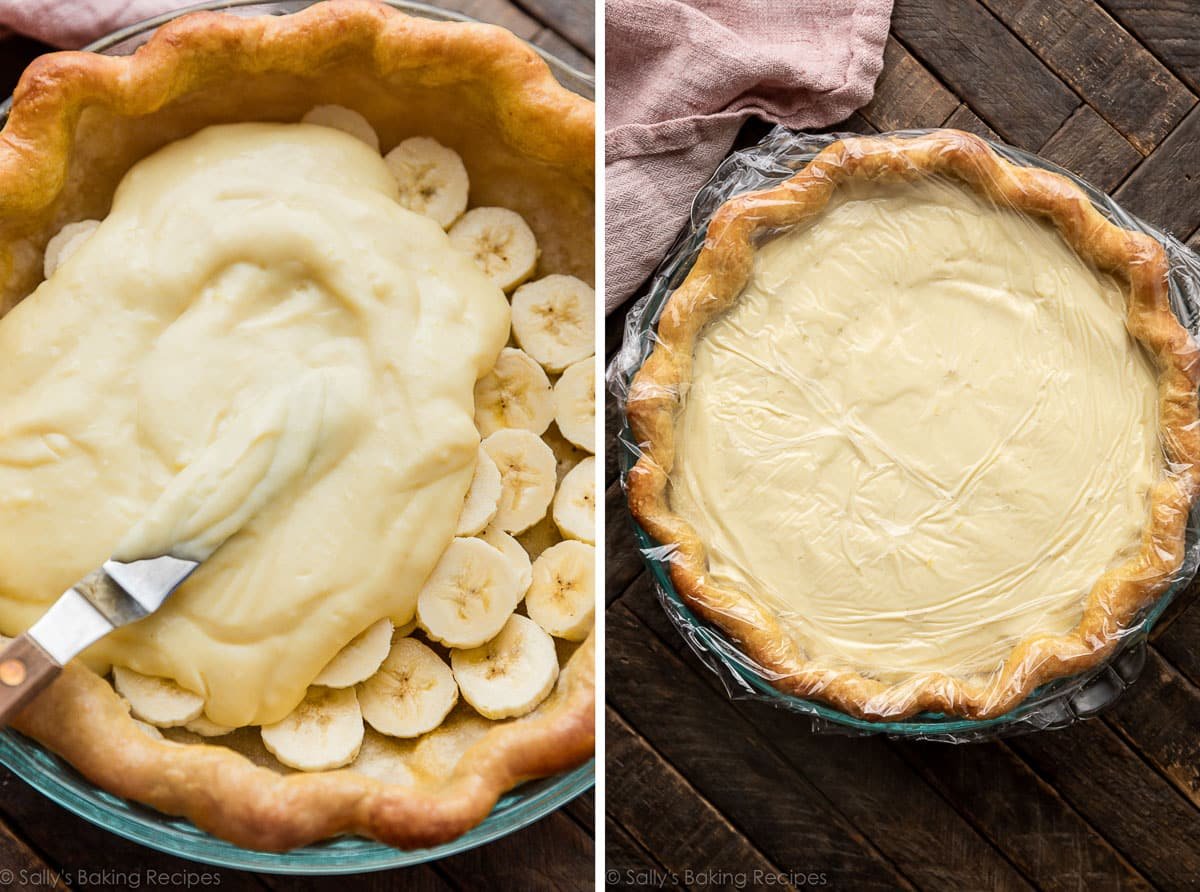
Spread the vanilla custard filling over the banana slices, cover with plastic wrap right on the surface to prevent a skin from forming, then refrigerate the pie for at least 4 hours and up to 1 day.
FAQ: Can I Make Banana Cream Pie in Advance?
This is a make-ahead dessert. You can make the pie dough in advance and bake the pie crust shell in advance. You can also refrigerate your assembled (but not garnished) banana cream pie for up to 1 day, with the plastic wrap right on top of the surface. And you can make the whipped cream topping in advance, but don’t add it until right before, or up to 1 hour before serving. So if you’re looking for Easter dessert recipes or hoping to make this pie for a special celebration, be sure to plan ahead.
You don’t want to decorate the pie with banana slices in advance because they’ll brown. (A brush of lemon juice can extend their freshness by a couple hours, but will affect their flavor.)
Right before, or up to 1 hour before, serving, top the pie with homemade whipped cream. You can decorate it any which way—a thick layer of whipped cream like this banoffee pie, or pretty piped dollops or swirls like the pictured pie. I use Wilton 1M piping tip to pipe it.
You could also use up your leftover egg whites and top it with this marshmallow meringue topping, and toast it with a kitchen torch!
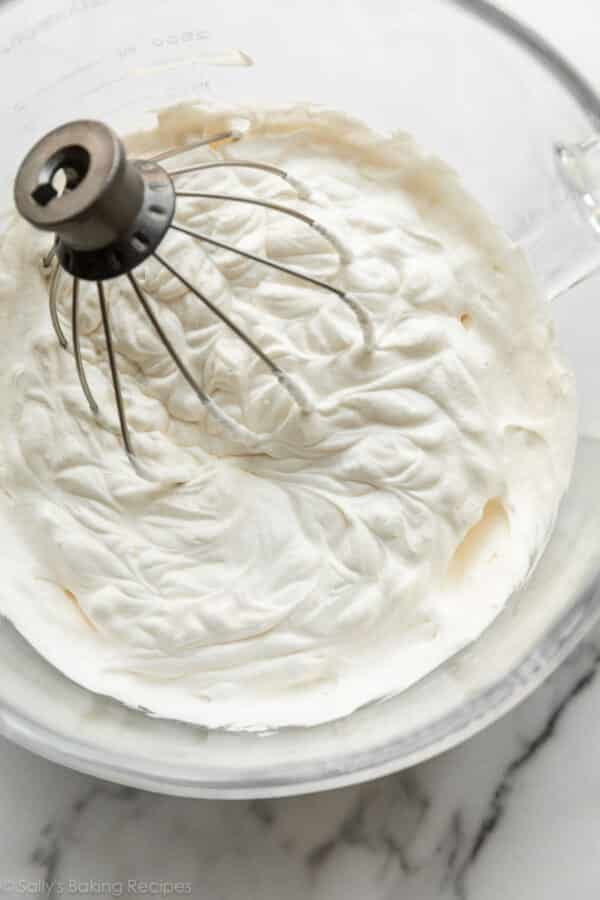
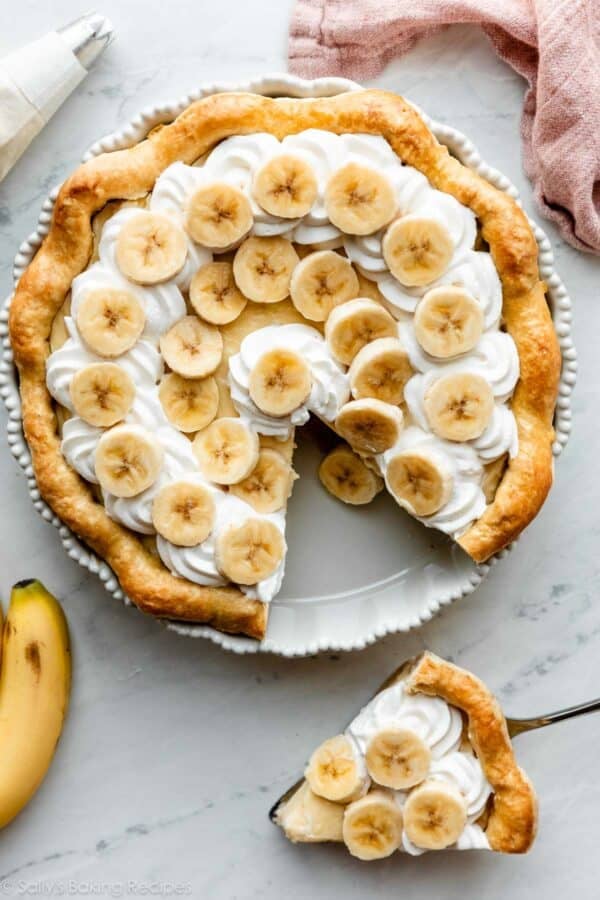
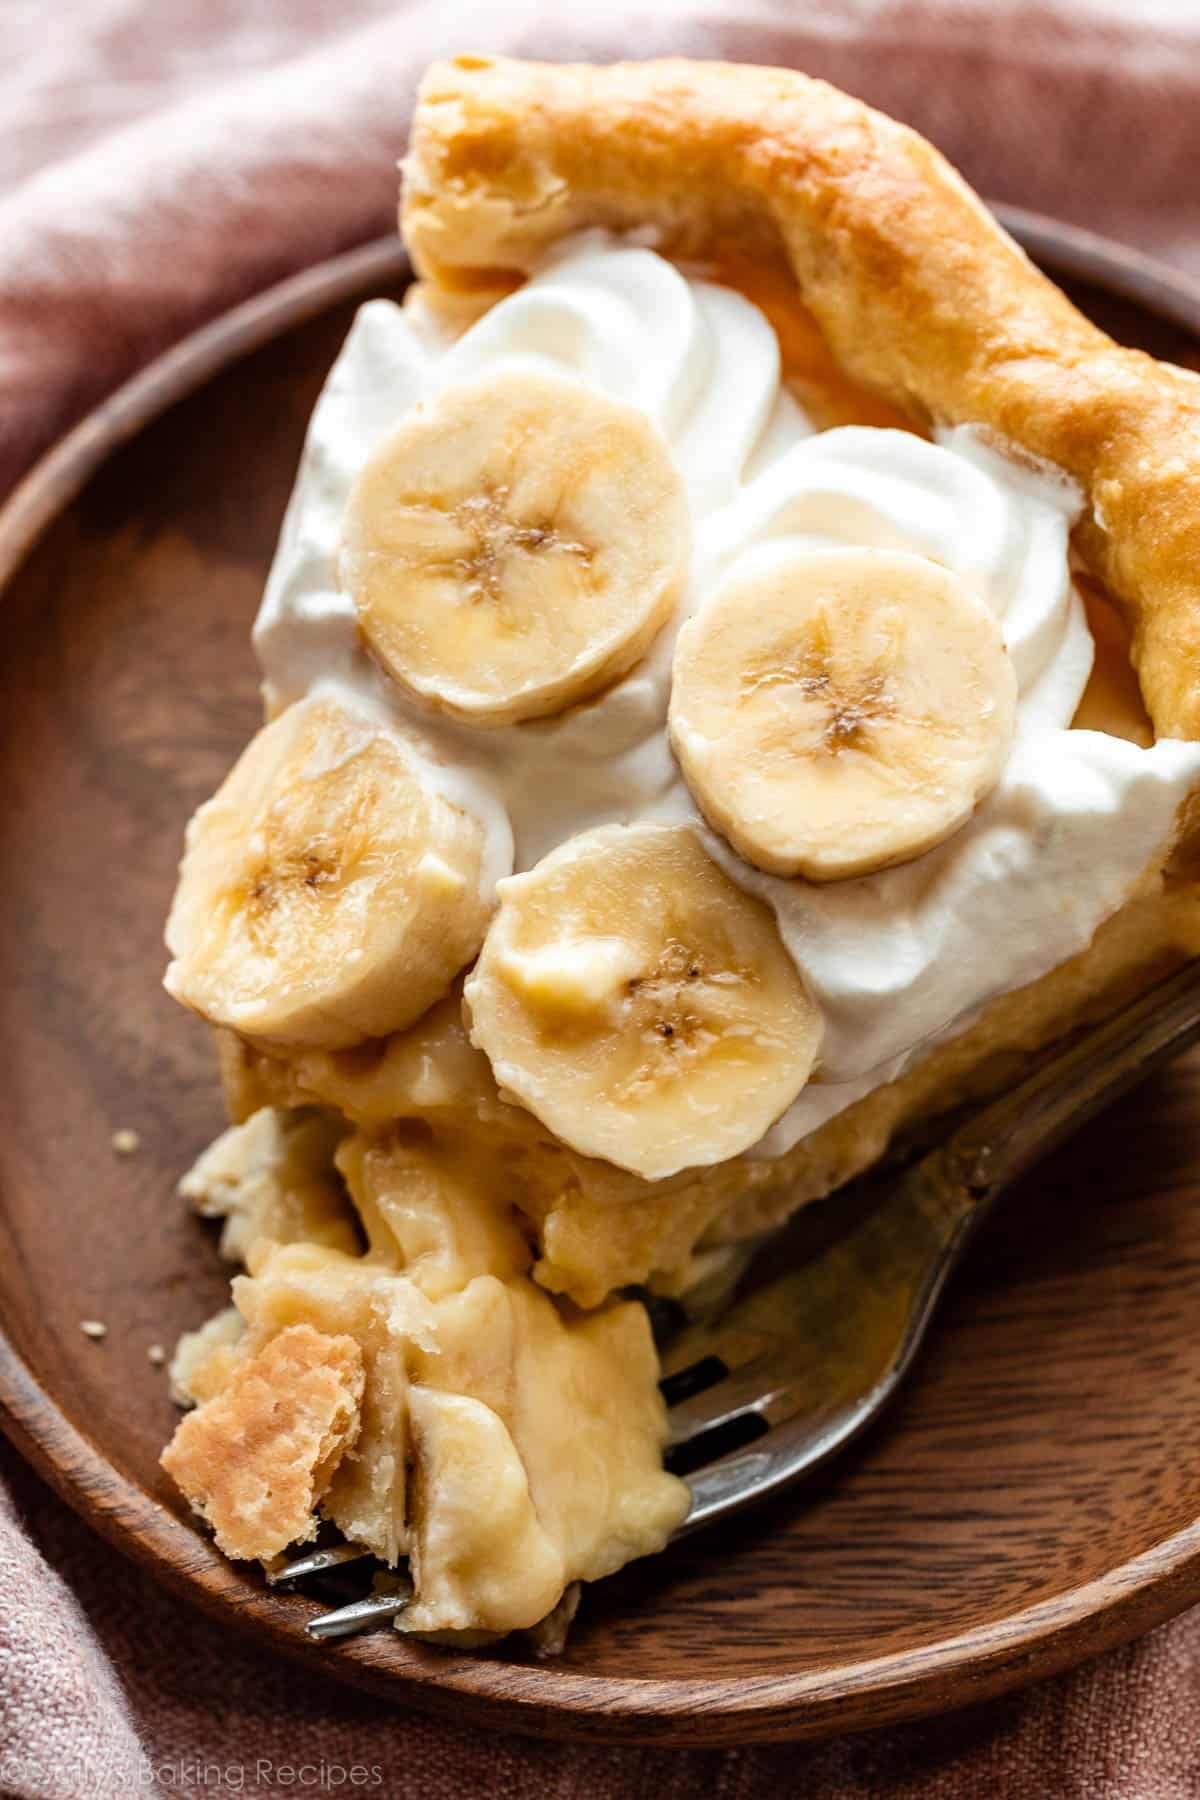
When ready to serve, add banana slices on top. I usually go heavy on the sliced banana garnish. I love texture in desserts, and banana cream pie doesn’t usually deliver on that front. But with lots of banana slices, we’ll get there.
Now savor every flaky, creamy, fluffy bite as it melts in your mouth, because you deserve to. You made this all from scratch!
Print
Homemade Banana Cream Pie
- Prep Time: 4 hours (includes crust)
- Cook Time: 30 minutes
- Total Time: 8 hours (includes chilling)
- Yield: 1 9-inch pie
- Category: Pie
- Method: Baking
- Cuisine: American
Description
Creamy and smooth from-scratch custard joins bananas, whipped cream, and a buttery flaky baked pie crust to make one epic banana cream pie. There are plenty of ways to make this banana cream pie recipe ahead of time. See various steps.
Ingredients
Crust
- 1 unbaked pie crust (what I used) or all butter pie crust*
- optional egg wash: 1 large egg white beaten with 1 Tablespoon milk
Custard Filling
- 4 large egg yolks
- 1/4 cup (30g) cornstarch
- 2 cups (480ml) whole milk
- 1/2 cup (120ml) heavy cream
- 1/2 cup (100g) granulated sugar
- 1/8 teaspoon salt
- 2 teaspoons pure vanilla extract
- 2 Tablespoons (28g) unsalted butter, softened to room temperature
- 4 yellow bananas (not super ripe yet)
- optional: sprinkle of ground cinnamon
Whipped Cream
- 1 cup (240ml) cold heavy cream
- 2 Tablespoons (15g) confectioners’ or granulated sugar
- 1/2 teaspoon pure vanilla extract
Instructions
- At least 2 hours ahead, make the pie dough: Make the pie crust through step 5 according to my directions and video tutorial in my pie crust recipe. Make pie dough in advance because it needs to chill in the refrigerator for at least 2 hours before rolling out (step 2). The recipe makes 2 crusts, and you only need 1 for this pie, so save the other for another pie.
- Roll out the chilled pie dough: On a floured work surface, roll out one of the discs of chilled dough. Turn the dough about a quarter turn after every few rolls until you have a circle 12 inches in diameter. Carefully place the dough into a 9-inch pie dish. Tuck it in with your fingers, making sure it is completely smooth. To make a lovely thick edge, I do not trim excess dough around the edges. Instead, fold the excess dough back over the edge and use your hands to mold the edge into a rim around the pie. Crimp the edges with a fork or use your fingers to flute the edges. (Review this how to crimp and flute pie crust page if you need extra help with this step.) If dough is too warm, fluting/crimping will be difficult, so you can always chill it in the refrigerator for 5–10 minutes first. After fluting/crimping the edges, chill the pie dough in the refrigerator for at least 30 minutes and up to 5 days. Cover the pie crust with plastic wrap if chilling for longer than 30 minutes. Chilling the shaped dough helps prevent the crust from shrinking.
- While the crust is chilling, preheat oven to 375°F (190°C).
- Blind bake the crust: Line the chilled pie crust with parchment paper. (Crunch up the parchment paper first so that you can easily shape it into the crust.) Fill with pie weights or dried beans. (Note that you will need at least 2 standard sets of pie weights to fit.) I like to push the weights up against the sides of the pie crust to help ensure the sides don’t shrink down. Bake until the edges of the crust are starting to brown, about 15–16 minutes. Remove pie from the oven and carefully lift the parchment paper (with the weights) out of the pie. Prick holes all over the bottom crust with a fork. If desired for a shiny golden crust, brush egg wash on edges. Return pie crust to the oven and bake for 14–15 minutes, or until bottom has browned. Remove from the oven, and cool on a wire rack completely before filling. You can blind bake the crust up to 3 days ahead of time. Cover cooled crust tightly and refrigerate until ready to fill. (Review this how to par-bake pie crust page if you need extra help with this blind-baking step.)
- Make the custard filling: Whisk the egg yolks and cornstarch together. (A fork works nicely for this, or a small whisk.) Set aside. Combine the milk, heavy cream, sugar, and salt in a medium saucepan over medium heat. Whisk until all the sugar has dissolved, then bring to a gentle simmer, whisking occasionally. Once simmering, remove about 1/2 cup (120ml) of the milk mixture and, in a slow and steady stream, whisk into the egg yolk and cornstarch mixture. Keep those egg yolks moving so they don’t scramble. In a slow and steady stream, pour and whisk the egg yolk mixture into the pot. The pudding will immediately begin to bubble and thicken. Stand back and use caution as the bubbles may burst. Cook for 1 full minute, whisking constantly.
- Remove the pan from heat and whisk in the vanilla and butter. You will have about 3 cups of filling. If you notice a lot of little chunks of egg yolk, they may not have been tempered properly. To fix, you can run the warm custard through a fine mesh sieve.
- Place a piece of plastic wrap directly on top of the warm pudding to prevent a skin from forming on top. Allow to cool for 15 minutes. I do not recommend any longer than this, as it will be too thick to spread neatly into the crust.
- Slice 2–3 bananas and arrange slices into the cooled pie shell. Sprinkle with cinnamon, if desired. Spread custard on top (it’s ok if it is still slightly warm). An offset spatula is helpful for spreading. Place a piece of plastic wrap directly on top of the custard; again, to prevent a skin from forming. Refrigerate for at least 4 hours and up to 1 day.
- When ready to serve, or up to 1 hour before serving, make the whipped cream: Using a handheld or stand mixer fitted with a whisk attachment, whip the heavy cream, sugar, and vanilla extract on medium-high speed until medium peaks form, about 3–4 minutes. Medium peaks are between soft/loose peaks and stiff peaks and are the perfect consistency for topping and piping on desserts.
- Pipe or spread the whipped cream on top. (I use Wilton 1M tip.) Slice remaining banana and garnish with banana slices and serve pie immediately, or refrigerate for up to 1 hour and then garnish with banana slices and serve. (Best to garnish with banana slices immediately before serving, but whipped cream can go on the pie up to 1 hour in advance.)
- Slice and serve. Cover leftovers and store in the refrigerator for up to 5 days.
Notes
- Make Ahead & Freezing Instructions: The pie dough can be prepared ahead of time and stored in the refrigerator for up to 5 days or in the freezer for up to 3 months. There are plenty of ways to make this recipe ahead of time. See end of step 2, end of step 8, and step 10. This is not the best pie to freeze; the filling’s texture is never quite the same. However, if you have leftover slices and aren’t concerned as much about taste and appearance, you can freeze leftover pie for up to 3 months. Thaw in the refrigerator.
- Special Tools (affiliate links): Rolling Pin | Pie Dish | Pie Weights | Pastry Brush | Egg Separator | Whisk | Offset Spatula | Electric Mixer (Handheld or Stand Mixer) | Piping Bag (Disposable or Reusable) and Wilton 1M Piping Tip if piping
- Pie Crust: Both linked pie crust recipes make 2 crusts. You only need 1 crust for this pie, so freeze the 2nd half for another use.
- Crumb Crust Alternative: To cut back on time, try using a graham cracker crust. Make sure you bake it for 10 minutes at 350°F (177°C), then let it cool completely before filling. Or you can use the crust recipe and baking instructions for the peanut butter cookie crust used in this peanut butter banana cream pie.
- Whole Milk & Heavy Cream: These are imperative for the custard to set properly. I do not recommend any substitutions.
- Prevent Bananas From Browning: Feel free to very, very lightly spritz or brush banana slices with lemon juice prior to arranging in pie crust shell, and prior to using as garnish. They will eventually brown, so it’s best to assemble the pie up to 1 day in advance (step 8), and garnish with banana slices right before serving (step 10).
- Update in 2023: Recipe used to call for 1 and 3/4 cups whole milk and 1 and 1/2 teaspoons vanilla extract. For a slightly smoother, more flavorful custard, I now use 2 cups whole milk and 2 teaspoons vanilla, as you can now see in the recipe.


Reader Comments and Reviews
A bit too much starch, followed the recipe and the custard was too thick almost immediately. I’d cut it down by a tablespoon or so next time. Otherwise, delicious!
Excellent pie recipe! First time making a pie successfully using cornstarch as thickener, previously I did not cook/ boil long enough, however your instructions were very clear. My husband, the banana pie aficionado, praised my efforts! MANY THANKS for helping me to be a successful baker. Huuugs! PS your site is fabulous!
Q: how can I convert basic recipe into chocolate pie or even bread coconut?
it was amazing! i made my ouwn crust with nilla wafers witch made it even better. (low taper fade)
Great flavor, way too jello like. Definitely only needs around 2 TBS of cornstarch.
Oh Sally, you’ve done it again. Another delicious pie. My husband had some and he said “this is just to die for.” I said to him, “now wait a minute hun till that life insurance policy clears!!!!” And boy oh boy did we have a good chuckle. Thank you Sally for all of your delicious recipes!
I made this today, and everyone loved it! Because of time constraints, I chose to make it with the graham cracker crust. I loved the idea of using Nutter Butter cookies, but we can’t buy them in Canada. Inspired by this idea, I decided to take a chance, and slathered my graham cracker crust with a thin layer of natural peanut butter. I’m glad I did because it was delicious, and unanimously approved of by everyone at the table. Thanks, for yet another delicious recipe! Sally’s Baking Addiction is my ‘go to’ site for new recipes and it never fails to deliver.
I loved this recipe so much! The cream is absolutely tasty. I believe banana cream pie needs caramel , so I tried to put some in the bottom of the crust. However, it made it kind of hard to cut. In terms of avoiding this pitfall, what would be the best way to avoid it?
Hi Liz, we think that a drizzle of salted caramel sauce on top before serving would work well.
Why in the world did I remove that 1/2 cup of simmering milk/heavy cream? It doesn’t show back up in the recipe and now it’s wasted. I would have been fine with a little bit extra custard….
Hi Joe, you whisk that into the egg yolk mixture in step 5. This is called tempering. The slow and steady stream of warm milk is bringing the egg yolks’ temperature up without scrambling them.
I just made this recipe, from scratch. 5 stars or more, if possible. I’m so incredibly grateful to you Sally, and your team, for INCREDIBLE INSTRUCTIONS AND DIRECTIONS, for me to follow, without mishaps.
Thank you so very much, for sharing your tried and true wisdom techniques, for baking. I’m very inspired by you Sally. Thank you, for you’ve helped bring back my passion, for pastry baking❣️
I am a baker, and I haven’t baked a pie crust, in over a decade.
God bless you all abundantly, in 2025 and beyond. ♥️♥️♥️
I made this pie exactly as written except I made a graham cracker crust. I also added a whole vanilla bean to the custard because I had some that I needed to use. It came out perfect and was loved by everyone who ate it for Christmas dessert. I wanted to make a 10” pie so I made 1 and a half times the recipe and it was perfect for the 10” pan. Filled it right to the top and there was about a quarter cup of the custard left which I happily ate! So good! I’ll definitely be making this again!
It’s missing a flavor.
Its not 100 % home made! Make your own pastry!
she linked the recipe to make your own pastry. The unbaked pie crust was just listed as an ingredient…
I’m making this pie tomorrow for Christmas Day. I want to make one and a half times the recipe to fill a 10” crust. Will there be any problem with the custard if I time and a half it? Thank you. Donna
Hi Donna, You can 1.5x the custard with no issue. It may be too much for a 10″ crust though. Let us know how it turns out!
I just posted my comment. It worked out great!
I was hoping to make this for a friend. They are picking up a day before serving. What happens if I put the whipped topping on sooner than the hour recommendation? Would it be better to give that to them on the side and have them put on?
Hi Dana! The whipped cream can weep and deflate. It would be best to keep it on the side, yes.
Came out perfect! Family loved so much last year I will be making two this year!