
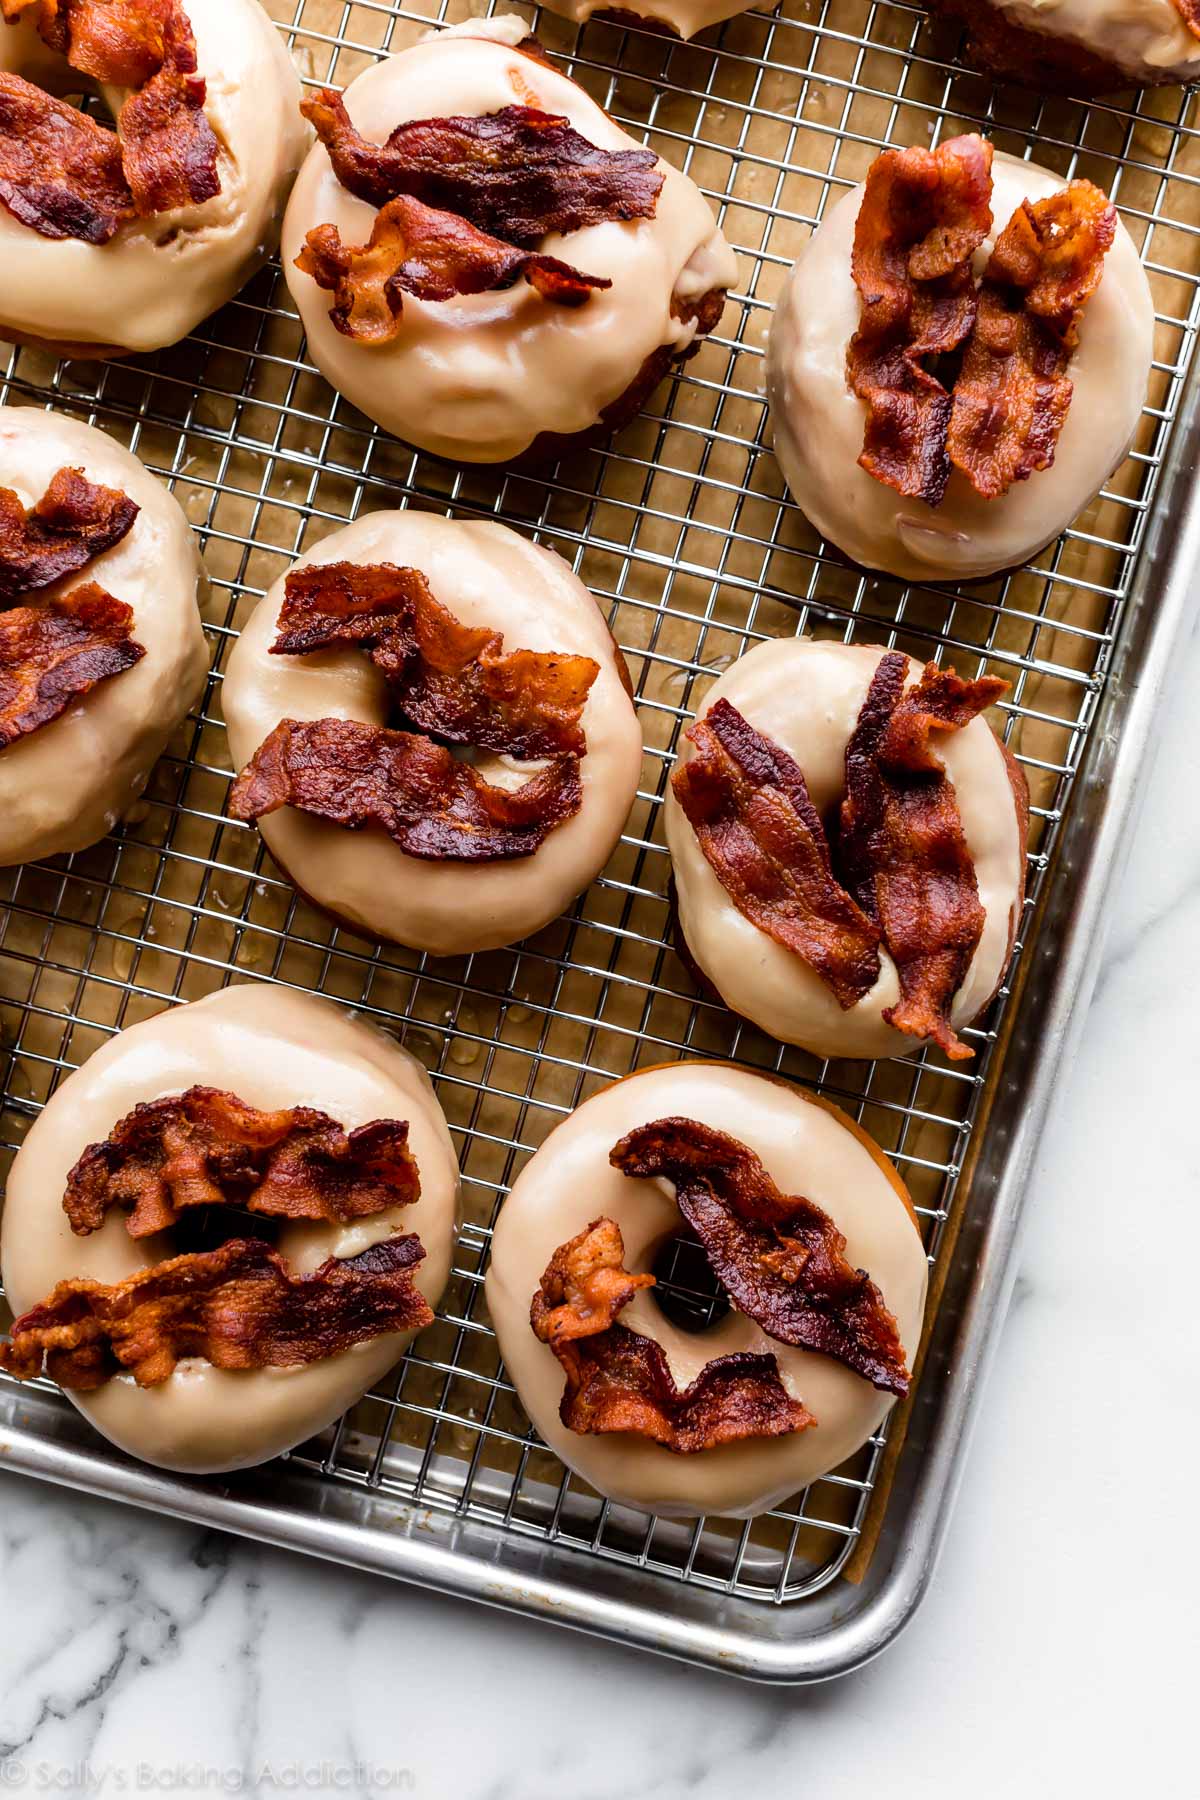
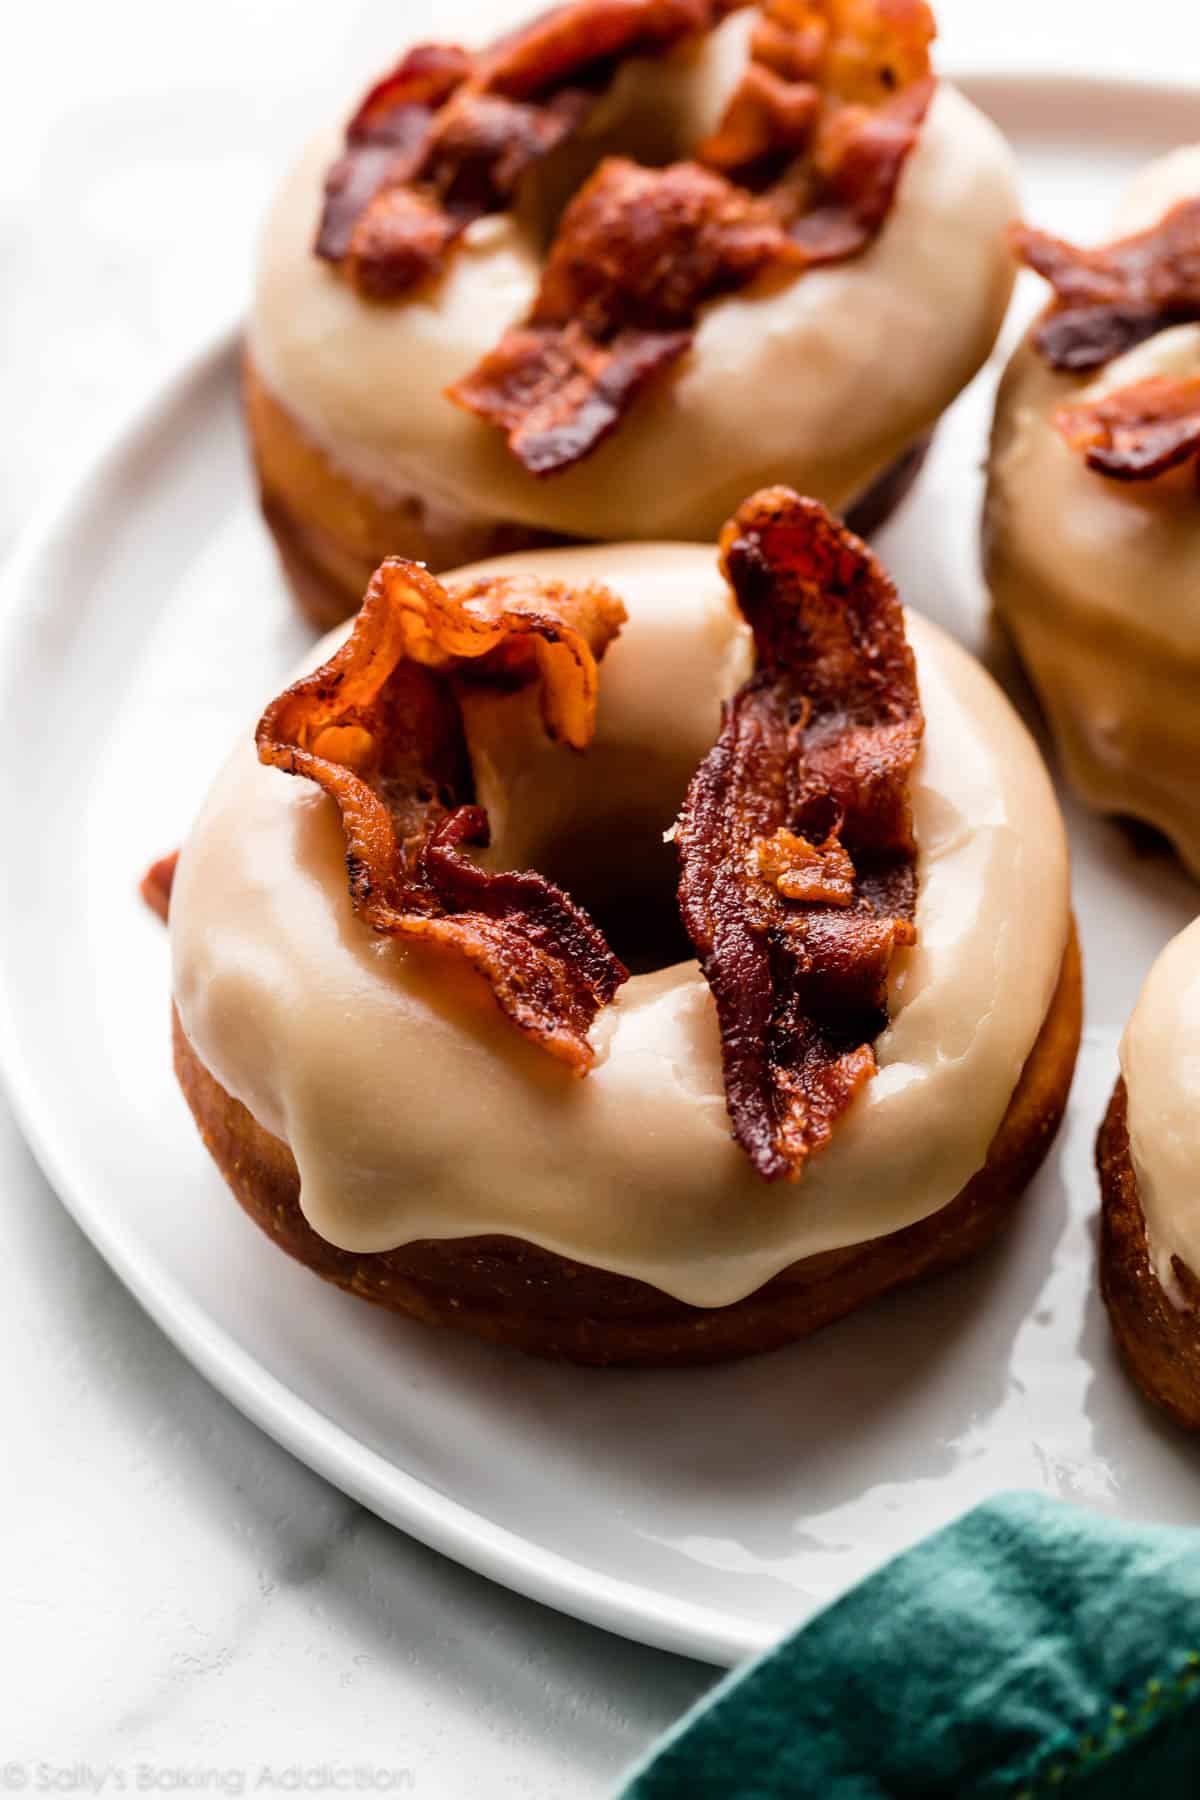
Using a super soft and simple yeasted dough, these homemade maple bacon doughnuts are just like a bakery’s version: unapologetically rich and perfectly satisfying! The sweet maple icing is creamy, but sets quickly and the bacon is wonderfully salty. Homemade doughnuts are a lot easier than you think, so let me walk you through the process with success tips, step-by-step photos, and a helpful video tutorial.
Remember when I taught you how to make homemade glazed doughnuts? I said they were the best homemade doughnuts I’d ever had.
Eating my words right now. And more maple bacon doughnuts, too.
Why You’ll Love These Maple Bacon Doughnuts
- Straightforward homemade dough
- Soft, bakery-style taste and flavor
- Perfect at-home weekend project
- Most of the time spent is waiting for the dough to rise and oil to heat!
- Sweet maple glaze & salty bacon
Homemade Doughnut Dough
We’re using the same yeasted dough as my homemade glazed doughnuts and it’s pretty similar to my homemade berry fritters and monkey bread, too. You need a few very basic ingredients and here’s why each are imperative:
- Milk: Liquid activates the yeast. Whole milk is a must for a tender dough.
- Yeast: You can use active dry yeast or instant yeast. If using an instant yeast, your rise time will be a little shorter. You need 1 Tablespoon of yeast which is a little more than 1 standard packet. Review my Baking with Yeast Guide before getting started if you need a little refresher.
- Sugar: Sugar sweetens the doughnuts and feeds the yeast.
- Eggs: Eggs provide structure and flavor.
- Butter: Melted butter promises enhanced flavor.
- Salt & Vanilla Extract: Both add flavor.
- Nutmeg: A little nutmeg is the secret ingredient to that cozy, comforting bakery taste. I never make yeasted doughnuts without it!
- Flour: All-purpose flour is the dough’s structure. You’ll be tempted to add more and more flour as you mix the dough, but don’t. You want a very soft, pillowy dough for soft, pillowy doughnuts. The dough can still be slightly sticky.
Baking with Yeast Guide
Reference this Baking with Yeast Guide whenever you work with baker’s yeast. I include practical answers to all of your common yeast questions.
Video Tutorial

Overview: How to Make Homemade Maple Bacon Doughnuts
Homemade doughnuts seem a little intimidating, but I guarantee you can handle this. Let me walk you through the process. The full written recipe is below.
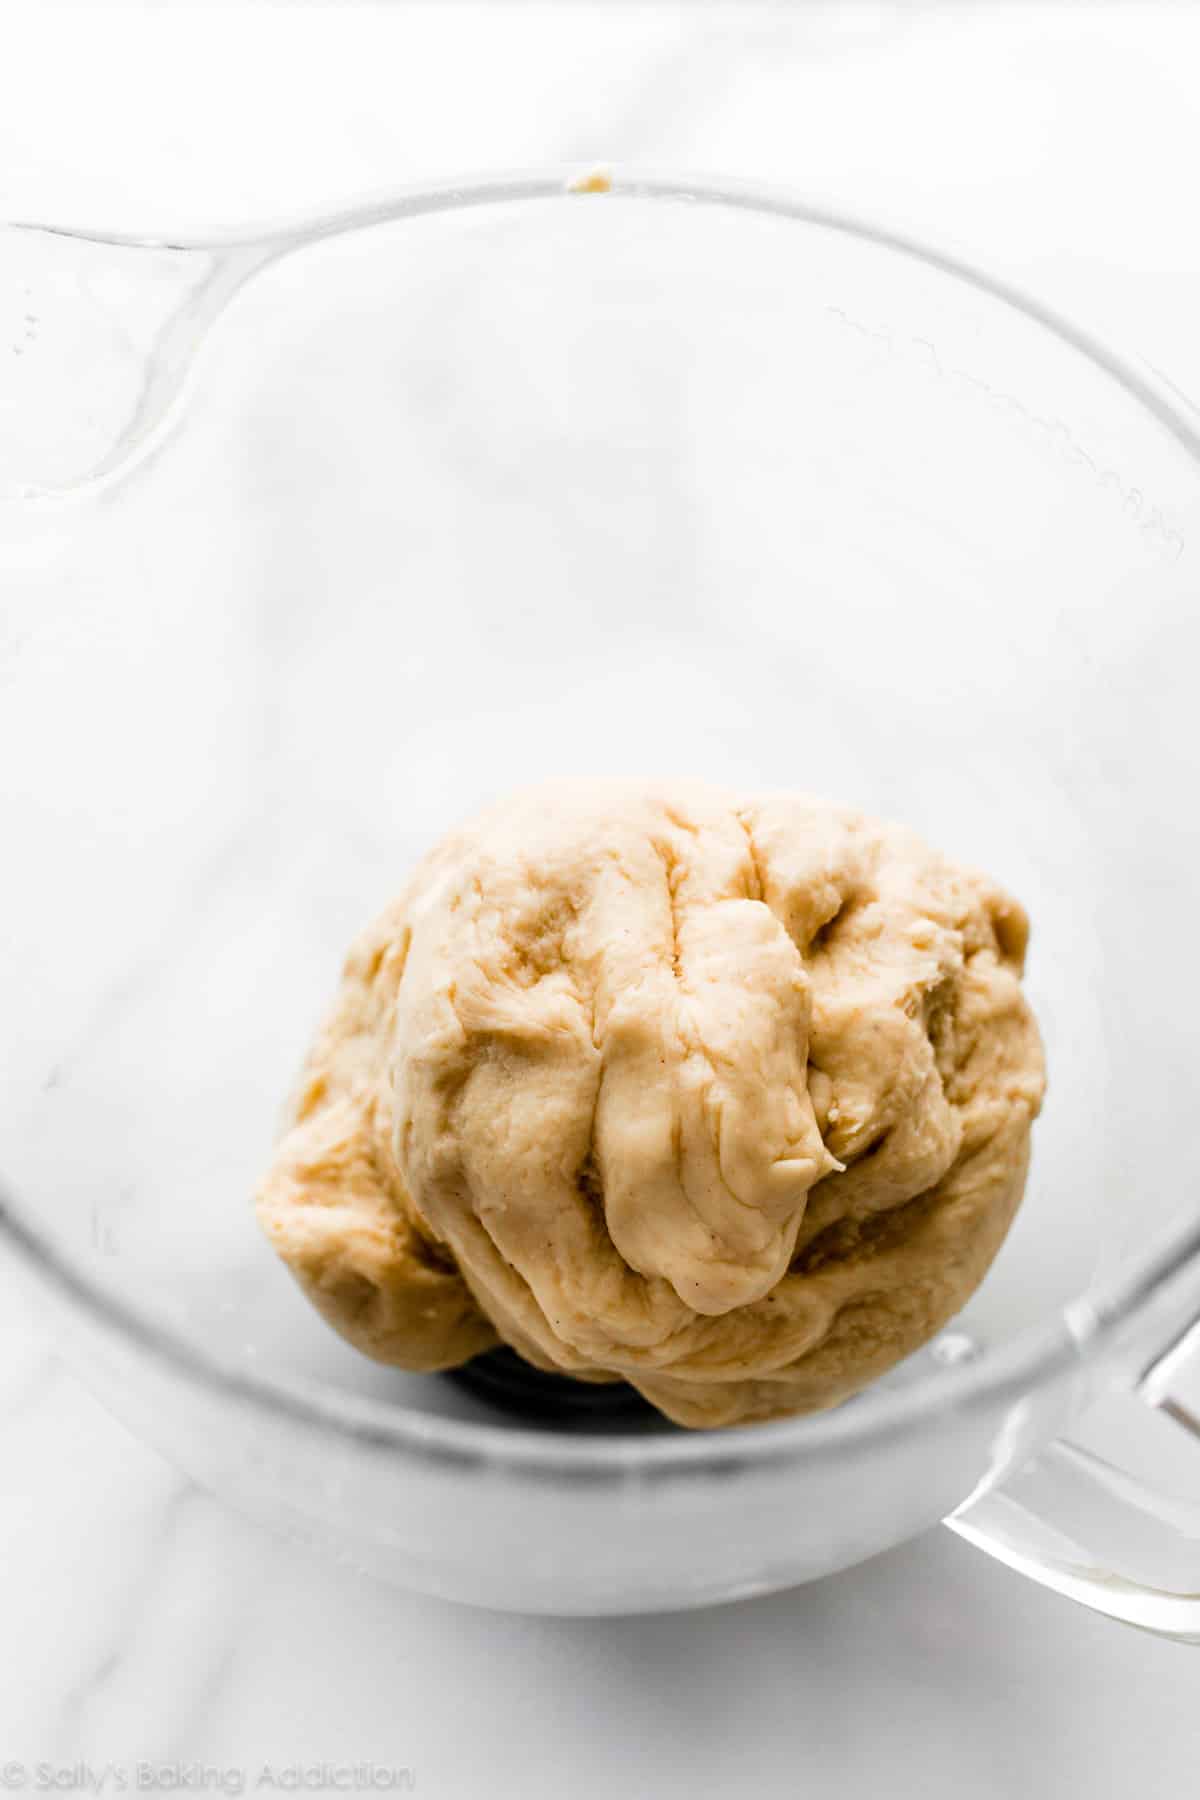
- Prepare the dough. The dough comes together with a mixer or you can mix it by hand. After the dough comes together, knead it for 5-7 minutes. See my How to Knead Dough video tutorial if you need extra help with this step.
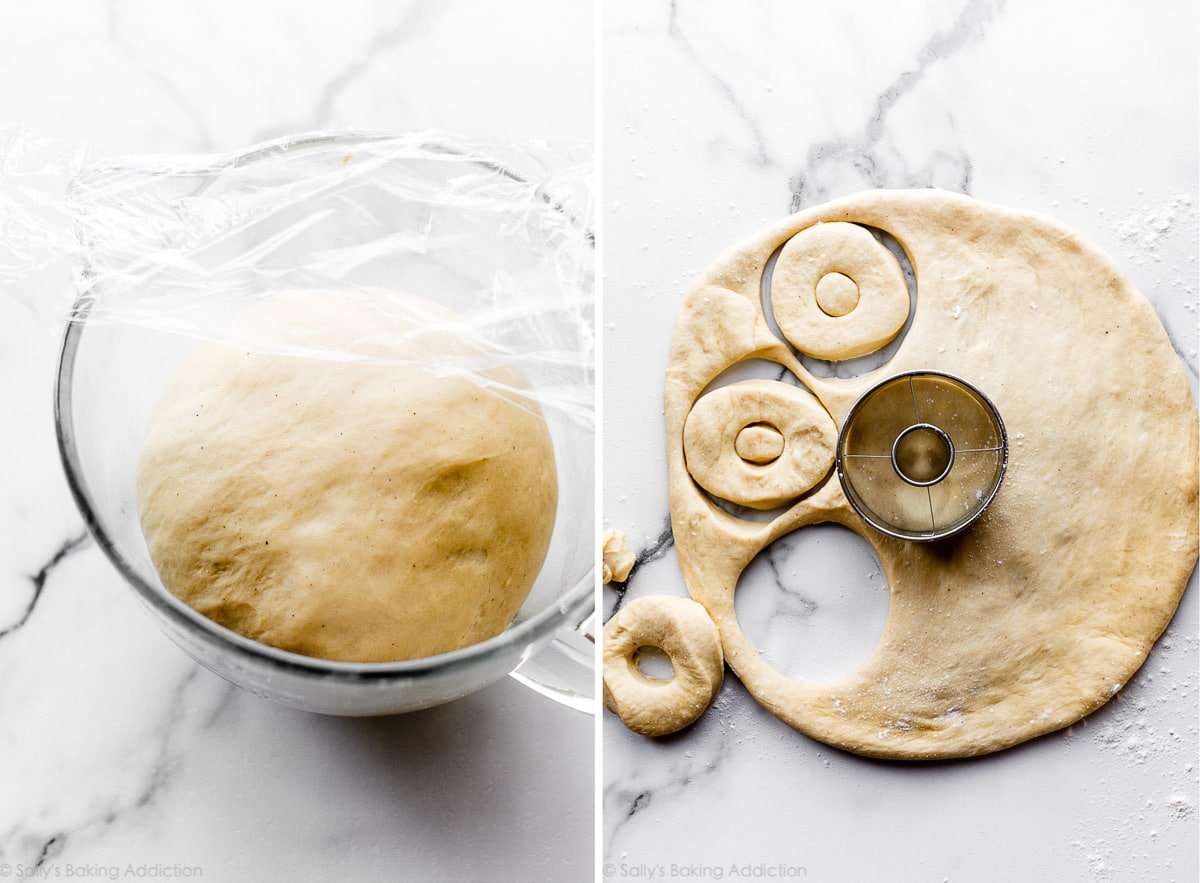
- Let the dough rise. It takes about 1.5-2 hours for it to double in size.
- Punch down the dough to release the air.
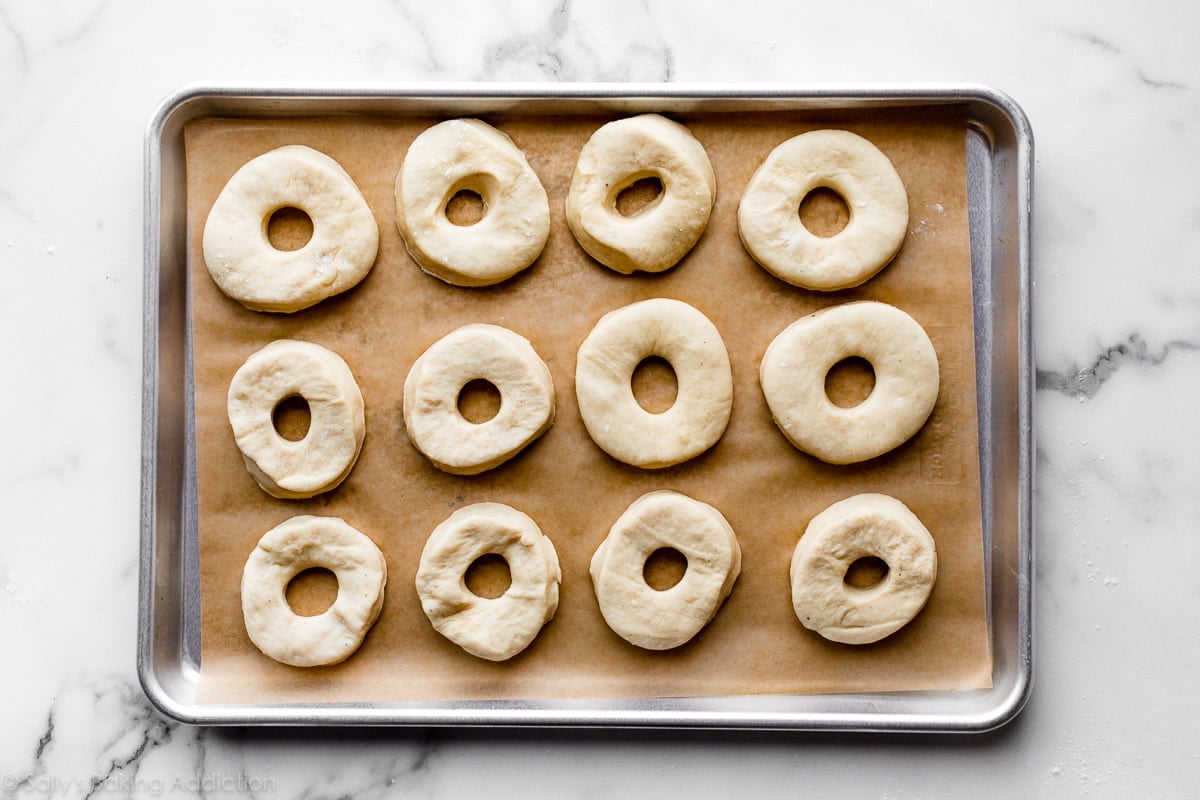
- Roll & cut into doughnuts. Roll the dough out to 1/2 inch thick. Cut the doughnuts using a 3-3.5 inch doughnut cutter. Line a couple baking sheets with parchment paper or a silicone baking mat. Place doughnuts (and doughnut holes, if you want to make those too!) onto the lined baking sheet, then lightly cover and allow to rest as you prepare the oil. Remember these are fried doughnuts. Do not bake this doughnut dough.
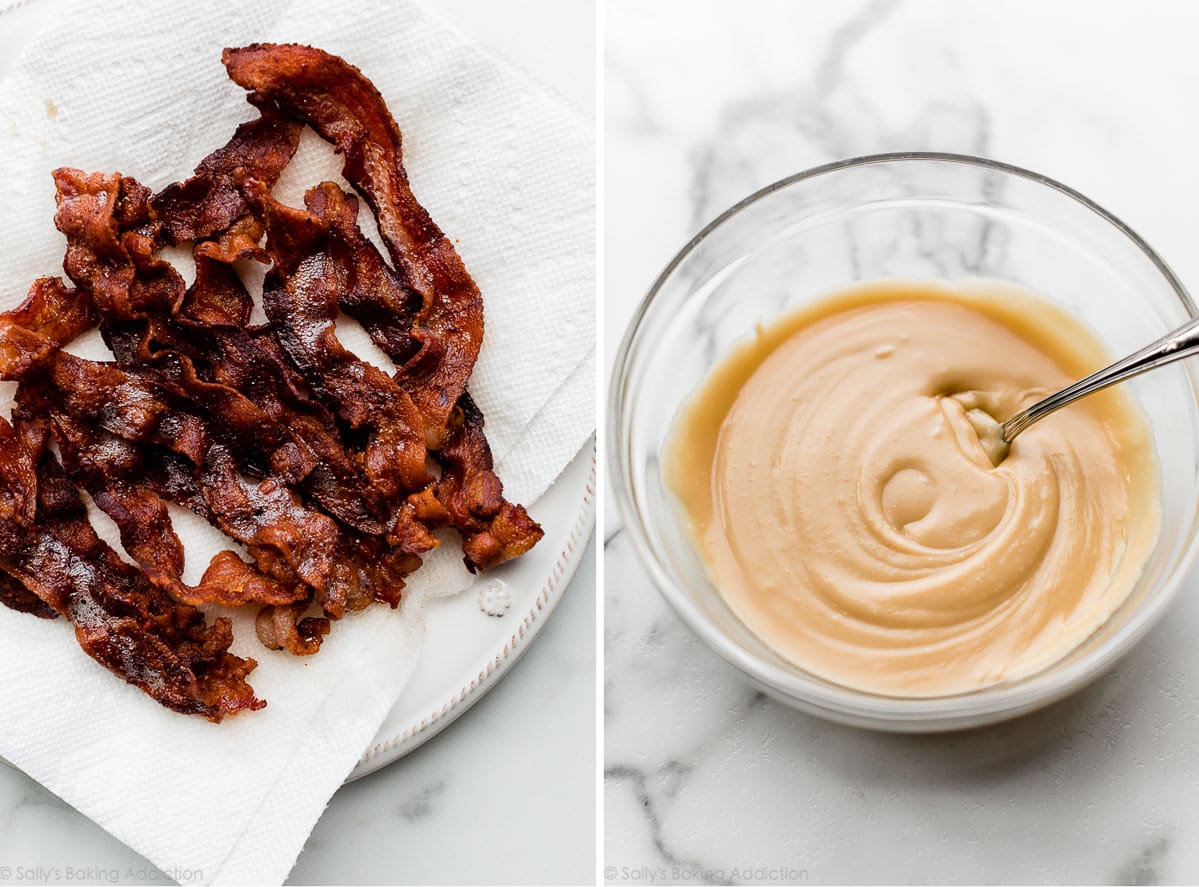
- Prepare the oil. Using a heavy-duty pot and an oil thermometer, heat the oil to 375°F (191°C). Place a cooling rack over another baking sheet. As the oil heats up, I usually fry the bacon.
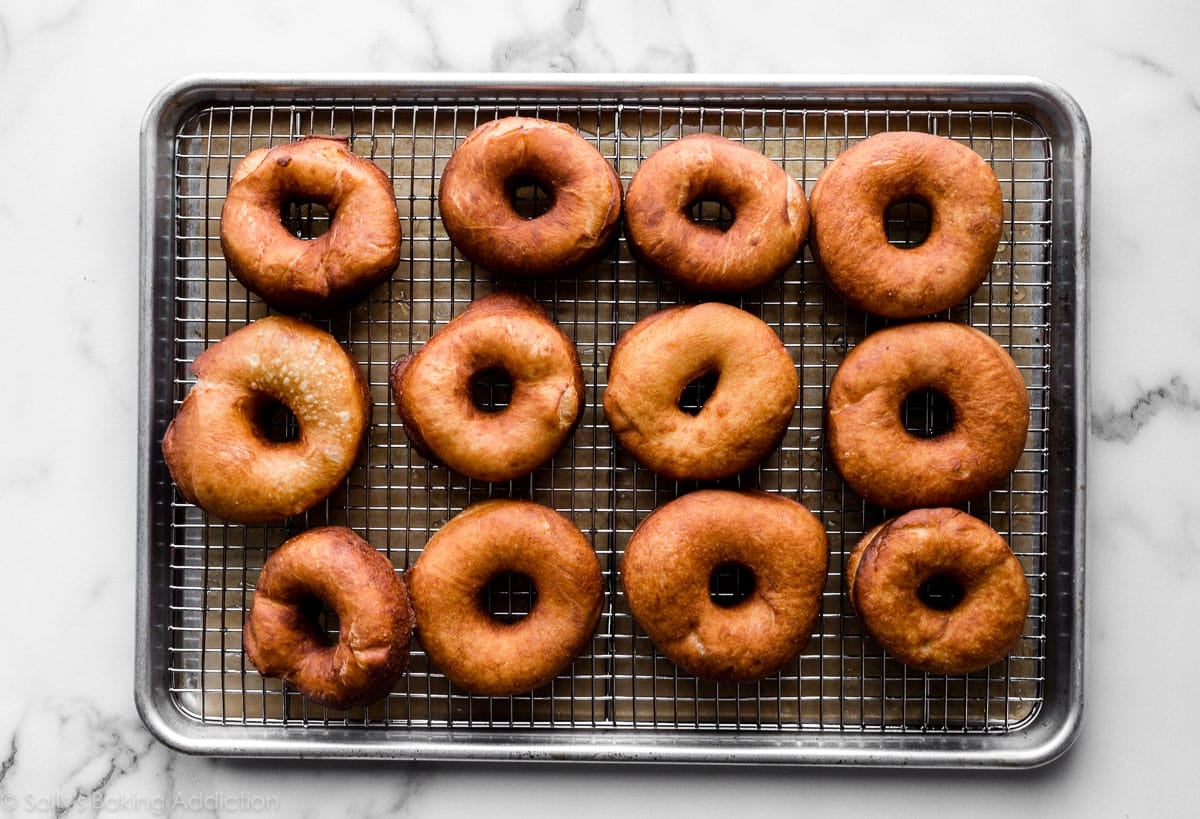
- Fry the doughnuts. Working with 2-3 doughnuts at a time, cook for 1 minute on each side. Remove from the oil and place onto the cooling rack. Once you’ve mastered the frying here, try your hand at homemade funnel cakes next!
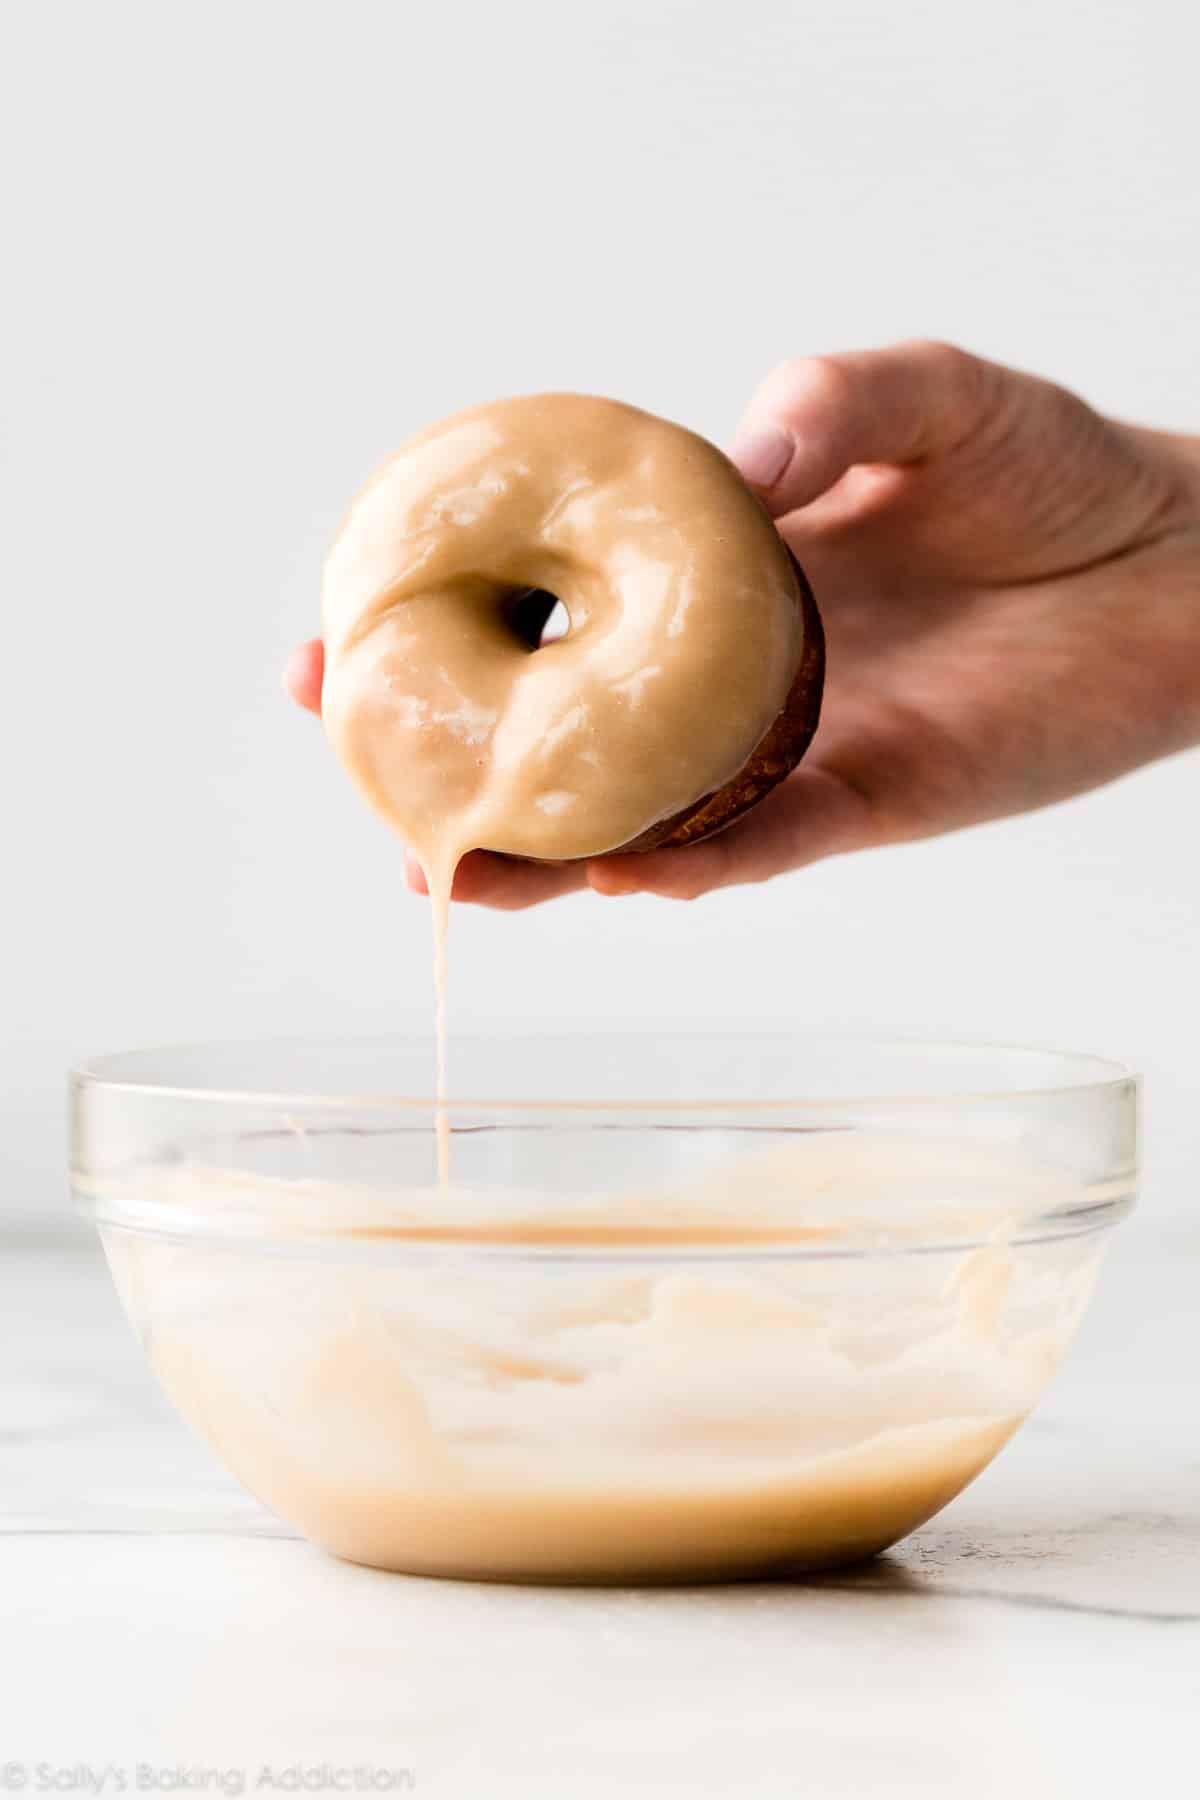
- Make the maple icing. It comes together quickly. Dip each warm doughnut into the icing, then top with cooked bacon.
Some step-by-step photos to help guide you:
Maple Icing
We’re using a slightly scaled up version of the maple icing from my maple brown sugar cookies. Heat butter and pure maple syrup together, then add the confectioners’ sugar and a little salt. To avoid any lumps, sift the confectioners’ sugar before measuring. If you can find it, add a splash of maple extract too. You can usually find it in the baking aisle with the vanilla extract.
The best part about this maple icing, besides its flavor, is that it eventually sets. You’ll also love it on regular cinnamon rolls or apple cinnamon rolls, crumb cake, and cheesecake carrot Bundt cake. We love making these for special brunches and they’re always fun for Mother’s Day or as part of your Father’s Day recipes, too!
Looking for other flavors? Try my strawberry, chocolate, and vanilla donut frostings.

What About Baked Donuts?
Here are my baked maple glazed donuts. Feel free to add bacon on top!
Print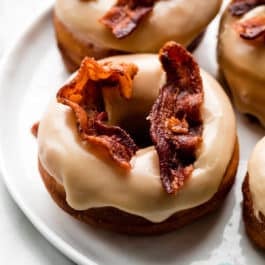
Homemade Maple Bacon Doughnuts
- Prep Time: 2 hours
- Cook Time: 10 minutes
- Total Time: 2 hours, 10 minutes
- Yield: 12 donuts and 12 holes
- Category: Breakfast
- Method: Frying
- Cuisine: American
Description
Using a super soft and simple yeasted dough, these homemade maple bacon doughnuts are just like a bakery’s version. For best success, review the blog post, video tutorial, and recipe notes before beginning.
Ingredients
- 1 cup (240ml) whole milk, warmed to about 110°F (43°C)*
- 1 Tablespoon active dry yeast*
- 1/3 cup (65g) granulated sugar
- 2 large eggs
- 6 Tablespoons (85g) unsalted butter, melted and slightly cooled
- 1 teaspoon pure vanilla extract
- 1/4 teaspoon ground nutmeg
- 1/2 teaspoon salt
- 4 cups (500g) all-purpose flour (spooned & leveled), plus more as needed
- 1 – 2 quarts vegetable oil*
Topping
- 3 Tablespoons (43g) unsalted butter
- 1/2 cup (120ml) pure maple syrup
- 1 and 3/4 cups (195g) sifted confectioners’ sugar*
- 1/8 teaspoon salt
- 1/4 teaspoon maple extract (optional)
- 12 slices cooked bacon, cut in half
Instructions
- Prepare the dough: Whisk the warm milk, yeast, and sugar together in the bowl of your stand mixer fitted with a dough hook or paddle attachment. Cover and allow to sit for 5 minutes. The mixture should be a little frothy on top after 5 minutes. If not, start over with new yeast.
- Add the eggs, butter, vanilla, nutmeg, salt, and 2 cups (245g) flour. Beat on low speed for 1 minute. Scrape down the sides of the bowl with a silicone spatula as needed. Add remaining flour and beat on medium speed until the dough comes together and pulls away from the sides of the bowl, about 2 minutes. If needed, add more flour, 1 Tablespoon at a time, until the dough pulls away from the sides of the bowl. Don’t add too much flour, though. You want a slightly sticky dough. *If you do not own a mixer, you can mix this dough with a large wooden spoon or silicone spatula. It will take a bit of arm muscle!*
- Knead the dough: Keep the dough in the mixer and beat for an additional 5-7 full minutes, or knead by hand on a lightly floured surface for 5-7 full minutes. (If you’re new to bread-baking, my How to Knead Dough video tutorial can help here.) If the dough becomes too sticky during the kneading process, sprinkle 1 teaspoon of flour at a time on the dough or on the work surface/in the bowl to make a soft, slightly tacky dough. Do not add more flour than you need because you do not want a dry dough. After kneading, the dough should still feel a little soft. Poke it with your finger—if it slowly bounces back, your dough is ready to rise. You can also do a “windowpane test” to see if your dough has been kneaded long enough: tear off a small (roughly golfball-size) piece of dough and gently stretch it out until it’s thin enough for light to pass through it. Hold it up to a window or light. Does light pass through the stretched dough without the dough tearing first? If so, your dough has been kneaded long enough and is ready to rise. If not, keep kneading until it passes the windowpane test.
- Let Dough Rise: Lightly grease a large bowl with oil or nonstick spray. Place the dough in the bowl, turning it to coat all sides in the oil. Cover the bowl with aluminum foil, plastic wrap, or a clean kitchen towel. Allow the dough to rise in a relatively warm environment for 1.5-2 hours or until double in size. (For a tiny reduction in rise time, see my answer to Where Should Dough Rise? in my Baking with Yeast Guide.)
- Shape Doughnuts: When the dough is ready, punch it down to release the air. Remove dough from the bowl and turn it out onto a lightly floured surface. If needed, punch down again to release any more air bubbles. Using a rolling pin, roll the dough out until it is 1/2 inch thick. Using a 3-3.5 inch doughnut cutter, cut into 12 doughnuts. If you can’t quite get 12, re-roll the scraps and cut more. (*If you don’t have a doughnut cutter, you can use 1 large + 1 smaller circle cookie cutter. Large should be about 3 and 1/2 inches.)
- Line 1 or 2 baking sheets with parchment paper or silicone baking mats. Place doughnuts and doughnut holes on each. (Feel free to discard doughnut holes if you don’t want to make them.) Loosely cover and allow to rest as you heat the oil. They will rise a bit as they rest. Place a cooling rack over another baking sheet.
- Pour oil into a large heavy-duty pot set over medium heat. Heat oil to 375°F (191°C). Add 2-3 doughnuts at a time and cook for 1 minute on each side. Carefully remove with a metal spatula or metal slotted spoon. Wear kitchen gloves if oil is splashing. Place fried doughnuts onto prepared cooling rack. Repeat with remaining doughnuts, then turn off heat.* (See note for doughnut holes.)
- Make the icing: In a small saucepan over low heat, melt the butter and maple syrup together, whisking occasionally. Once the butter has melted, remove from heat and whisk in the sifted confectioners’ sugar, salt, and maple extract. Dip each warm doughnut into the icing. The icing quickly thickens, so feel free to place it back over heat as you dip the doughnuts. Place dipped doughnuts back onto cooling rack as excess icing drips down. Gently press bacon slices on top of each. (You can also crumble/chop up the bacon for topping.) After about 30 minutes, the glaze will set + harden.
- Doughnuts are best enjoyed the same day. You can store in an airtight container at room temperature or in the refrigerator for 1-2 extra days.
Notes
- Freezing Instructions: Prepare recipe through step 5. Freeze shaped doughnuts for up to 3 months. On the day you serve them, let the doughnuts thaw and rest at room temperature for about 4-5 hours. Fry as directed. You can also freeze the fried doughnuts (unglazed). Allow them to cool completely, then freeze for up to 3 months. Thaw in the refrigerator or at room temperature, then reheat as desired (microwave is great) and top with icing and bacon.
- Overnight Instructions: Complete dough through step 3. Instead of allowing to rise in a warm environment in step 4, place the covered dough into the refrigerator overnight (8-12 hours). The next morning, remove from the refrigerator and allow to rise in a warm environment until doubled. The dough will lightly rise in the refrigerator overnight, so the rise the next morning won’t be too long. After rising, continue with step 5.
- Special Tools (affiliate links): Electric Stand Mixer | Large Heavy Bottomed Pot or Dutch Oven | High-Heat Thermometer (I love this thermometer, too) | Doughnut Cutter | Baking Sheets | Silicone Baking Mats or Parchment Paper | Cooling Rack | Small Saucepan | Whisk
- Doughnut Holes: Add holes to hot oil and fry until golden, about 30 seconds, on each side.
- Milk: Whole milk is a must for the most tender dough—or you can try buttermilk. Lower fat or nondairy milks work in a pinch, but the doughnuts aren’t as flavorful or rich.
- Yeast: If using an instant yeast, your rise time will be a little shorter. Reference my Baking with Yeast Guide for answers to common yeast FAQs.
- Oil: The amount of oil really depends on how wide or tall your pot is. You want oil to fill about 1/3 of the pot. I use a little more than 1 quart for my 4 and 1/2 quart Dutch oven.
- Leftover Oil: Do not pour used oil down the sink drain. Allow to cool, then pour into an empty container and discard in the trash or reuse it.
- Dough adapted from Mark Bittman and Top Pot Doughnuts


Reader Comments and Reviews
Hey Sally! Thanks so much for all your hard work. I’ve been following you for a decade now! I’m currently looking for a recipe to make yeast baked doughnuts. I’m wondering if recipes like this one, which calls for deep frying, would work the same. If not, do you have any recommendations?
Hi Tati! Recipes that call for frying, like this one, don’t work well for baking. We haven’t developed a recipe for yeasted baked doughnuts yet, but let us know if you find one you love! We would look for one with good reviews.
Can I use Organic Sunflower Oil instead of Vegetable Oil?
Hi Lazurus, we haven’t tested sunflower oil for doughnuts. Have you fried with it before? We’re unsure of how it would preform.
I have not. Have you found online whether it would burn at such temperatures before?
Also, whether it they get fried in oil or baked in the oven, do any of you have a donut recipe that uses Maple Extract, and Active Dry Yeast?
Where can I store the maple glaze by itself, and for how long can I store it.
Hi Lazurus, you can store the glaze in the refrigerator for a few days.
Ok, but can I store it in the freezer? I’m really just wondering if the fridge is the place where I can store it the longest.
You should be able to freeze the icing. We recommend re-heating after thawing to bring the icing back together again.
Thanks for the help.
Hi Sally! Can I use cookie cutters to make fun shapes? do you have any tricks to prevent the donuts from becoming super dark brown? I am not the best at frying!
Hi Claire, This dough won’t hold a crisp shape of a detailed cookie cutter but you can certainly try it. When frying be sure to use an thermometer to help keep your oil at the correct temperature, that should help!
Loved this recipe so much! It’s amazing! If you follow the steps and are patient, the end result is simply chef’s kiss. I’ve been doing Sally’s recipes for a while now and they have not failed me yet!
Do you have a recipe for a baked Doughnut Recipe where I cook the doughnuts in the oven?
Hi Neil, you might like this recipe for baked maple donuts!
Thank you so much – such a speedy reply !!!
This was SO GOOD and truly if you’re patient and follow each step with intention, you’ll have amazing donuts! I cut mine into bar shapes because I don’t have round cutters, cooking time was the same. My only recommendation, for me personally, would be maybe double the glaze recipe, or at least x1.5. I was a bit short, but, I do think it’s because I let the glaze set up too much toward the end of glazing. The extra would have been nice though for the holes I made with the scraps. Delicious!
Hi Sally! Can I use bacon lard instead of butter to drive home the bacon flavor of donut? Or maybe use both???
Hi Megan! We haven’t tested bacon lard in the topping, but would love to hear how it goes if you do! We do love the flavor the butter gives, so would maybe try a combination.
Hello! Can I make this recipe into a bar-shaped donut instead? If so, will it require different frying times / thinner dough, etc?
Hi Ellie, we haven’t tested a long john/bar shape doughnut, but imagine that should work fine. We’re unsure of the best frying/bake times. Let us know if you do any experimenting!
They taste best when the flavours in the dough are allowed to develop overnight before frying. It’s worth the wait. I also added more salt, like a full teaspoon instead of a half teaspoon. Thanks. Great recipe
Making homemade donuts sounds intimidating, but the video and step-by-step instructions make them super easy to make. They’re so light, fluffy, and delicious. They were the perfect Father’s day treat fir my husband…i think he ate half of the batch!
So happy to hear that these are a hit for Father’s Day!
Hi Sally, I don’t know if you’ll see this message or not since it has been about a year from what I can tell since you last responded to a message (on this recipe) but I was wondering what if the glaze recipe would taste any different without the maple extract? I don’t have any maple extract and haven’t been able to find some so I was wondering ehat I would do instead of using the maple extract? Sorry this is long and I hope you aren’t confused at what I’m trying to say/ask. Thanks a lot and I love your recipes!
Hi A.S., you can omit the maple extract if needed with no other changes to the glaze recipe. The extract just gives it a slightly stronger maple flavor, but you’ll still get some maple flavor from the maple syrup. Hope you enjoy the doughnuts!
I recently discovered your recipes and I love them!
My question is because I haven’t got pure maple syrup on hand. Should I use the maple flavored syrup I do have or not at all? I do have maple extract.
Hi Liah, You could try that. Or try using the plain glaze from the original glazed doughnuts recipe instead. You can still top with bacon if desired.