This easy homemade bagels recipe proves that you can make deliciously chewy bagels in your own kitchen with only a few basic ingredients and baking tools!
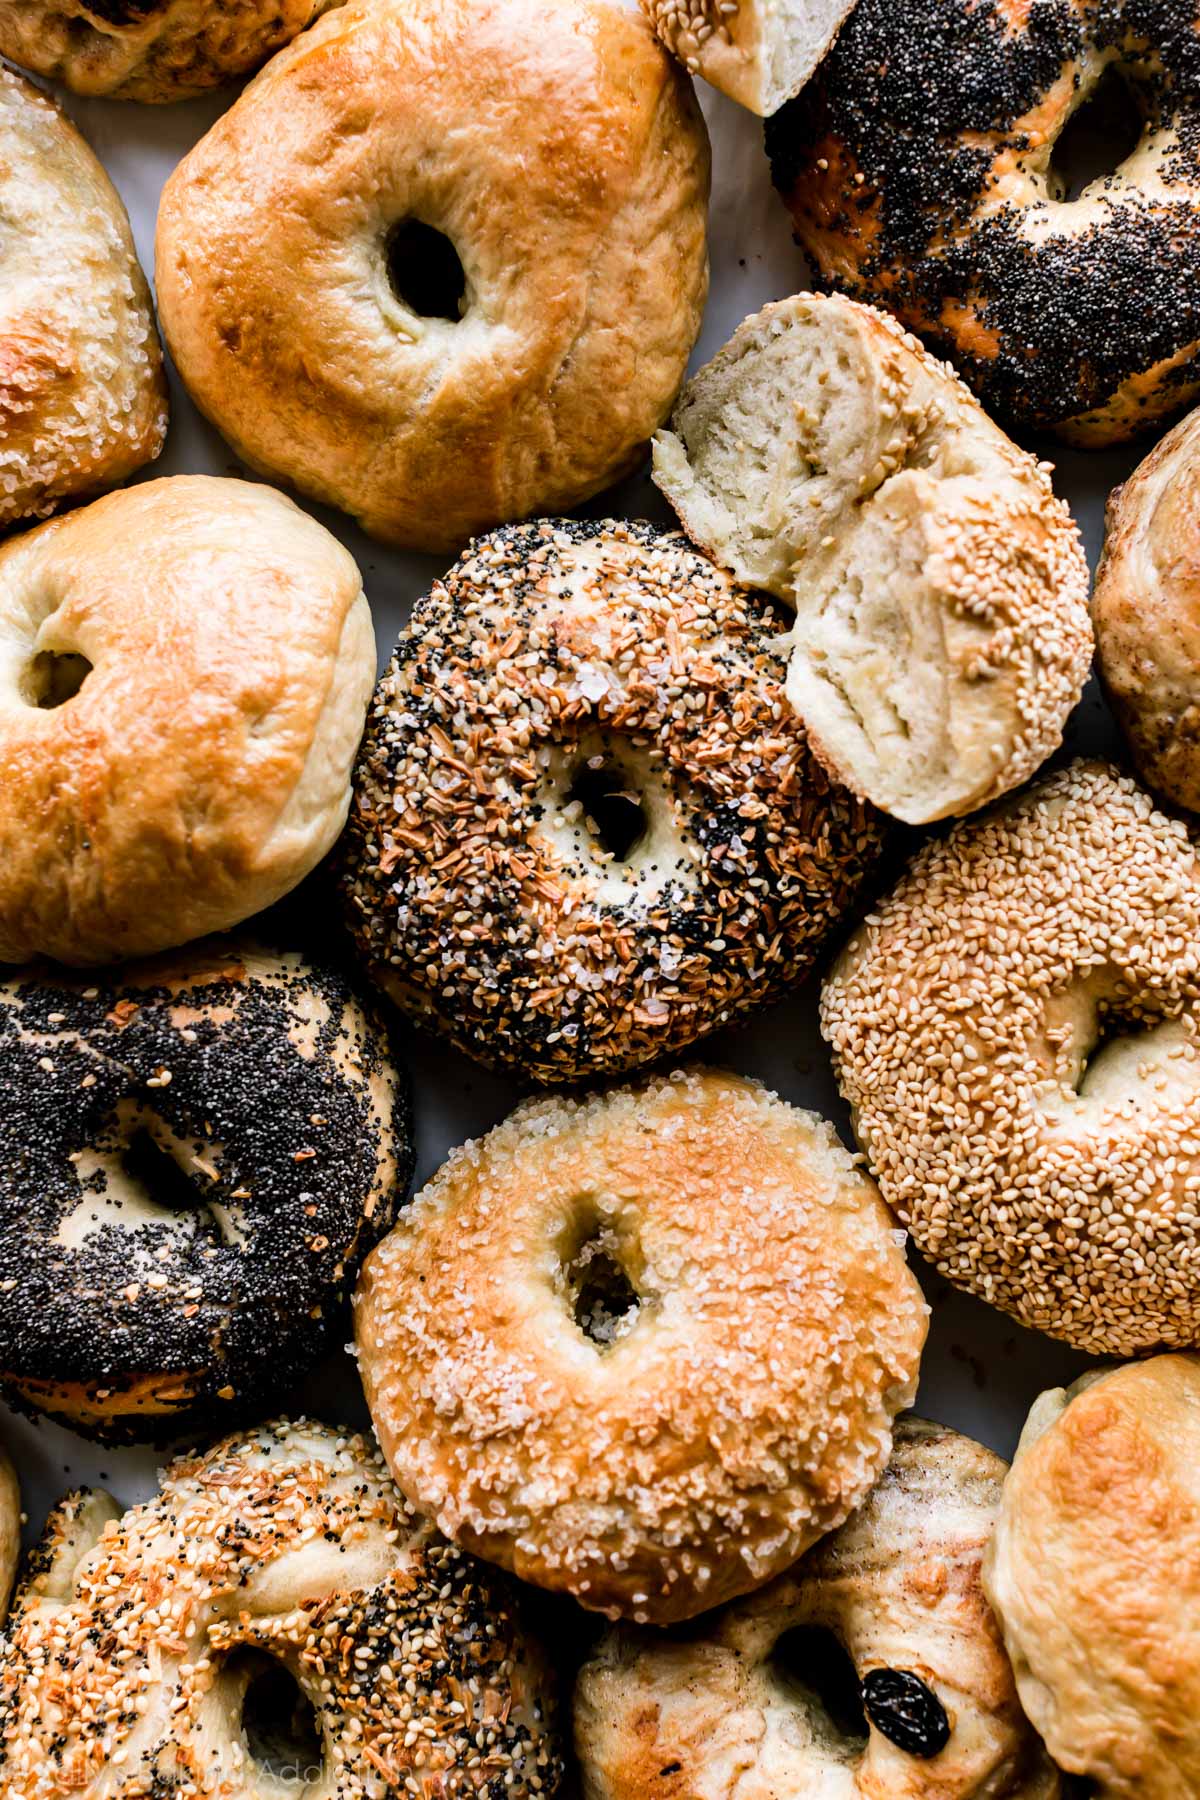
Today I’m teaching you how to make homemade bagels with only a few basic ingredients and kitchen tools. Today you’re going to tackle any fears of yeast and bread baking—and I’m right here to guide you along!
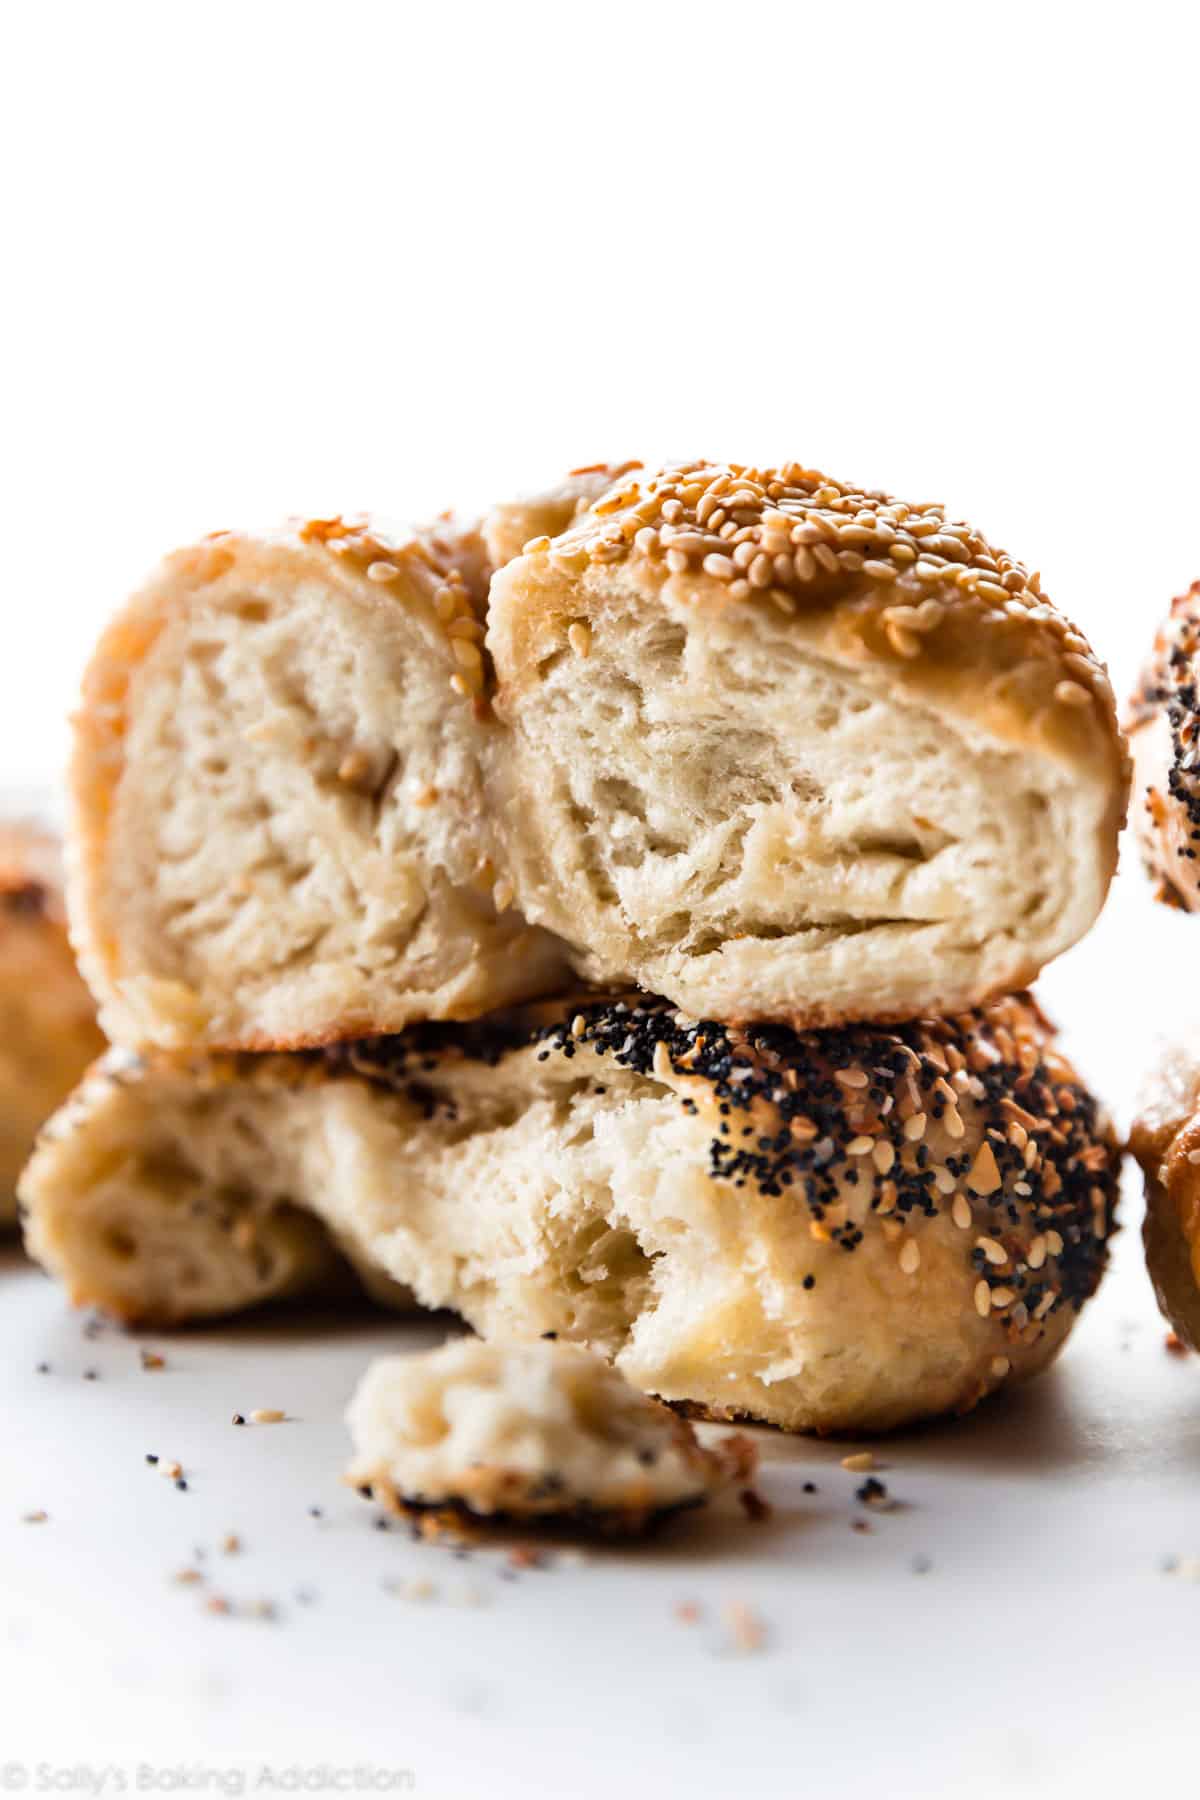
Bagels, crème brûlée, soft pretzels, and French macarons. What do these foods have in common? Each seem really complicated to make at home. That’s why you’ll often find them on your baking bucket list. But secretly, they couldn’t be easier. Homemade bagels taste fresher, are cheaper, and you’ll earn the bragging rights for from-scratch baking. (PS: Each of those recipes has a video tutorial!)
Bagels Require a Lean Dough
The 1st step is to make the bagel dough. This is the same dough you use for everything bagels, a recipe already published on my blog. There’s only 5 ingredients.
- Warm Water: Liquid for the dough.
- Yeast: Allows the dough to rise. I recommend an instant or active dry yeast.
- Bread Flour: A high protein flour is necessary for bagels. We want a dense and chewy texture, not soft and airy like cinnamon rolls. Bread flour is the only solution!
- Brown Sugar: Bakeries use barley malt syrup to sweeten the bagel dough—it can be a little difficult to find, but brown sugar is a fine substitute.
- Salt: Flavor.
Notice how there is no fat? This is called a lean dough. Lean dough is ideal for recipes like focaccia, pizza dough, artisan bread, and cranberry nut no-knead bread. Breads like dinner rolls and homemade breadsticks, and sweet bread, such as cinnamon rolls, include fat for richness and flavor.
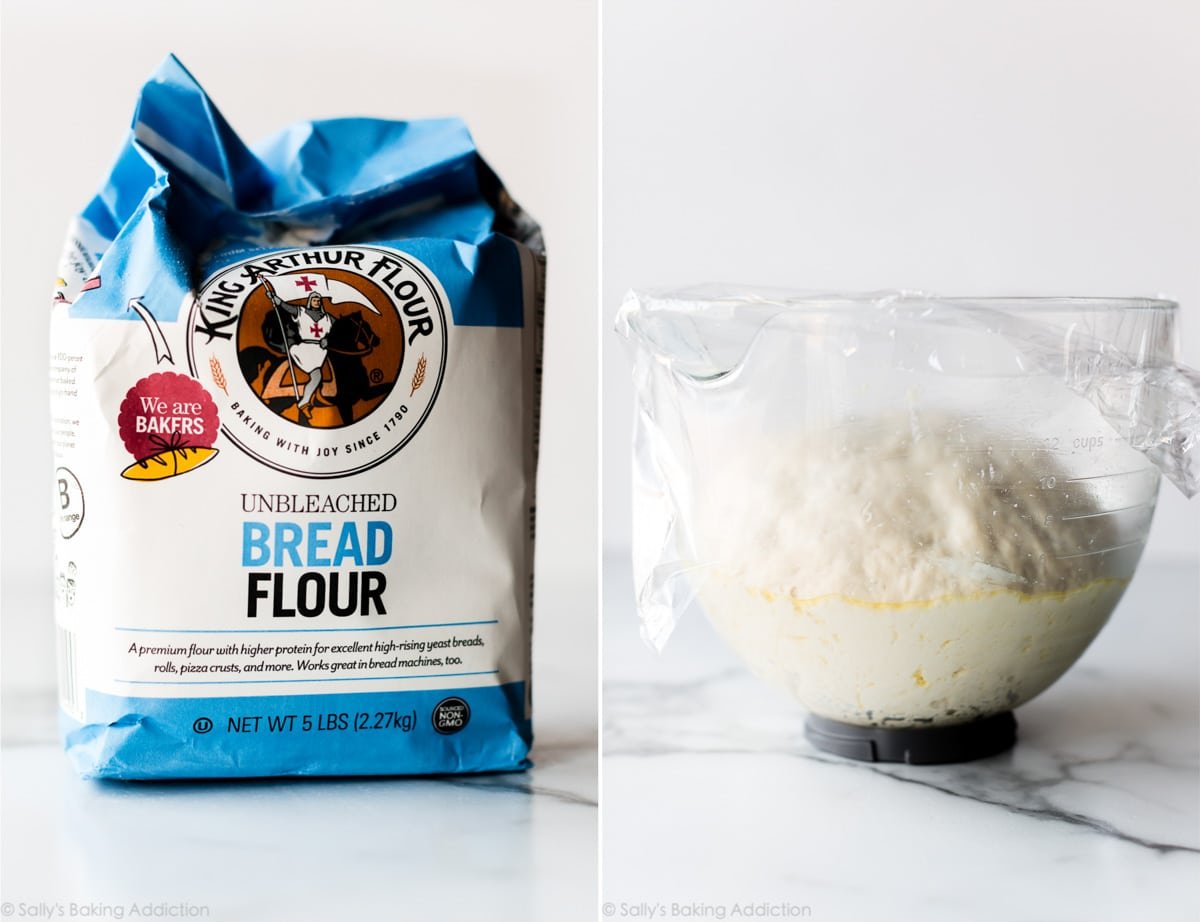
You can prepare and knead the dough with a mixer or by hand. If you’d like a visual of how to knead the dough by hand, you can watch the full video tutorial in my post on How To Knead Dough. After the dough has been kneaded, let it rise for 60-90 minutes. Punch it down, then divide into 8 sections and shape into bagels.
How to Shape Bagels
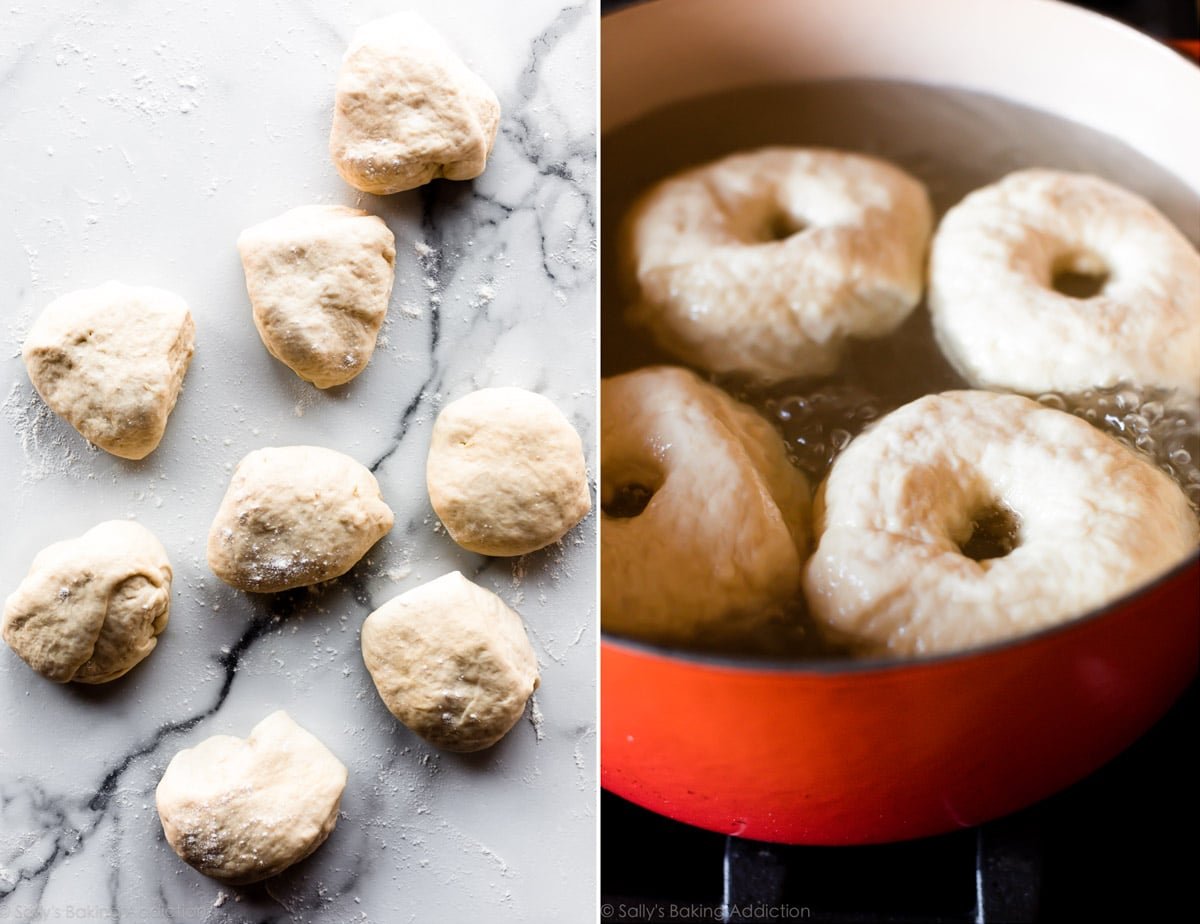
Shaping bagels is easier than it looks. Poke your finger through the center of the ball of dough, then use 2 fingers to widen the hole to about 1.5 – 2 inches. That’s it! I don’t really do anything fancy and the bagels don’t need to be perfect. Mine never are!
Bagel Water Bath
Bagels must cook for 1 minute on each side in a pot of boiling water. This is actually the most important step in the whole recipe. Why?
- Boiling the bagels gives the bagel its beautiful shine. But looks aren’t everything—this shine is actually a result of the dough’s starches gelatinizing which creates a crisp, shiny coating. I learned this from Cooks Illustrated.
- Boiling bagels cooks the outer layer of dough, which guarantees they’ll hold their shape in the oven.
Add honey or barley malt syrup to the water bath. Why? The sugar adds extra caramelization and crisp. Brushing the boiled bagels with egg wash does the same. Don’t skip either!
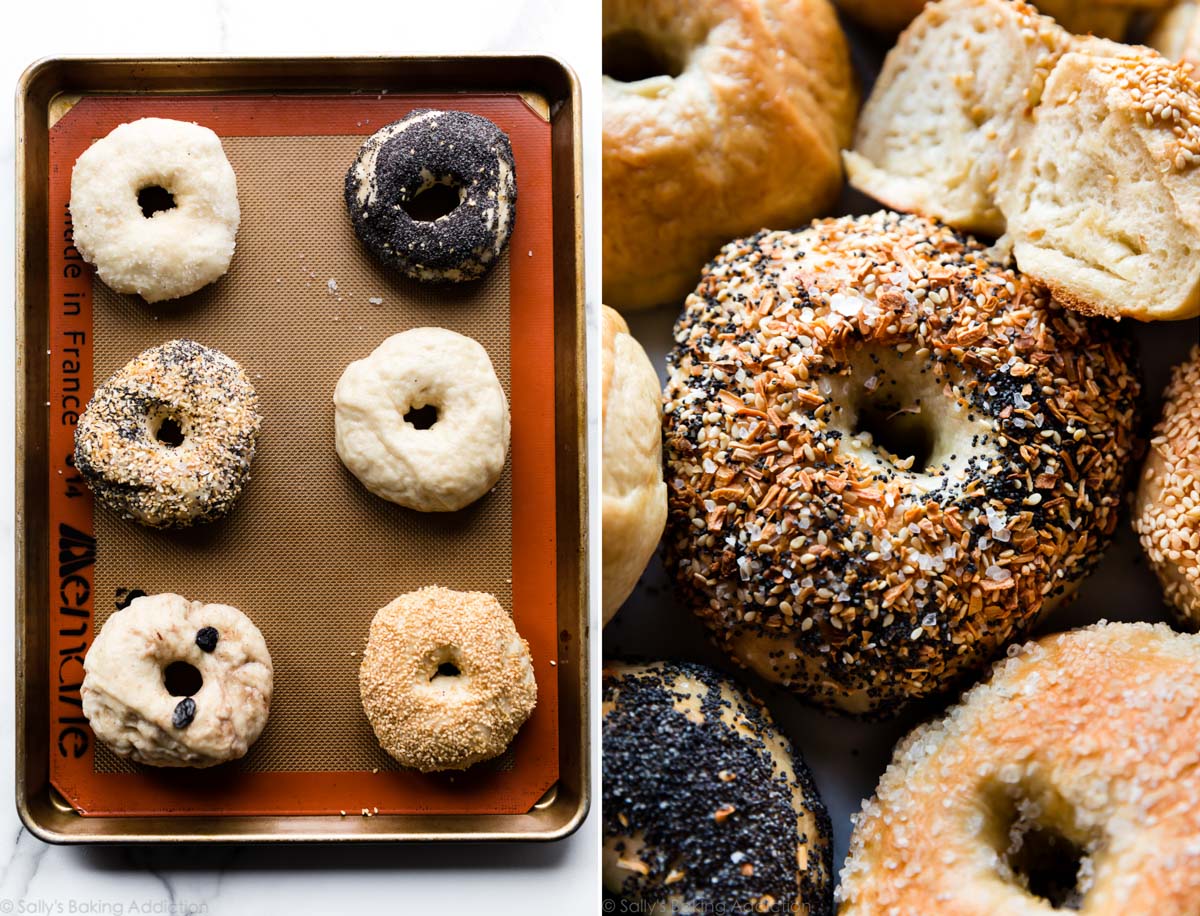
Homemade Bagel Varieties
- Plain Bagels: Follow the recipe below. These are excellent as the base for breakfast casserole.
- Cinnamon Raisin Bagels: Follow my cinnamon raisin bagels recipe.
- Everything Bagels: Follow my everything bagels recipe.
- Sesame Seed Bagels: Use 1/3 cup sesame seeds. After brushing with egg wash in step 9, top with or dunk each bagel into topping. Use more as needed.
- Poppy Seed Bagels: Use 1/3 cup poppy seeds. After brushing with egg wash in step 9, top with or dunk each bagel into topping. Use more as needed.
- Salt Bagels: Use 1/3 cup coarse sea salt. After brushing with egg wash in step 9, top with or dunk each bagel into topping. These are pretty salty, so feel free to go lighter on the salt.
- Cheese Bagels (Asiago, Cheddar, etc): Add 1/2 cup of shredded cheese to the dough when you add the flour. After brushing with egg wash in step 9, sprinkle with extra cheese.
- Cinnamon Crunch Bagels: Add 1 teaspoon of cinnamon to the dough recipe below when you add the salt. Double the cinnamon crunch topping from cinnamon crunch bread. After brushing the bagels with the egg wash in step 9 below, spoon cinnamon crunch topping on each.
Some readers have used this bagel recipe to make whole wheat bagels by replacing half of the bread flour with whole wheat flour. I haven’t tried it, but I do use some whole wheat flour when making homemade English muffins, another breakfast staple!
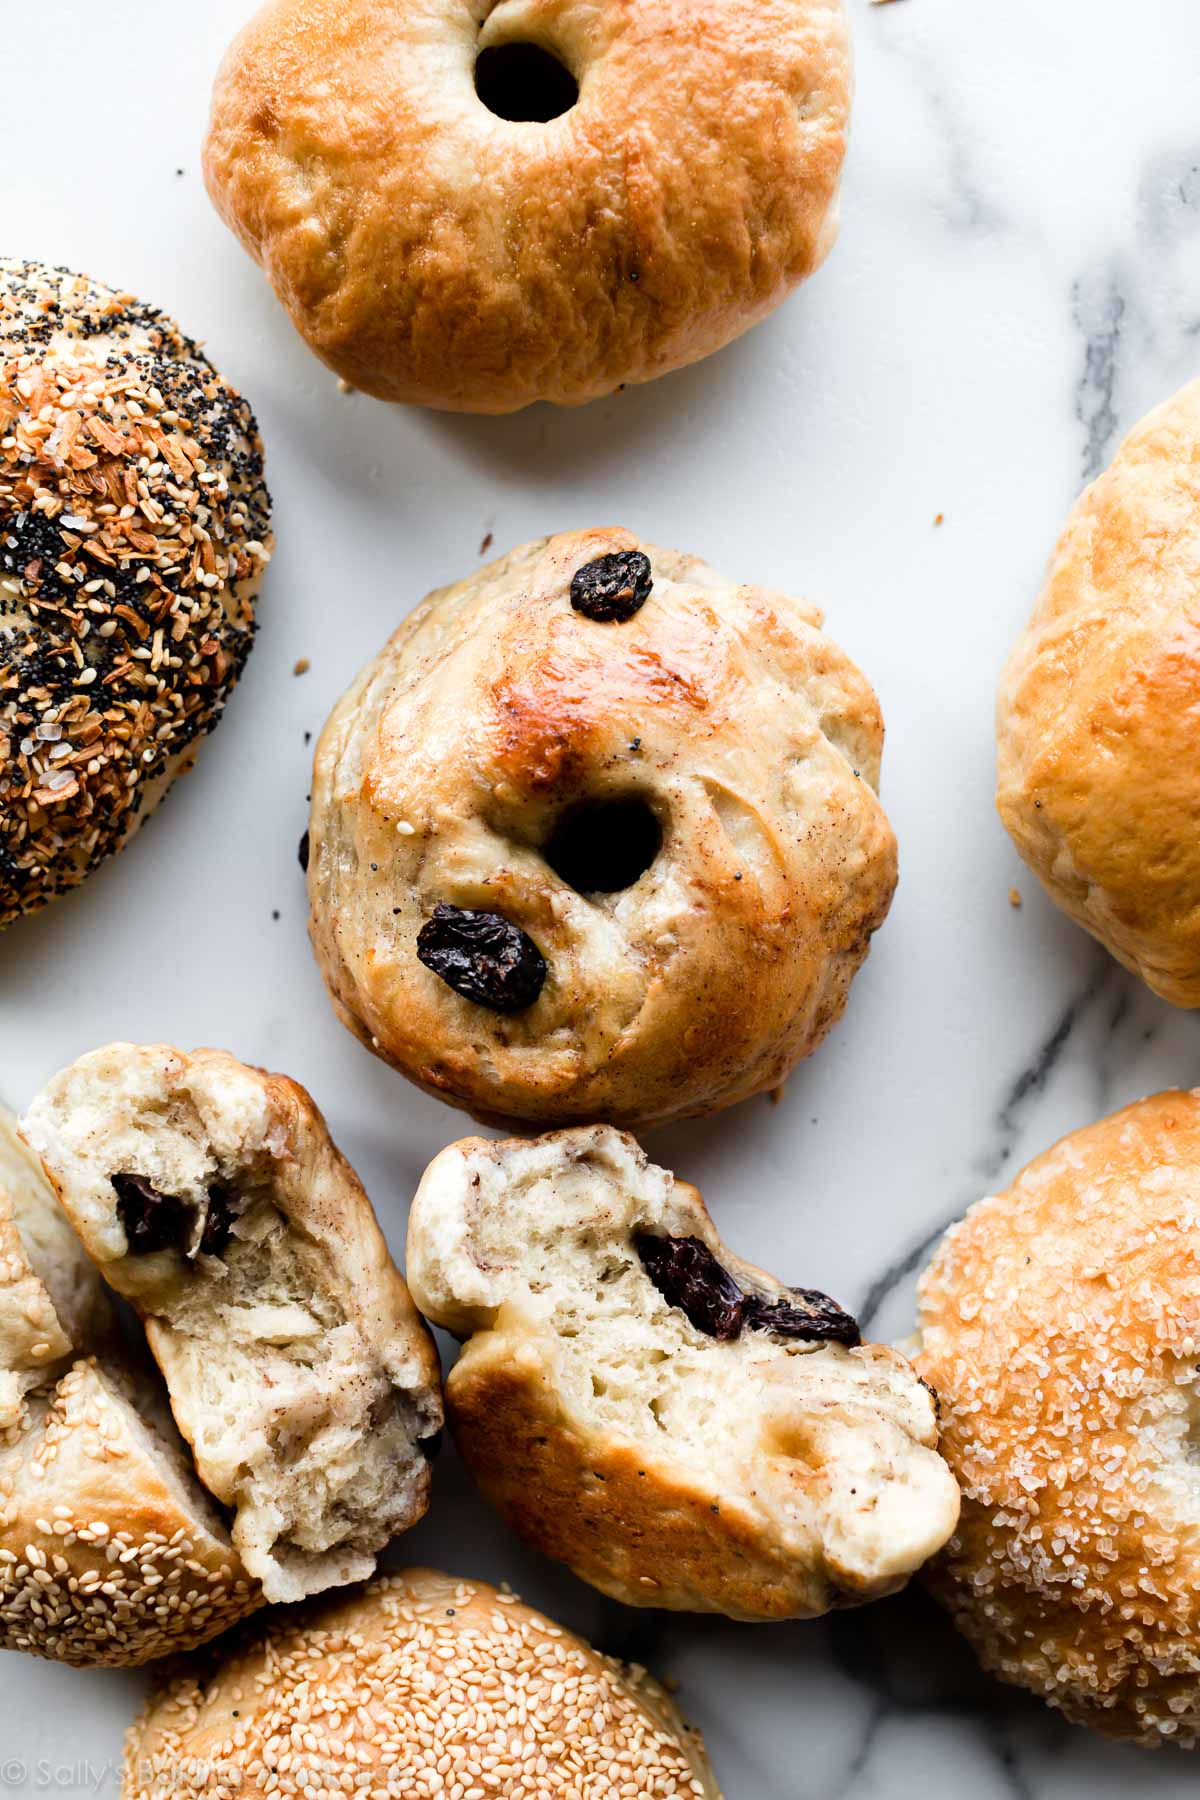
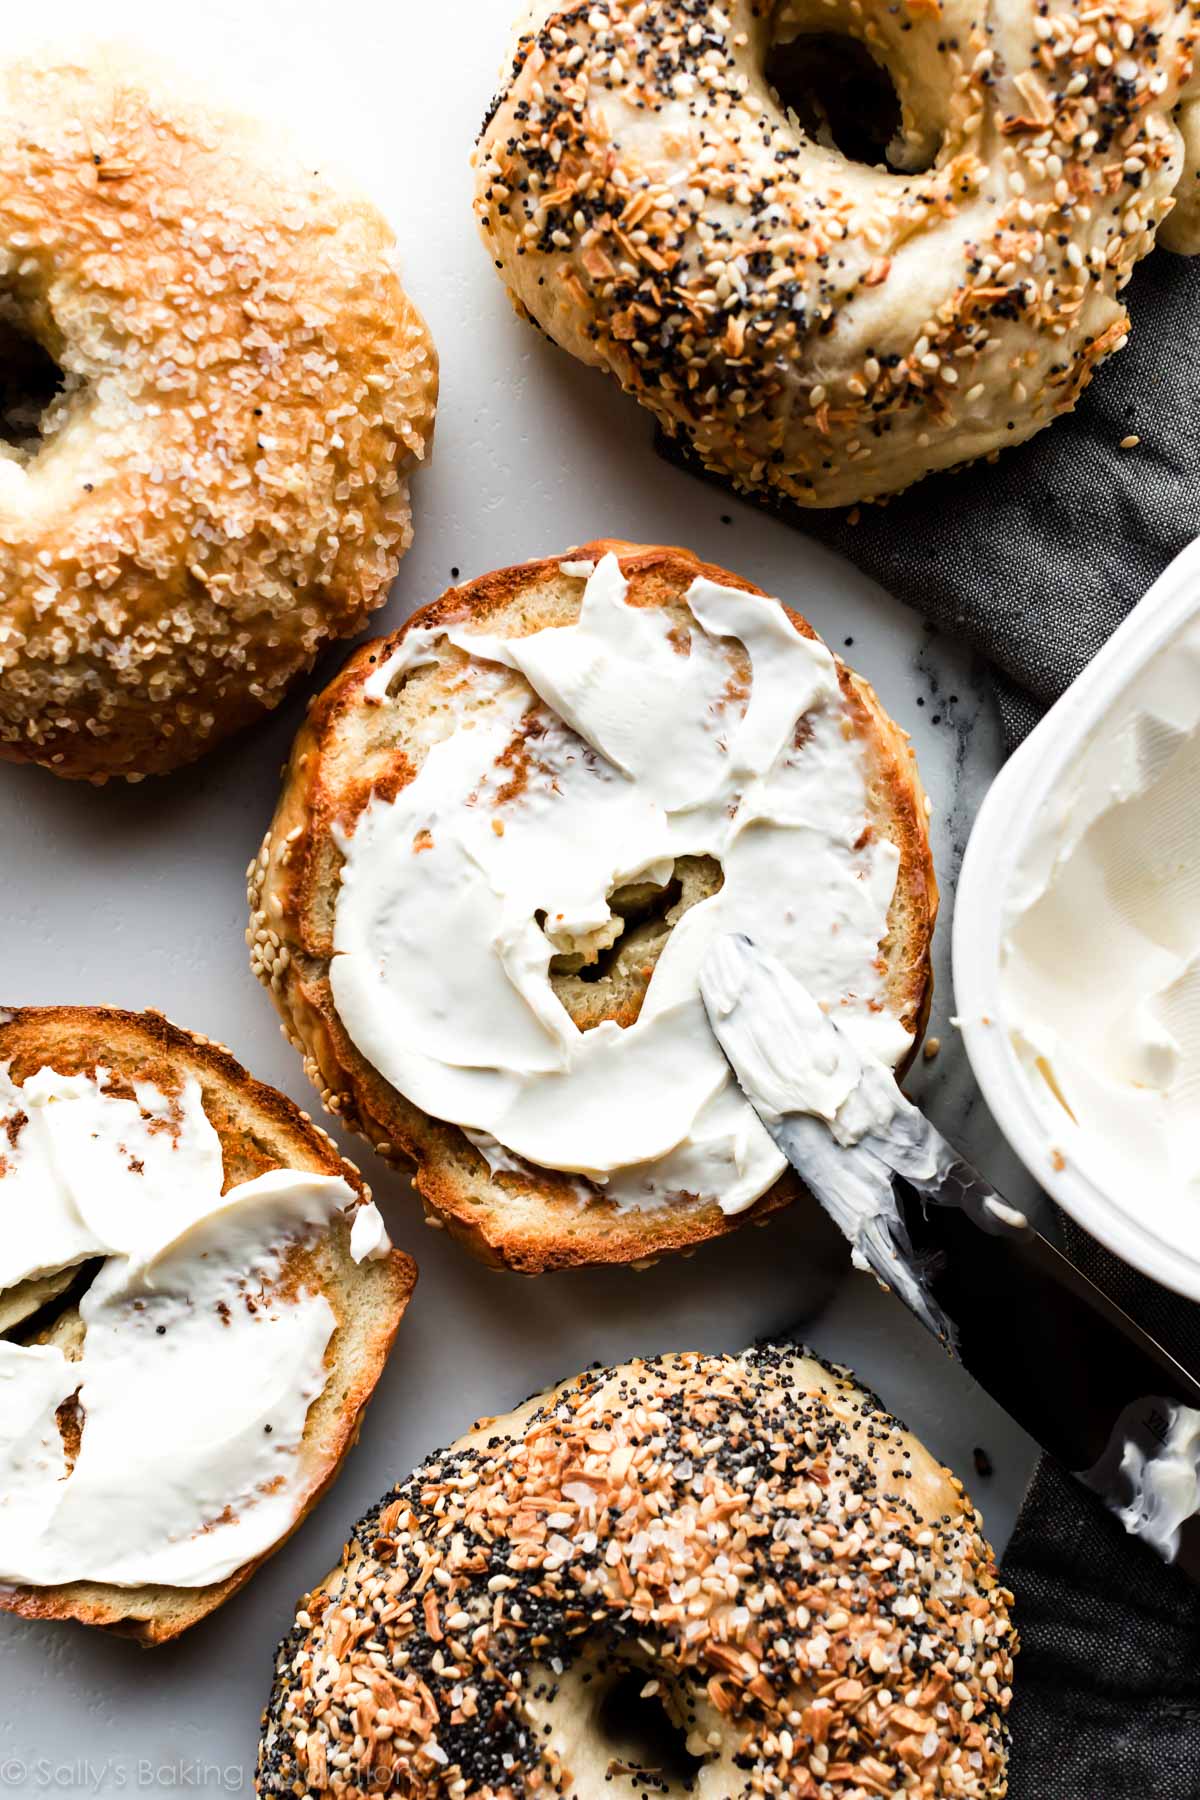
See Your Homemade Bagels!
Many readers tried this recipe as part of a baking challenge! Feel free to email or share your recipe photos with us on social media. 🙂
Print
Homemade Bagels Recipe
- Prep Time: 2 hours, 10 minutes
- Cook Time: 25 minutes
- Total Time: 3 hours
- Yield: 8 bagels
- Category: Bread
- Method: Baking
- Cuisine: American
Description
Make fresh bagels right at home with this tested dough recipe. Don’t skip the water bath and egg wash—both provide an extra chewy and golden brown crust.
Ingredients
- 1 and 1/2 cups (360ml) warm water (between 100-110°F, 38-43°C)
- 2 and 3/4 teaspoons instant or active dry yeast*
- 4 cups (520g) bread flour (spooned & leveled), plus more for work surface and hands*
- 1 Tablespoon granulated sugar or packed light or dark brown sugar (or barley malt syrup)*
- 2 teaspoons salt
- coating the bowl: nonstick spray or 2 teaspoons olive oil
- egg wash: 1 egg white beaten with 1 Tablespoon water
For Boiling
- 2 quarts water
- 1/4 cup (60g) honey (or barley malt syrup)*
Instructions
- Prepare the dough: Whisk the warm water and yeast together in the bowl of your stand mixer fitted with a dough hook attachment. Cover and allow to sit for 5 minutes. *If you don’t have a stand mixer, simply use a large mixing bowl and mix the dough with a wooden spoon or silicone spatula in the next step.
- Add the flour, brown sugar, and salt. Beat on low speed for 2 minutes. The dough is very stiff and will look somewhat dry.
- Knead the dough: Keep the dough in the mixer and beat for an additional 6-7 full minutes, or knead by hand on a lightly floured surface for 6-7 full minutes. (If you’re new to bread-baking, my How to Knead Dough video tutorial can help here.) If the dough becomes too sticky during the kneading process, sprinkle 1 teaspoon of flour at a time on the dough or on the work surface/in the bowl to make a soft, slightly tacky dough. Do not add more flour than you need because you do not want a dry dough. After kneading, the dough should still feel a little soft. Poke it with your finger—if it slowly bounces back, your dough is ready to rise. You can also do a “windowpane test” to see if your dough has been kneaded long enough: tear off a small (roughly golfball-size) piece of dough and gently stretch it out until it’s thin enough for light to pass through it. Hold it up to a window or light. Does light pass through the stretched dough without the dough tearing first? If so, your dough has been kneaded long enough and is ready to rise. If not, keep kneading until it passes the windowpane test.
- Lightly grease a large bowl with oil or nonstick spray. Place the dough in the bowl, turning it to coat all sides in the oil. Cover the bowl with aluminum foil, plastic wrap, or a clean kitchen towel. Allow the dough to rise at room temperature for 60-90 minutes or until double in size.
- Line two large baking sheets with parchment paper or silicone baking mats.
- Shape the bagels: When the dough is ready, punch it down to release any air bubbles. Divide the dough into 8 equal pieces. (Just eyeball it—doesn’t need to be perfect!) Shape each piece into a ball. Press your index finger through the center of each ball to make a hole about 1.5 – 2 inches in diameter. Watch video below for a visual. Loosely cover the shaped bagels with kitchen towel and rest for a few minutes as you prepare the water bath.
- Preheat oven to 425°F (218°C).
- Water bath: Fill a large, wide pot with 2 quarts of water. Whisk in the honey. Bring water to a boil, then reduce heat to medium-high. Drop bagels in, 2-4 at a time, making sure they have enough room to float around. Cook the bagels for 1 minute on each side.
- Using a pastry brush, brush the egg wash on top and around the sides of each bagel. Place 4 bagels onto each lined baking sheet.
- Bake for 20-25 minutes, rotating the pan halfway through. You want the bagels to be a dark golden brown. Remove from the oven and allow bagels to cool on the baking sheets for 20 minutes, then transfer to a wire rack to cool completely.
- Slice, toast, top, whatever you want! Cover leftover bagels tightly and store at room temperature for a few days or in the refrigerator for up to 1 week.
Notes
- Overnight Make Ahead Instructions: Prepare the dough through step 4, but allow the dough to rise overnight in the refrigerator instead of at room temperature for 60-90 minutes. The slow rise gives the bagels wonderful flavor! In the morning, remove the dough from the refrigerator and let the dough rise for 45 minutes at room temperature. Continue with step 5. I don’t recommend shaping the bagels the night before as they may puff up too much overnight.
- Freezing Make Ahead Instructions: Baked bagels freeze wonderfully! Freeze them for up to 3 months, thaw overnight in the refrigerator or at room temperature, then warm to your liking. You can also freeze the bagel dough. After punching down the dough in step 6, wrap the dough tightly in plastic wrap, then a layer of aluminum foil. Freeze for up to 3 months. Thaw overnight in the refrigerator, then punch the dough down again to release any air bubbles. Continue with the rest of step 6.
- Special Tools (affiliate links): Stand Mixer | Baking Sheets | Parchment Paper or Silicone Baking Mats | Large Pot (such as a large 5.5 quart dutch oven) | Pastry Brush
- Yeast: Use instant or active dry yeast. If using active dry yeast, the rise time may be up to 2 hours. 1 standard packet is about 2 and 1/4 teaspoons, so you will need a little more than 1 packet of yeast. Reference my Baking with Yeast Guide for answers to common yeast FAQs.
- Bread Flour: Bagels require a high protein flour. Bread flour is a must. Here are all my recipes using bread flour if you want more recipes to use it up. All-purpose flour can be used in a pinch, but the bagels will taste flimsy and won’t be nearly as chewy.
- Barley Malt Syrup: This ingredient can be a little hard to find, but truly gives bagels that traditional malty flavor we all know and love. Most natural food stores carry it. I offer alternatives such as brown sugar in the dough and honey in the water bath; I’ve made bagels with these alternatives AND with barley malt syrup and honestly love both versions.
- Bread Machine: Place the dough ingredients into the pan of the machine. Program the machine to dough or manual, then start. After 9-10 minutes, the dough will be quite stiff. Allow the machine to complete its cycle, then continue with the recipe.
- Bagel Varieties: See blog post above for various add-ins and toppings. Note that the toppings are added after the egg wash in step 9. Some readers have used this bagel recipe to make whole wheat bagels by replacing half of the bread flour with whole wheat flour. I haven’t tried it, but let me know if you do!
- Halve or Double: You can halve this dough recipe by simply halving all of the dough ingredients (do not halve the water or honey for the boiling step). No changes to the recipe instructions. For best taste and texture and to not overwhelm your mixer with excess heavy dough, I do not recommend doubling this dough recipe. Instead, make separate batches of dough.
- Adapted from a mix of recipes I’ve tried: King Arthur Flour, Cook’s Illustrated, and Complete Book of Breads


Reader Comments and Reviews
In the recipe do you use table iodized salt or Kosher salt? Thank you.
Hi Martha, We always use table salt unless otherwise noted.
I love these bagels they r my go to recipe and I have recommended it to my friends too
What is the nutritional value
Hi Celia, We don’t usually include nutrition information as it can vary between different brands of the same ingredients. Plus, many recipes have ingredient substitutions or optional ingredients listed. However, there are many handy online calculators where you can plug in and customize your exact ingredients/brands. Readers have found this one especially helpful: https://www.verywellfit.com/recipe-nutrition-analyzer-4157076
Can I put both pans in the oven at the same time? And by rotating, do you mean switching the position of the pans with each other or turning the pan?
Hi Andrea, you can bake them both at the same time as long as they can fit on the same rack. Baking on different racks would prevent the bagels from baking evenly. Otherwise, it’s best to bake the pans one at a time and turning the pan half way through. Hope this helps!
These are very easy to make! I highly recommend eat on the same day because of course they are divine. They’re great the next day too, but a plus plus the first day the same as it any bagel shop that makes them fresh.
Cold proofing question – after I take the dough out of the fridge in the morning, do I punch it down first before allowing it to rise at room temperature for 45 min? Or should I wait to punch it down until it comes to room temperature? Thanks for the recipe!
Hi Madeline, let the dough rise for 45 minutes at room temperature and then punch down.
This recipe is AMAZING! & so easy! Thank you so much! Is it possible to let the dough rise too much? I want to have it fully risen when I need today but I want them fresh out the oven when my guests arrive but I’m not sure of the exact time they’ll be here. Thanks so much for this recipe & all of your other recipes!
Hi Hanna, yes, letting the dough rise for too long can cause it to over proof and then collapse when baked. If the wait time isn’t too long, you can allow the dough to rise at room temperature as stated and then place it in the refrigerator to slow the rise until you need it today. Hope they’re a hit!
I’m new to making bagels – and I think for my first time they came out really well! Though, I did notice my kneading time took much longer than what the recipe suggested. I also had to add quite a bit more flour than expected too. I think in the future I may try weighing out the ingredients instead of using measuring cups, since I know that can always be iffy in recipes.
Coworker’s claimed they were chewy, but weren’t that big of a fan of the chewiness. However, they came out beautifully and I quite enjoyed them. I’ll just need to make them a second time to see if my boyfriend, who is a bread lover, will agree!
10 out of 10 ****
Sally your recipes are my go to recipes, they work every time.
My bagels came out perfectly.
Thank you so much for this amazing recipe.
I just tried my hand at making bagels for the first time and I’m thrilled with how awesome they turned out! It was surprisingly fun and much easier than I expected. Since it’s just my husband and me, I decided to make half a recipe and it worked out perfectly! I’m so excited to experiment with different flavors and toppings next time. These are so much better than store bought.
This recipe is A+. As a New Yorker no longer living in NYC, I can’t find good bagels anywhere. These are amazing. The one edit I would make is to put them directly onto a rack to cool instead of cooling on the pan, as my bagel bottoms got soggy. I also did the first proof overnight in the fridge.
I made these today and they were stunning! We had friends over and they said if they hadn’t seen me bake them they would’ve thought they were from a bakery!
I really want to try and make blueberry bagels with this recipe. Is it as simple as folding blueberries into the dough before rising and maybe a dash of vanilla?
Thank you for such a lovely recipe!
Hi Katie, for blueberry bagels we would follow our cinnamon raisin bagels recipe, substituting dried blueberries for raisins.
I have made this recipe and placed all the ingredients, in multiple bread makers. With the bread maker doing all the work/proofing. It always turns out wonderful. Thank you for this fantastic recipe!
I’ve tried this recipe 3 or 4 times by hand (no mixer) and it has not worked a single time even after kneading 10, 15, 30 minutes
Hi Spencer, what about it isn’t working? We’re happy to help troubleshoot. Is the dough too tough? Our guide to kneading might be helpful as well.
These came out great. The first recipe last week was too dense, but today’s Asiago and Everything bagels were perfect using your method. I only subbed hot honey in the water for a little more kick.
Thanks!
I love these bagels! I always end up with funny folds in them and am unsure why – spaces where they just don’t adhere to the dough around it. I am wondering if it is a kneading issue – if so, do you think it is under kneaded? What speed do you suggest kneading on the Kitchen-Aid for the 6-7 minute knead? Thanks!
Hi Madeline! It’s likely a shaping issue, which just takes practice! We usually use medium speed for kneading.
Just made these and they turned out perfect. Thank you!
Came out absolutely perfect. And this is my first time making bagels. I followed every step. Absolutely delicious !!!!
I wish I could leave a picture
This recipe is easy to follow and they come out great. My thoughts in the sweetener. (I have made it all 3 ways) Go out of your way to get barley malt syrup, if you don’t do that, use molasses, if you have to use brown sugar, I’d probably just buy some bagels from the store.
I’m not sure where I went wrong but the bottoms of my bagels absolutely burned along with the parchment paper. Any idea what happened?
Hi Kayla, if the bottoms of your bagels are burning, try lowering the oven temperature a bit more or even flipping them over halfway through baking (if you’re making plain bagels). Also, wait for the bagels to somewhat dry before baking. It could be the water from the boiling step that is burning on the bottoms (you can dab up extra water with a paper towel if needed). Finally, are you using an especially thin or dark baking sheet? Those can both cause burning. Thanks so much for giving these a try!
Thought the bagels were great and I thought it was an awesome recipe. Some bagels ended up kind of flat. Not sure why. While other bagels had a nice rise.
Hi Lauren! If they’re coming out flat, they may be rising for too long and deflating. Try letting the dough rise for a shorter amount of time to prevent this. Our baking with yeast guide may be a helpful resource as well!
I followed everything perfectly and after kneading for a while and checking it was ready to rise (poke test) it was ready but felt so dense. Is that normal?
Hi Kel! The video tutorial above should give you a good visual for the dough texture. A dense dough could be caused by over-measuring the flour. How did you measure the flour? Make sure to spoon and level (instead of scooping) to avoid packing in too much flour into your measuring cups – or use a kitchen scale. You can read more about properly measuring baking ingredients in this post.
Oh no! I scooped. I didn’t realize there was a difference. 🙁